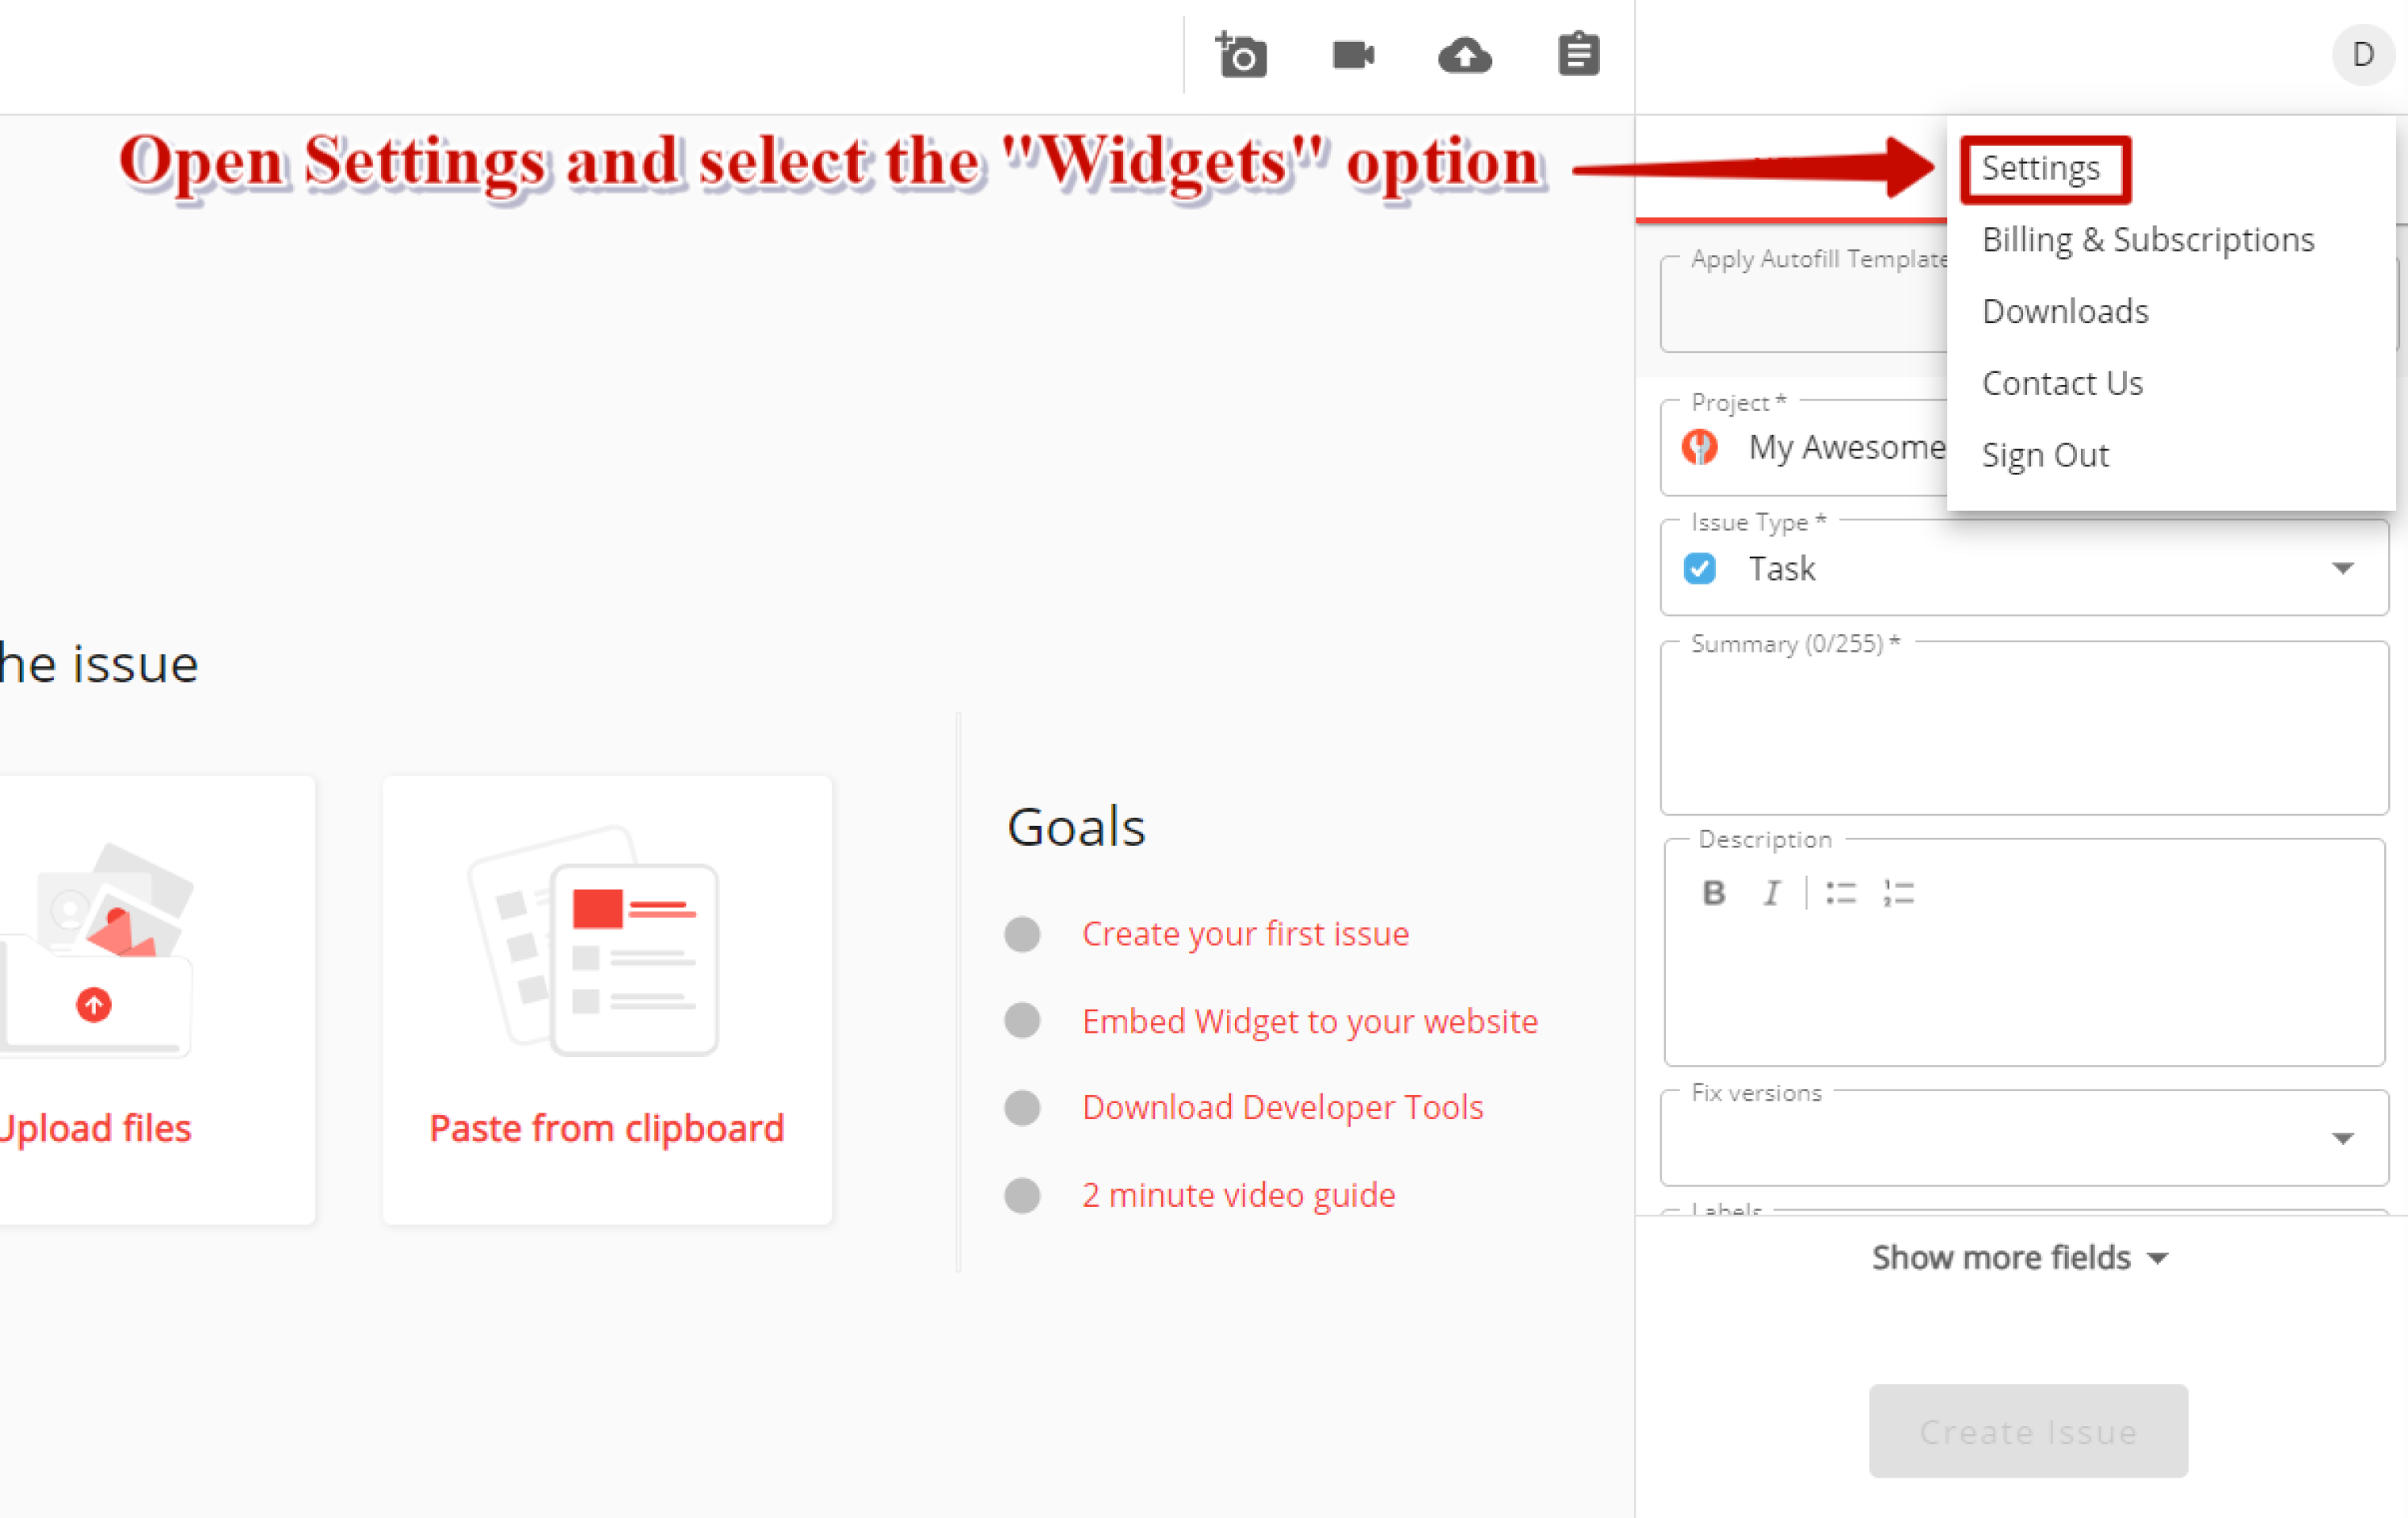
1. Sign in to the Redpen
- Select a service that is connected to Redpen.
- Open Widgets settings by clicking on the profile picture → Settings → Widgets. Click Create Widget button to create a new Redpen Widget.
3. Select the “Mobile” option and add the name of the widget. This is the internal name and won’t show anywhere on the mobile.
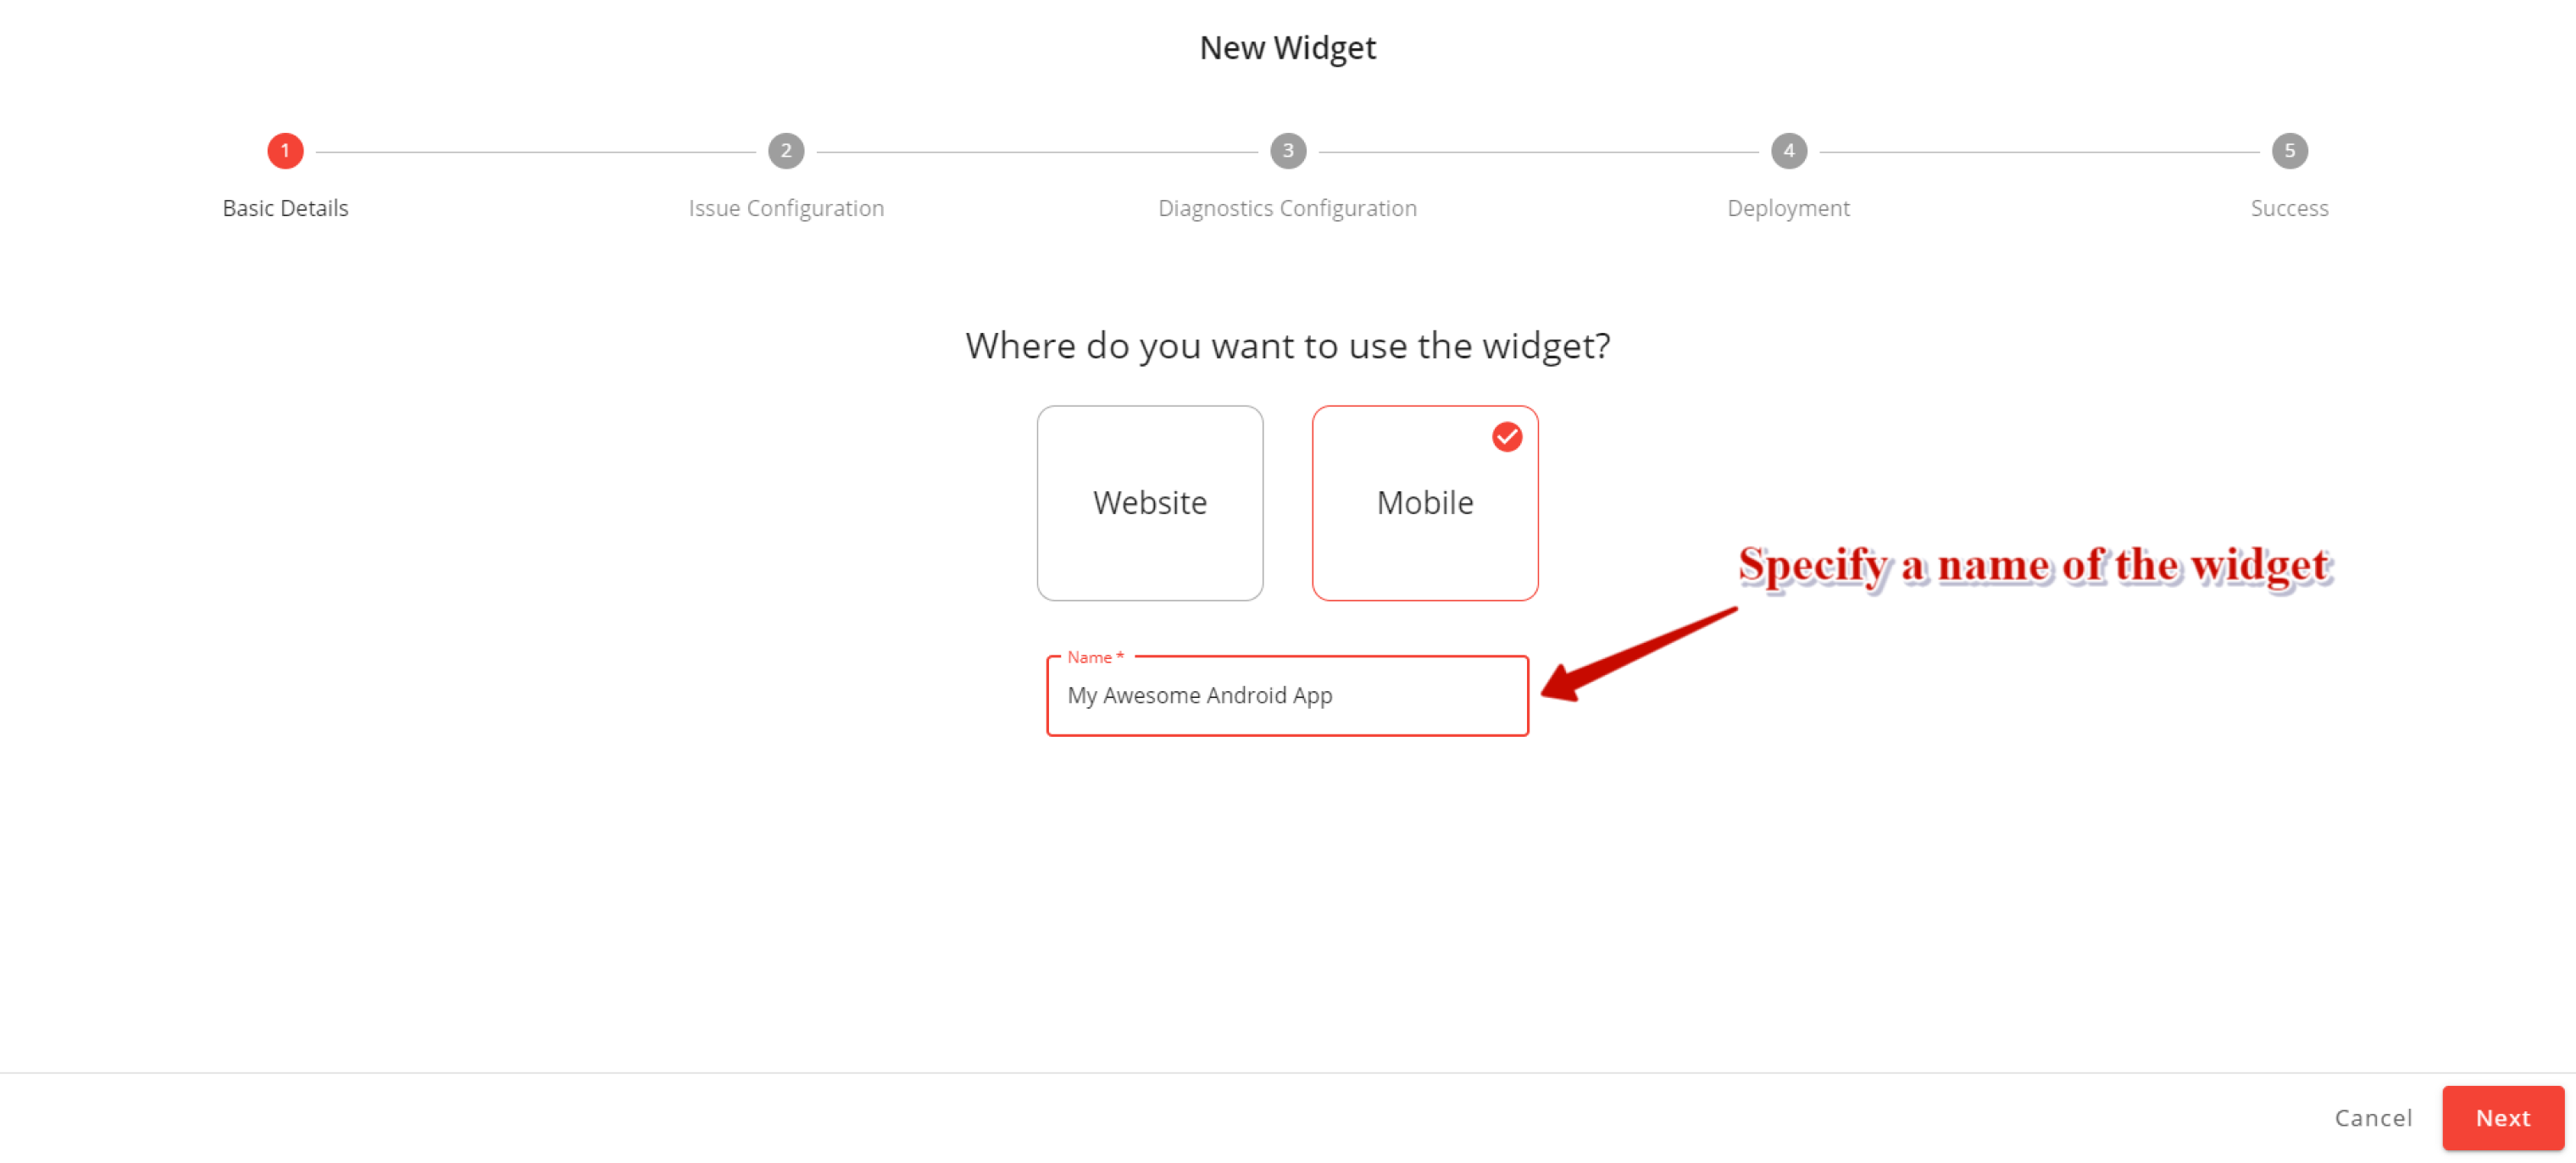
4. Click the Next button to fill out the configuration details.
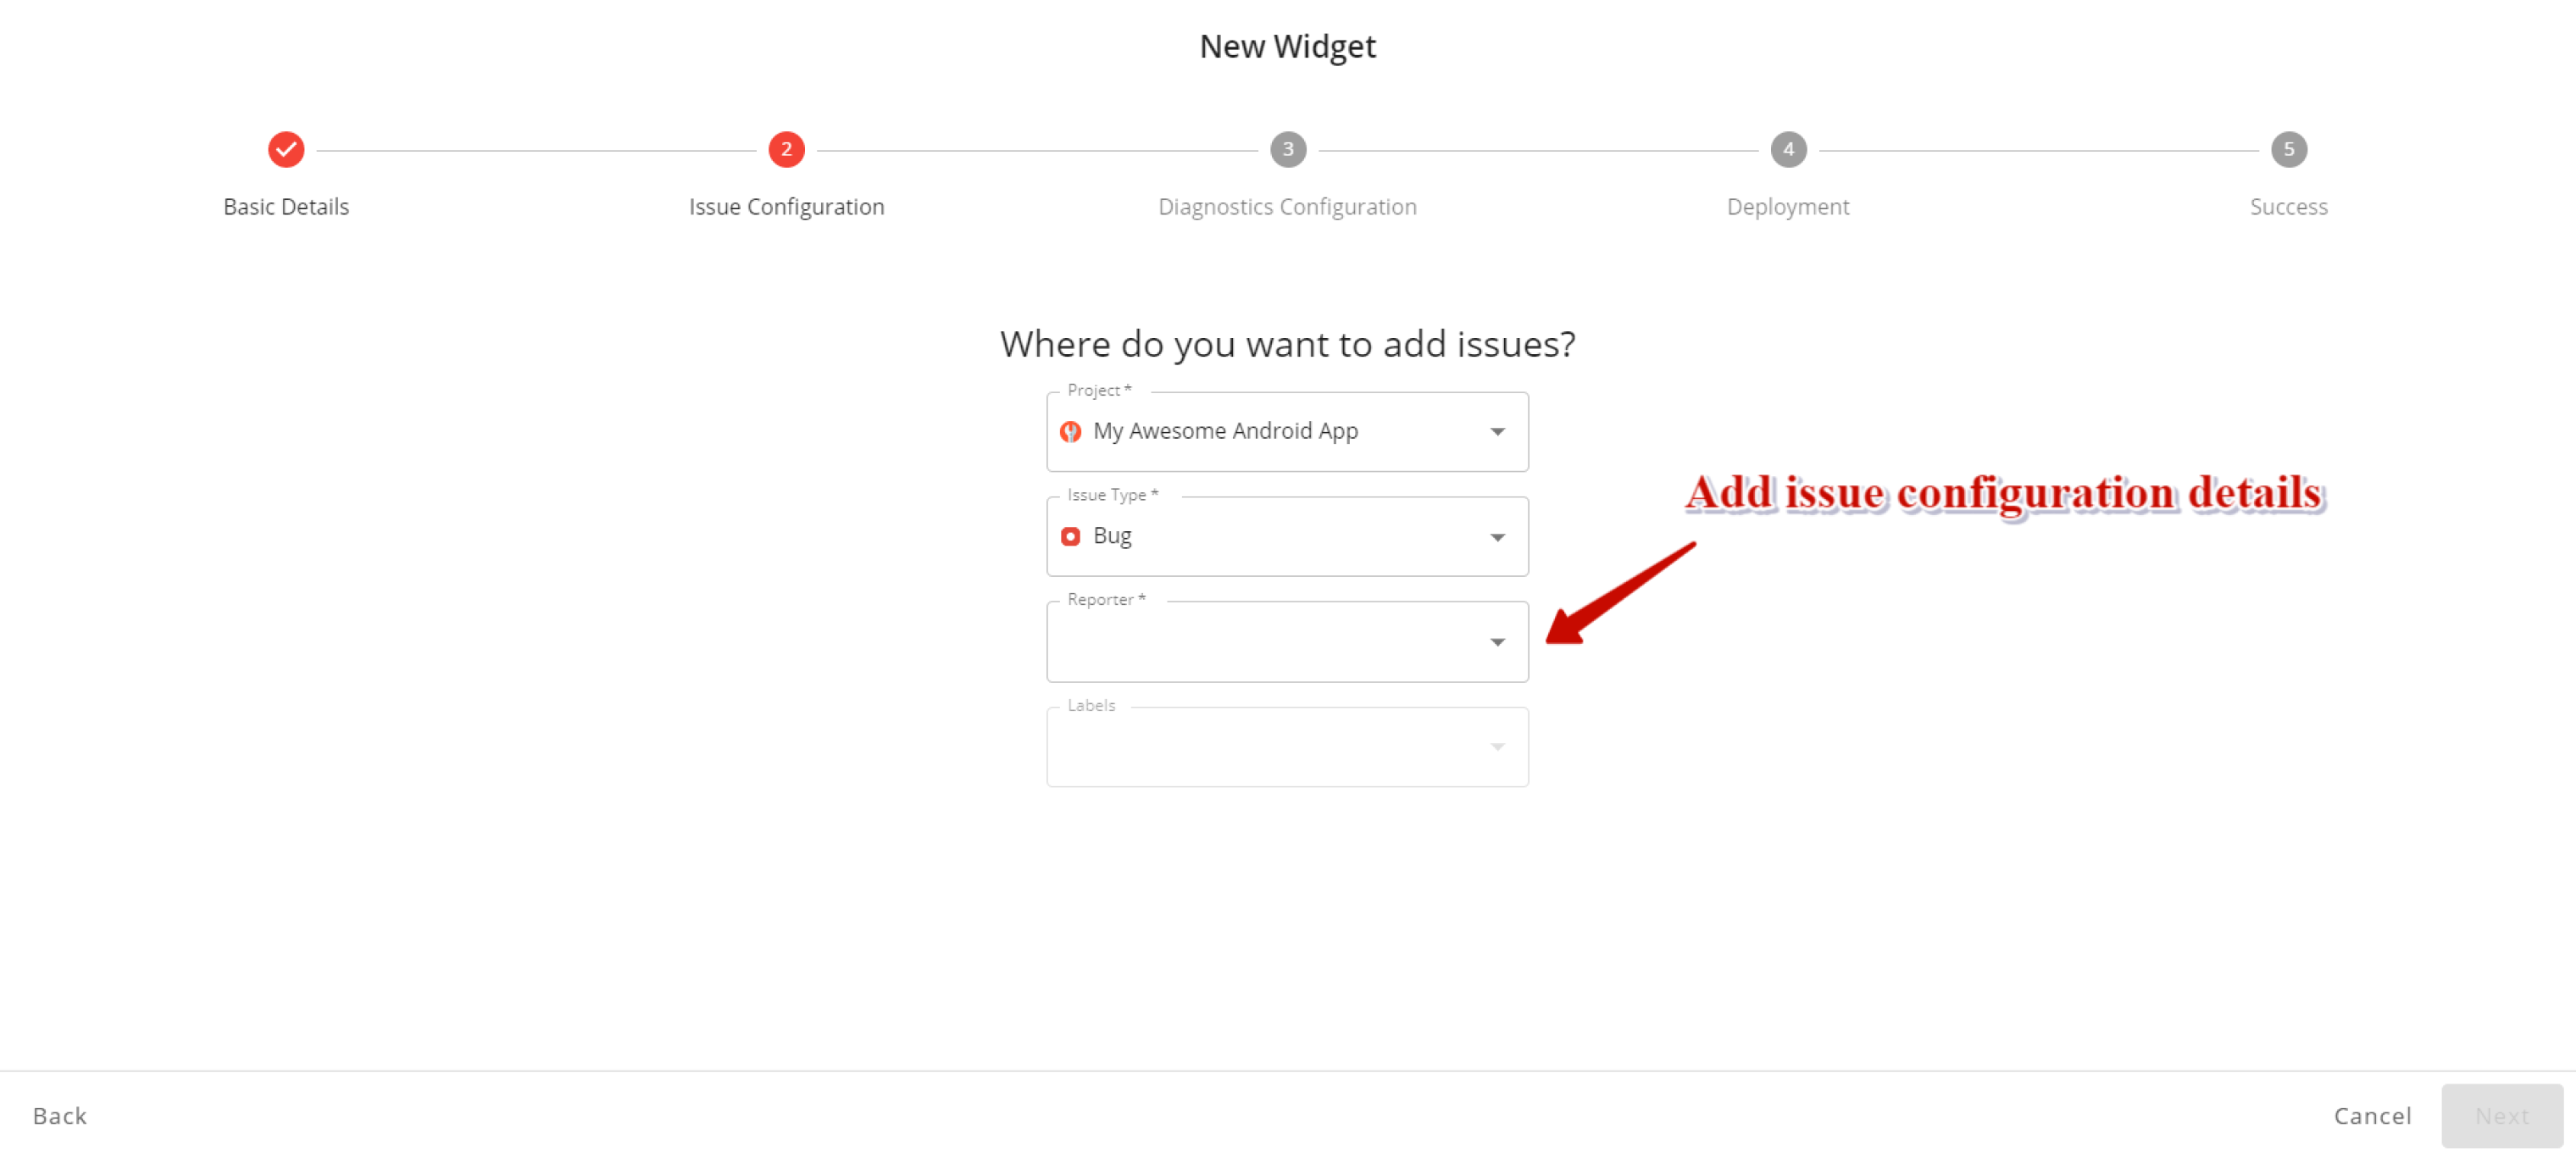
Project: Select the project in which you want to create the issue when feedback is received
Issue Type: Select the type of issue you want to create.
Reporter: Select who you want to be the reporter of the issue created from the widget. This field will be enabled if you have permission to add/edit a reporter.
Labels: Add labels you want to have when the issues are created from the widget. It can help you filter out the issues created from the widget.
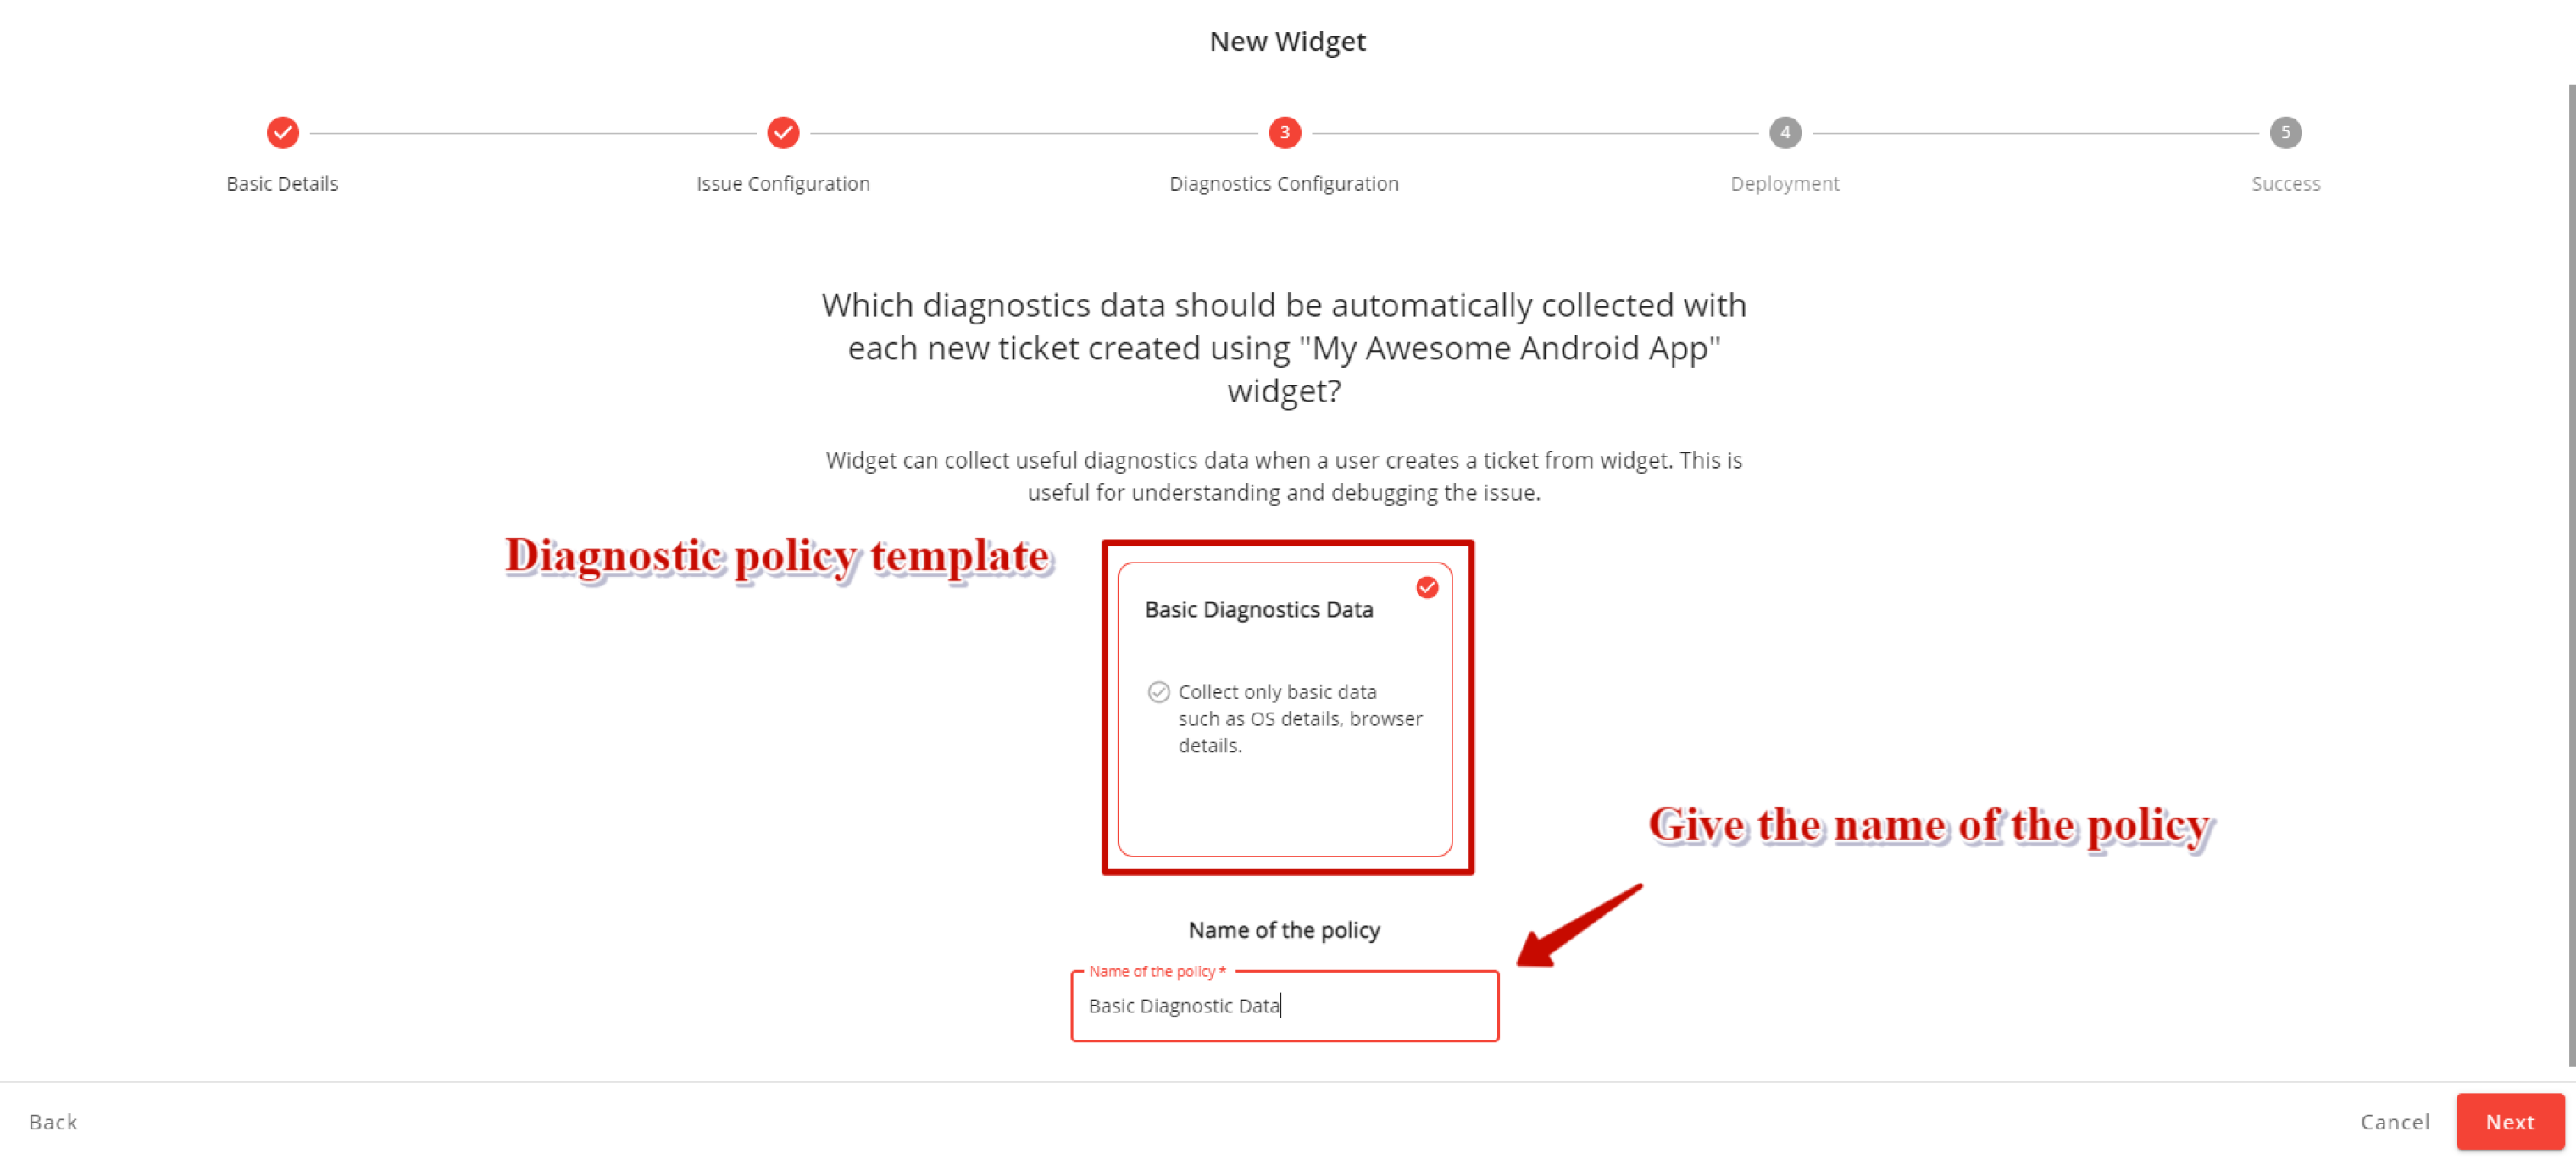
5. Click the Next button to configure the diagnostics policy for the widget. Select the diagnostics policy from pre-defined templates and give the name of the policy.
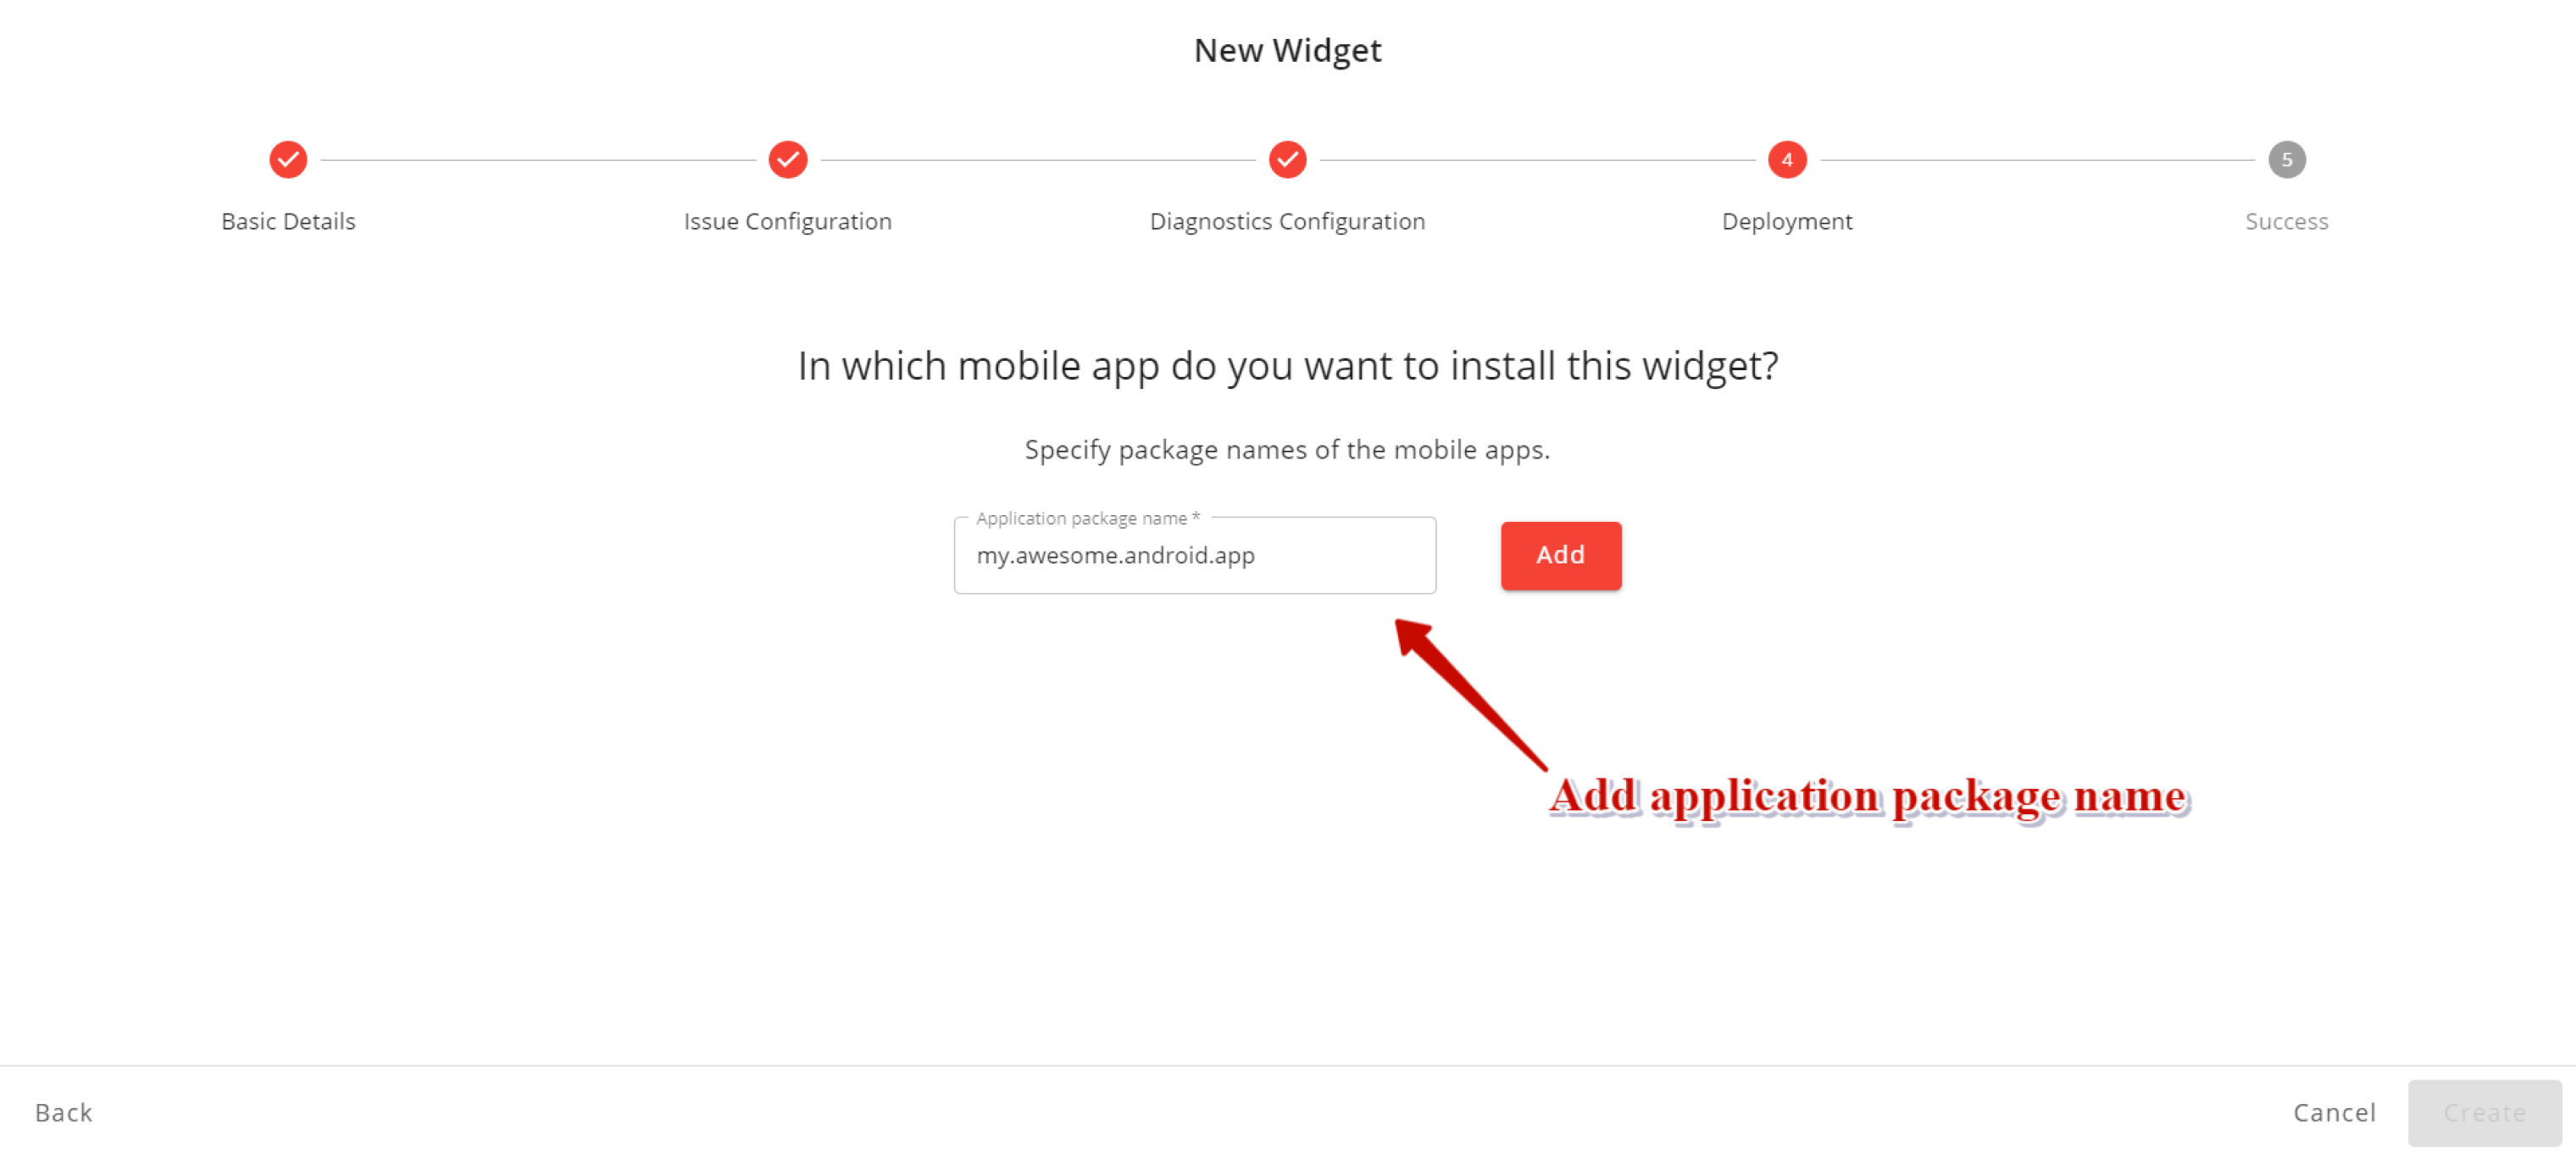
6. Click the Next button to add the application package name on which you want to use the widget. You can add a minimum of 1 and a maximum of 3 application package names
7. Click Create button to create the widget. You will see the success page.
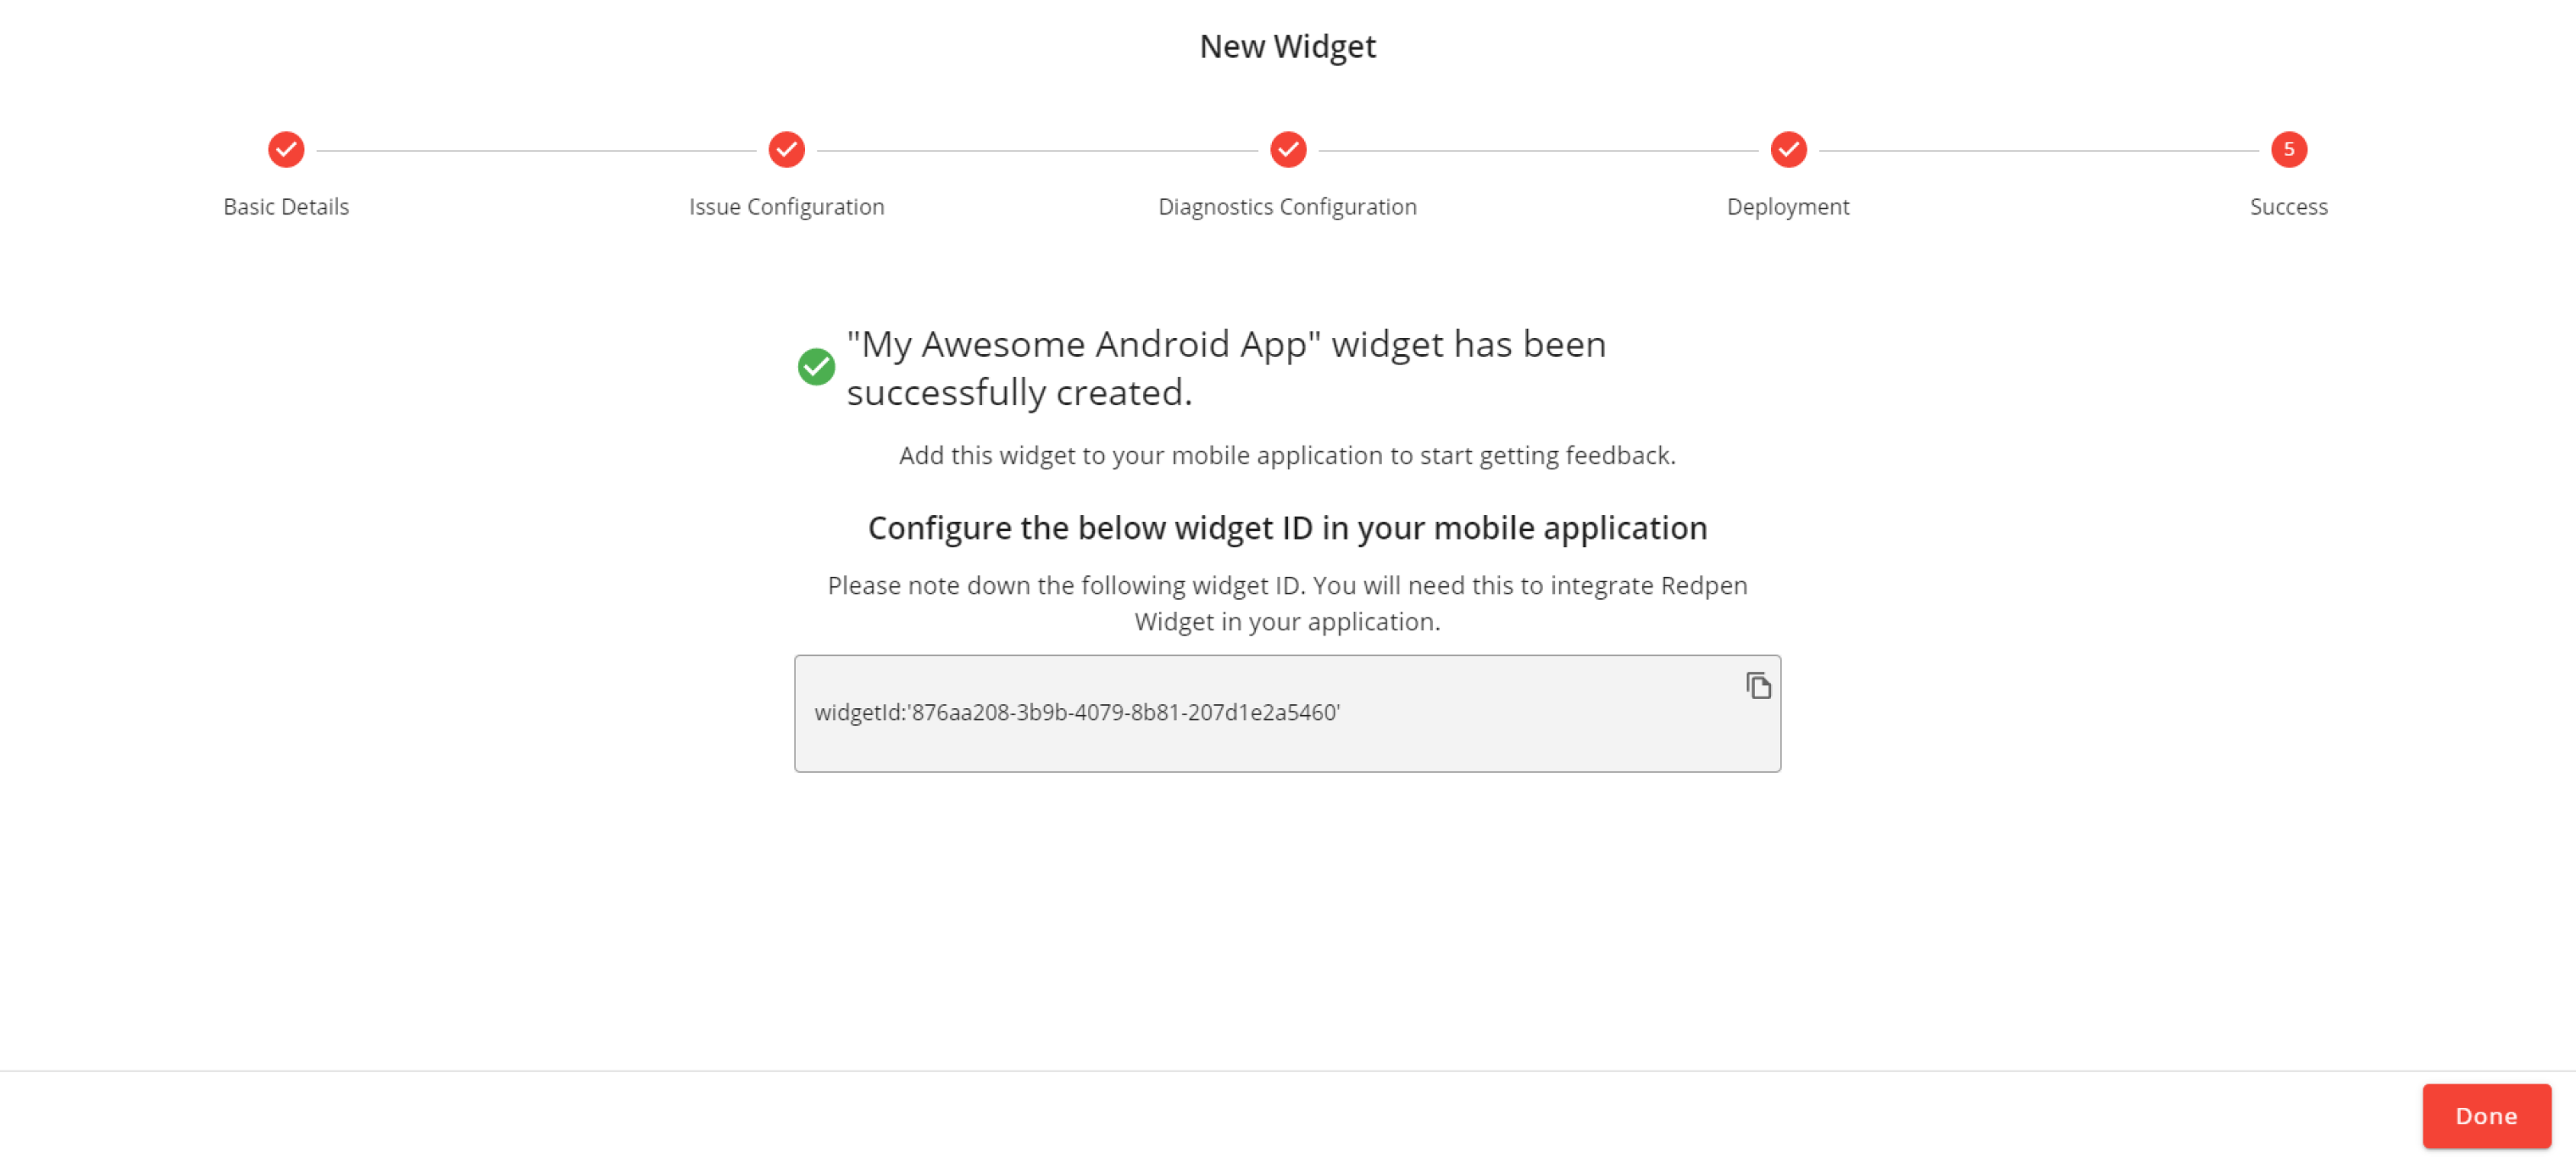
Super… Redpen Widget is created successfully!!!