Pre-requisites:
- The user should be the admin of the organization
Follow the below steps to create the Jira Rule:
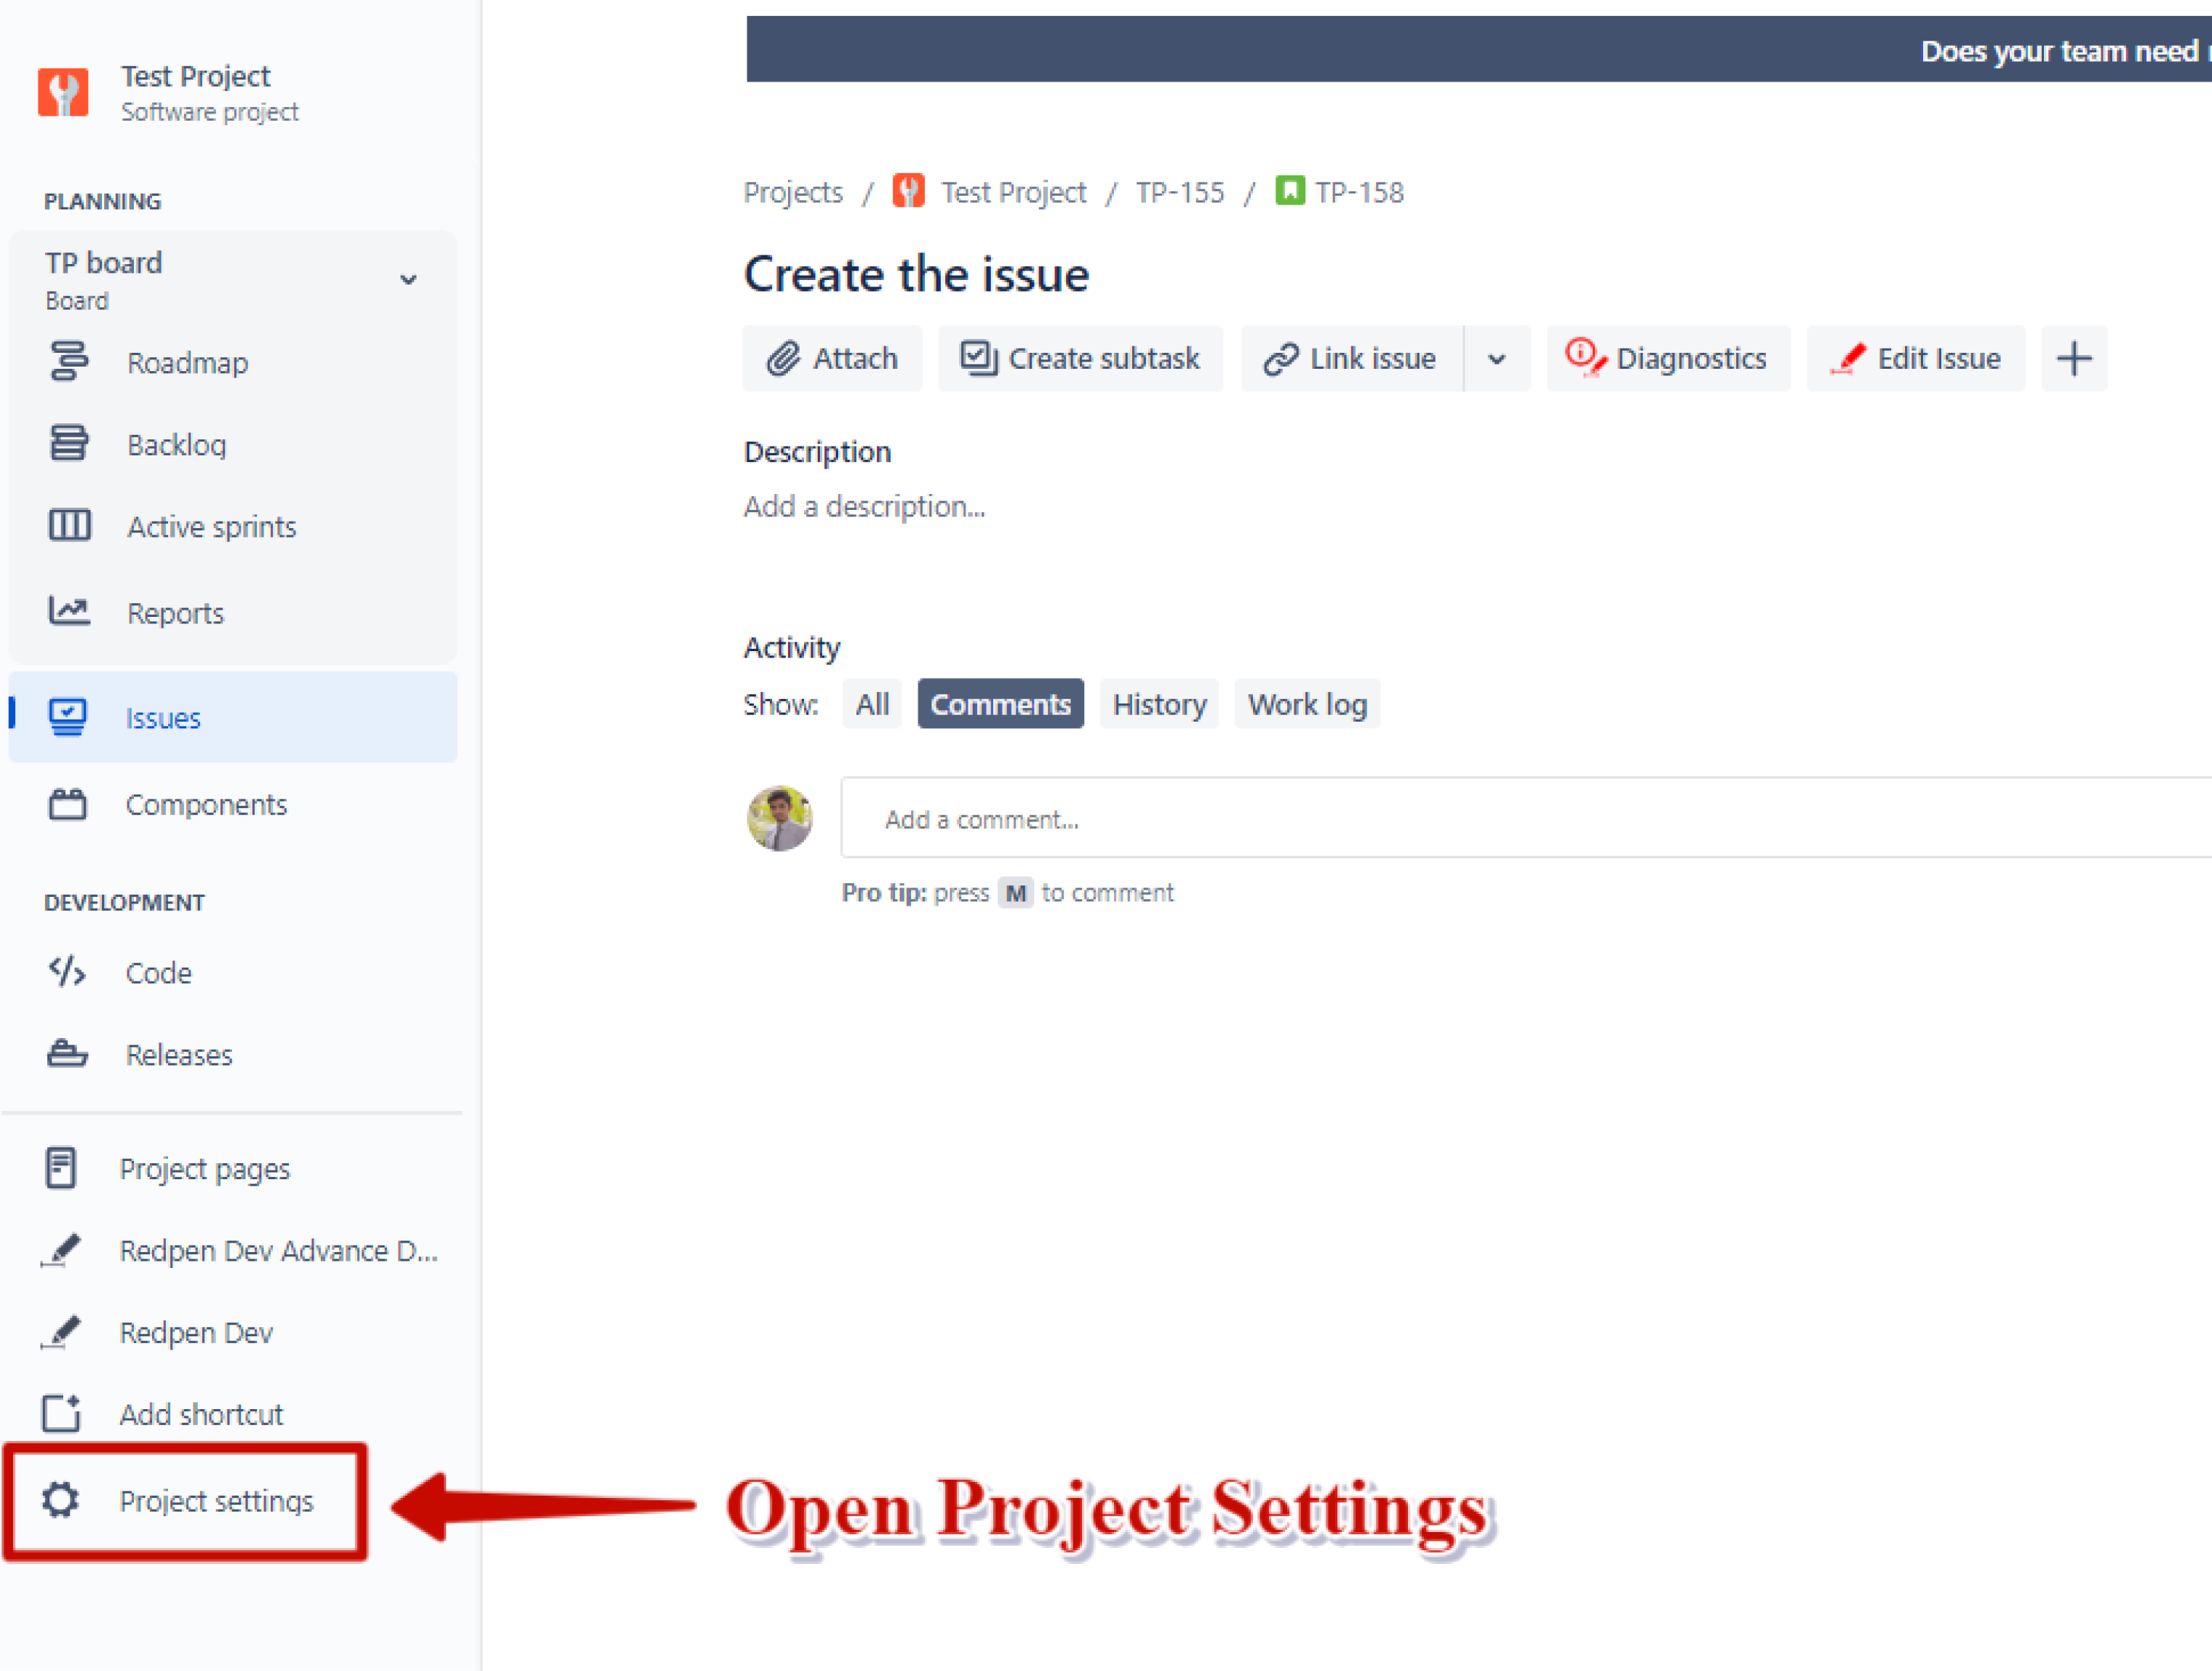
1. Open Project Setting
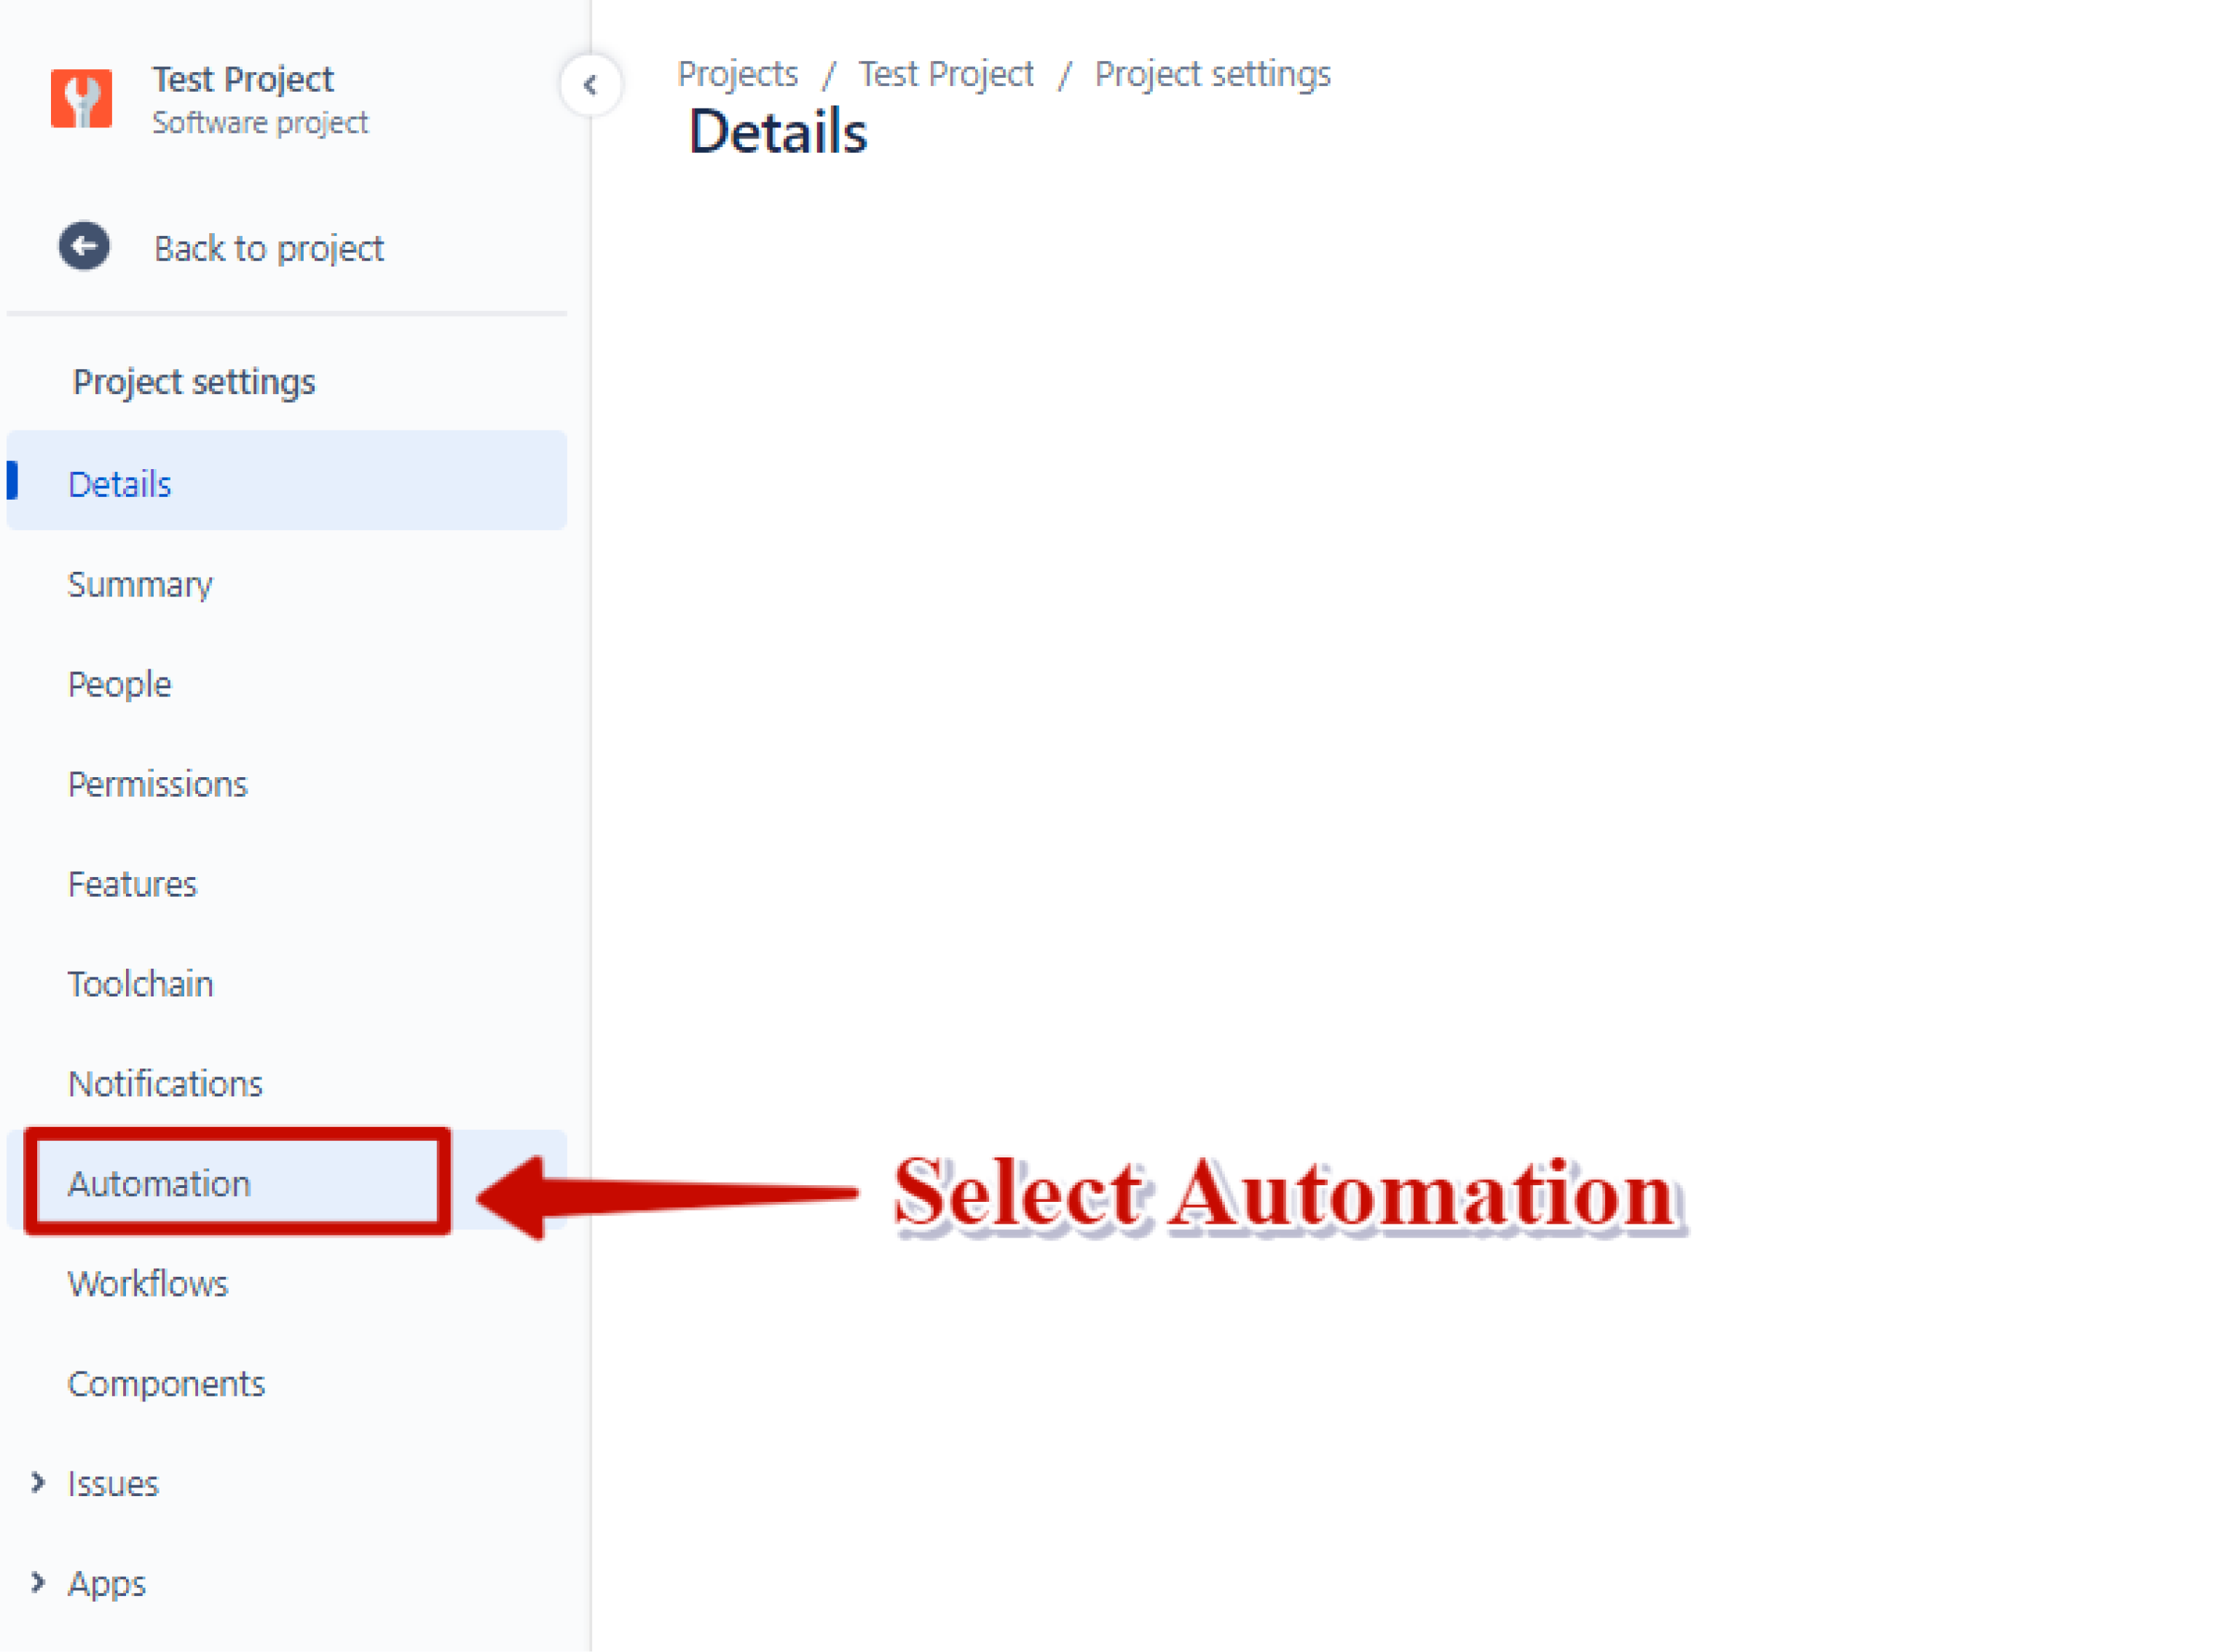
2. Select the Automation option
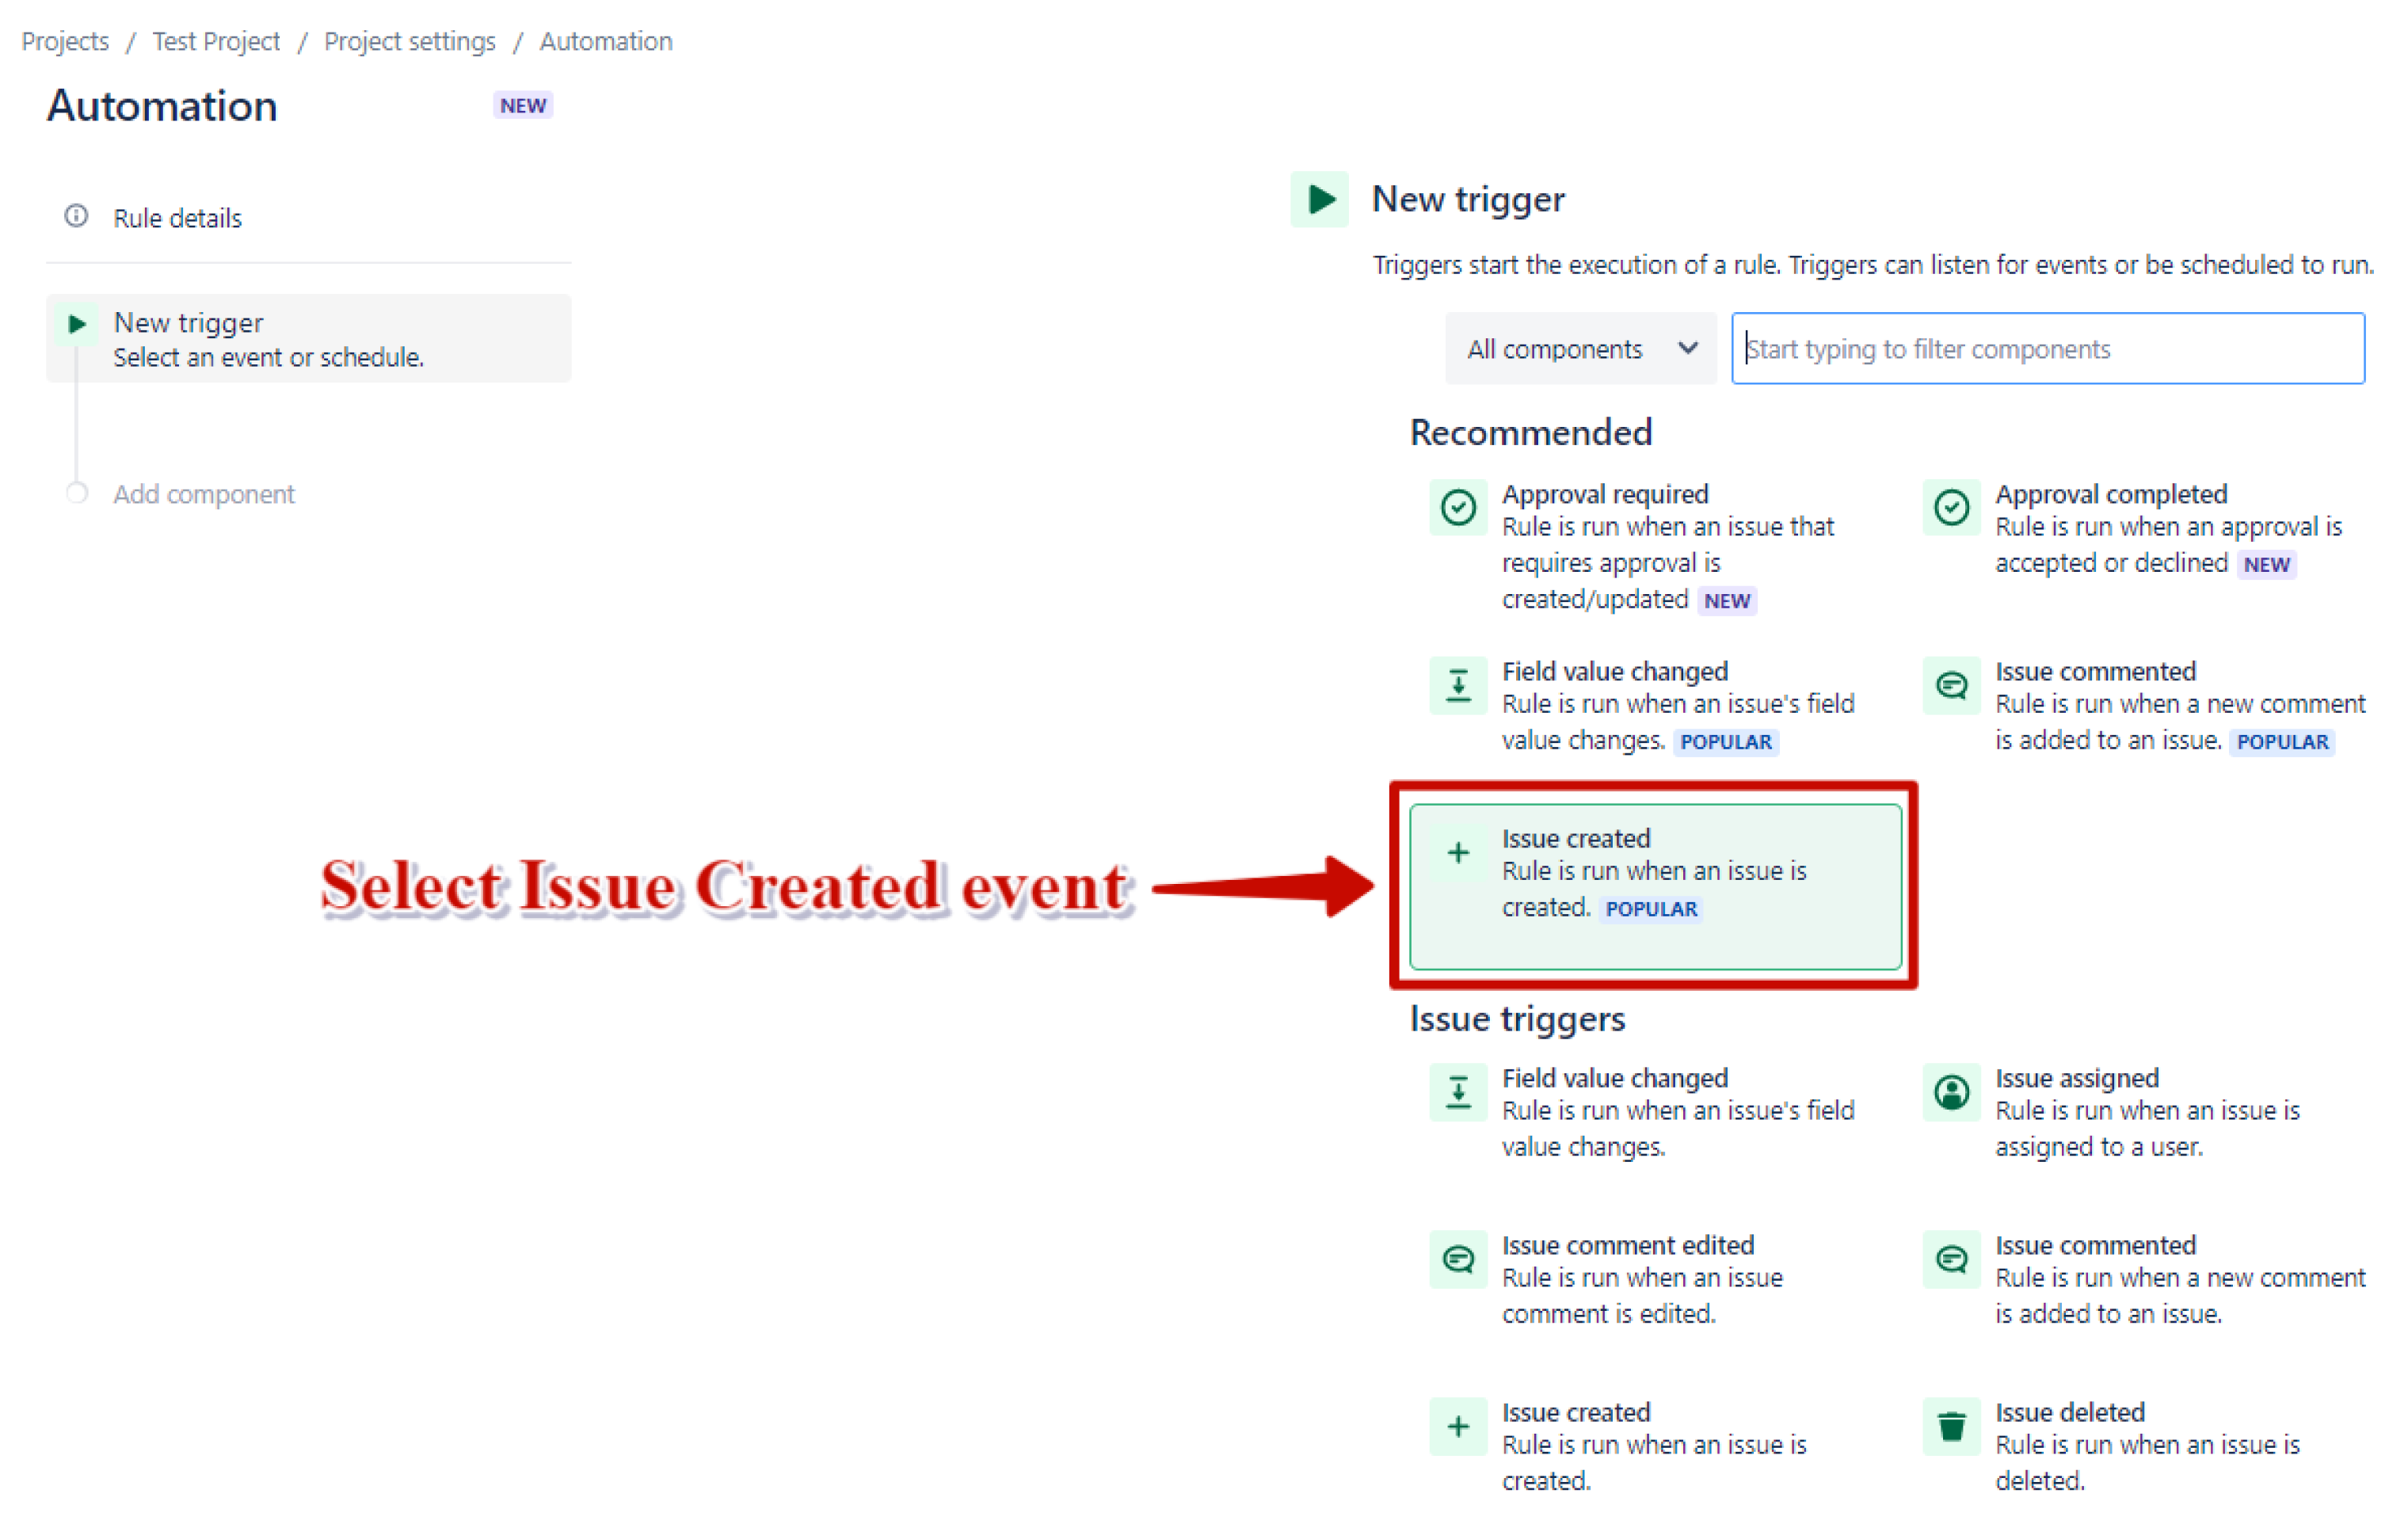
3. Click the Create rule

4. Select Issue Created event and click the Save button
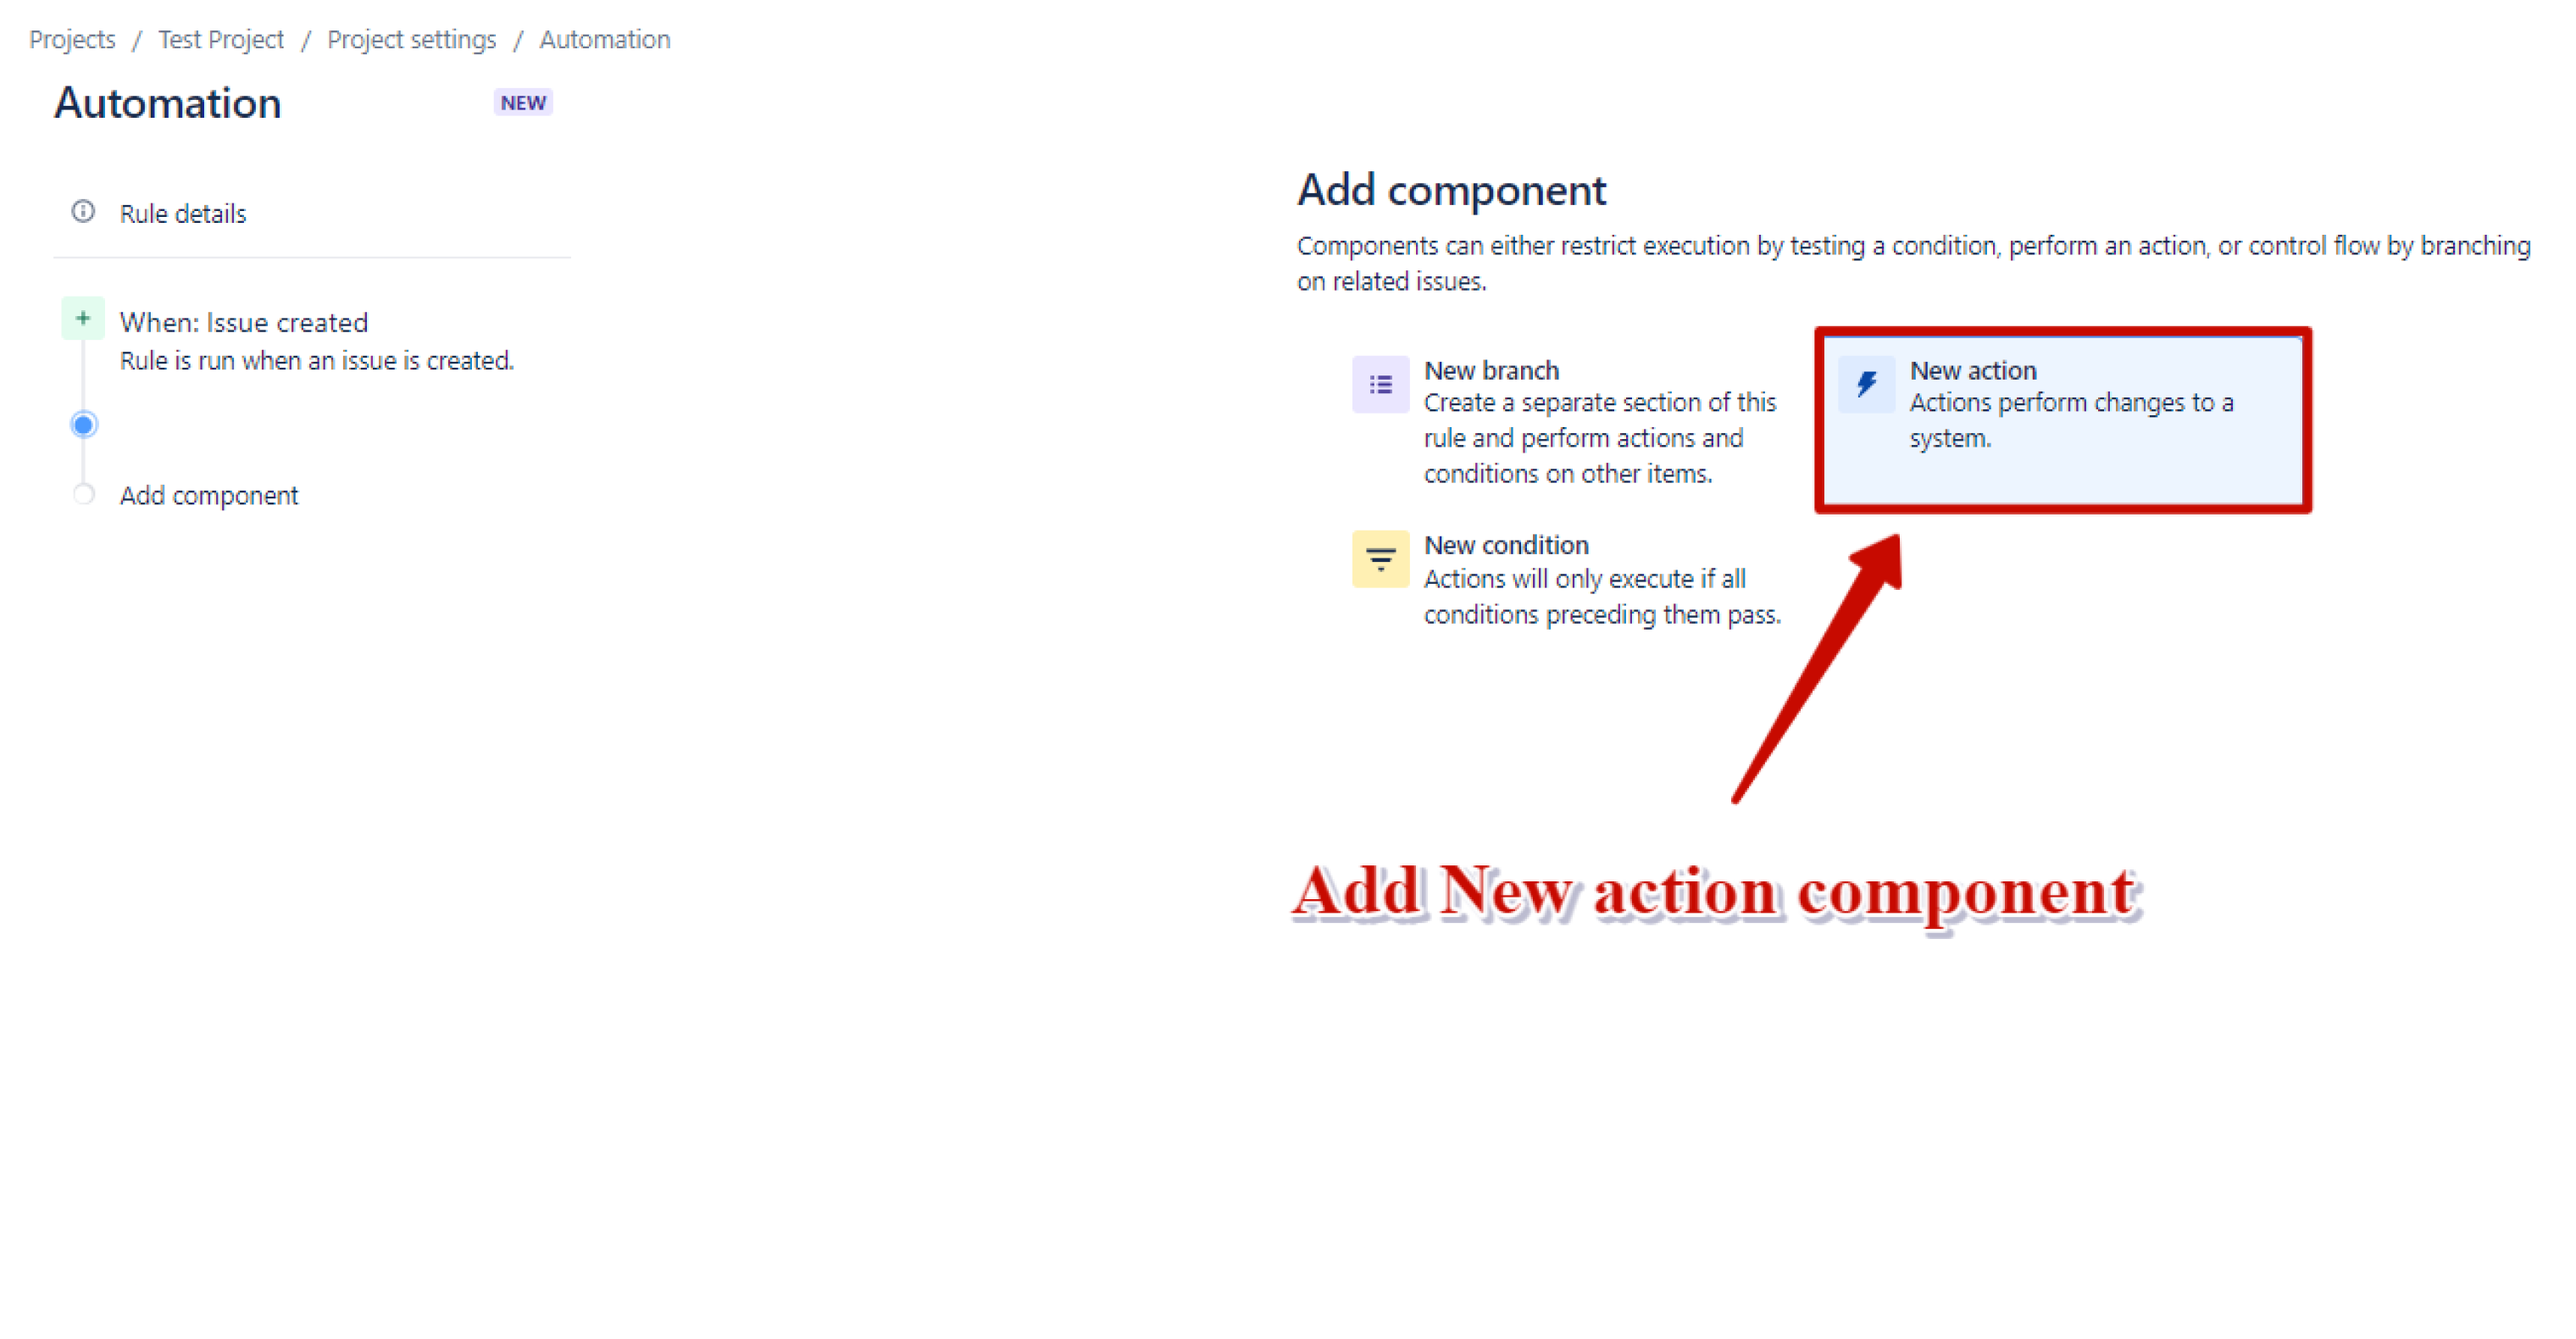
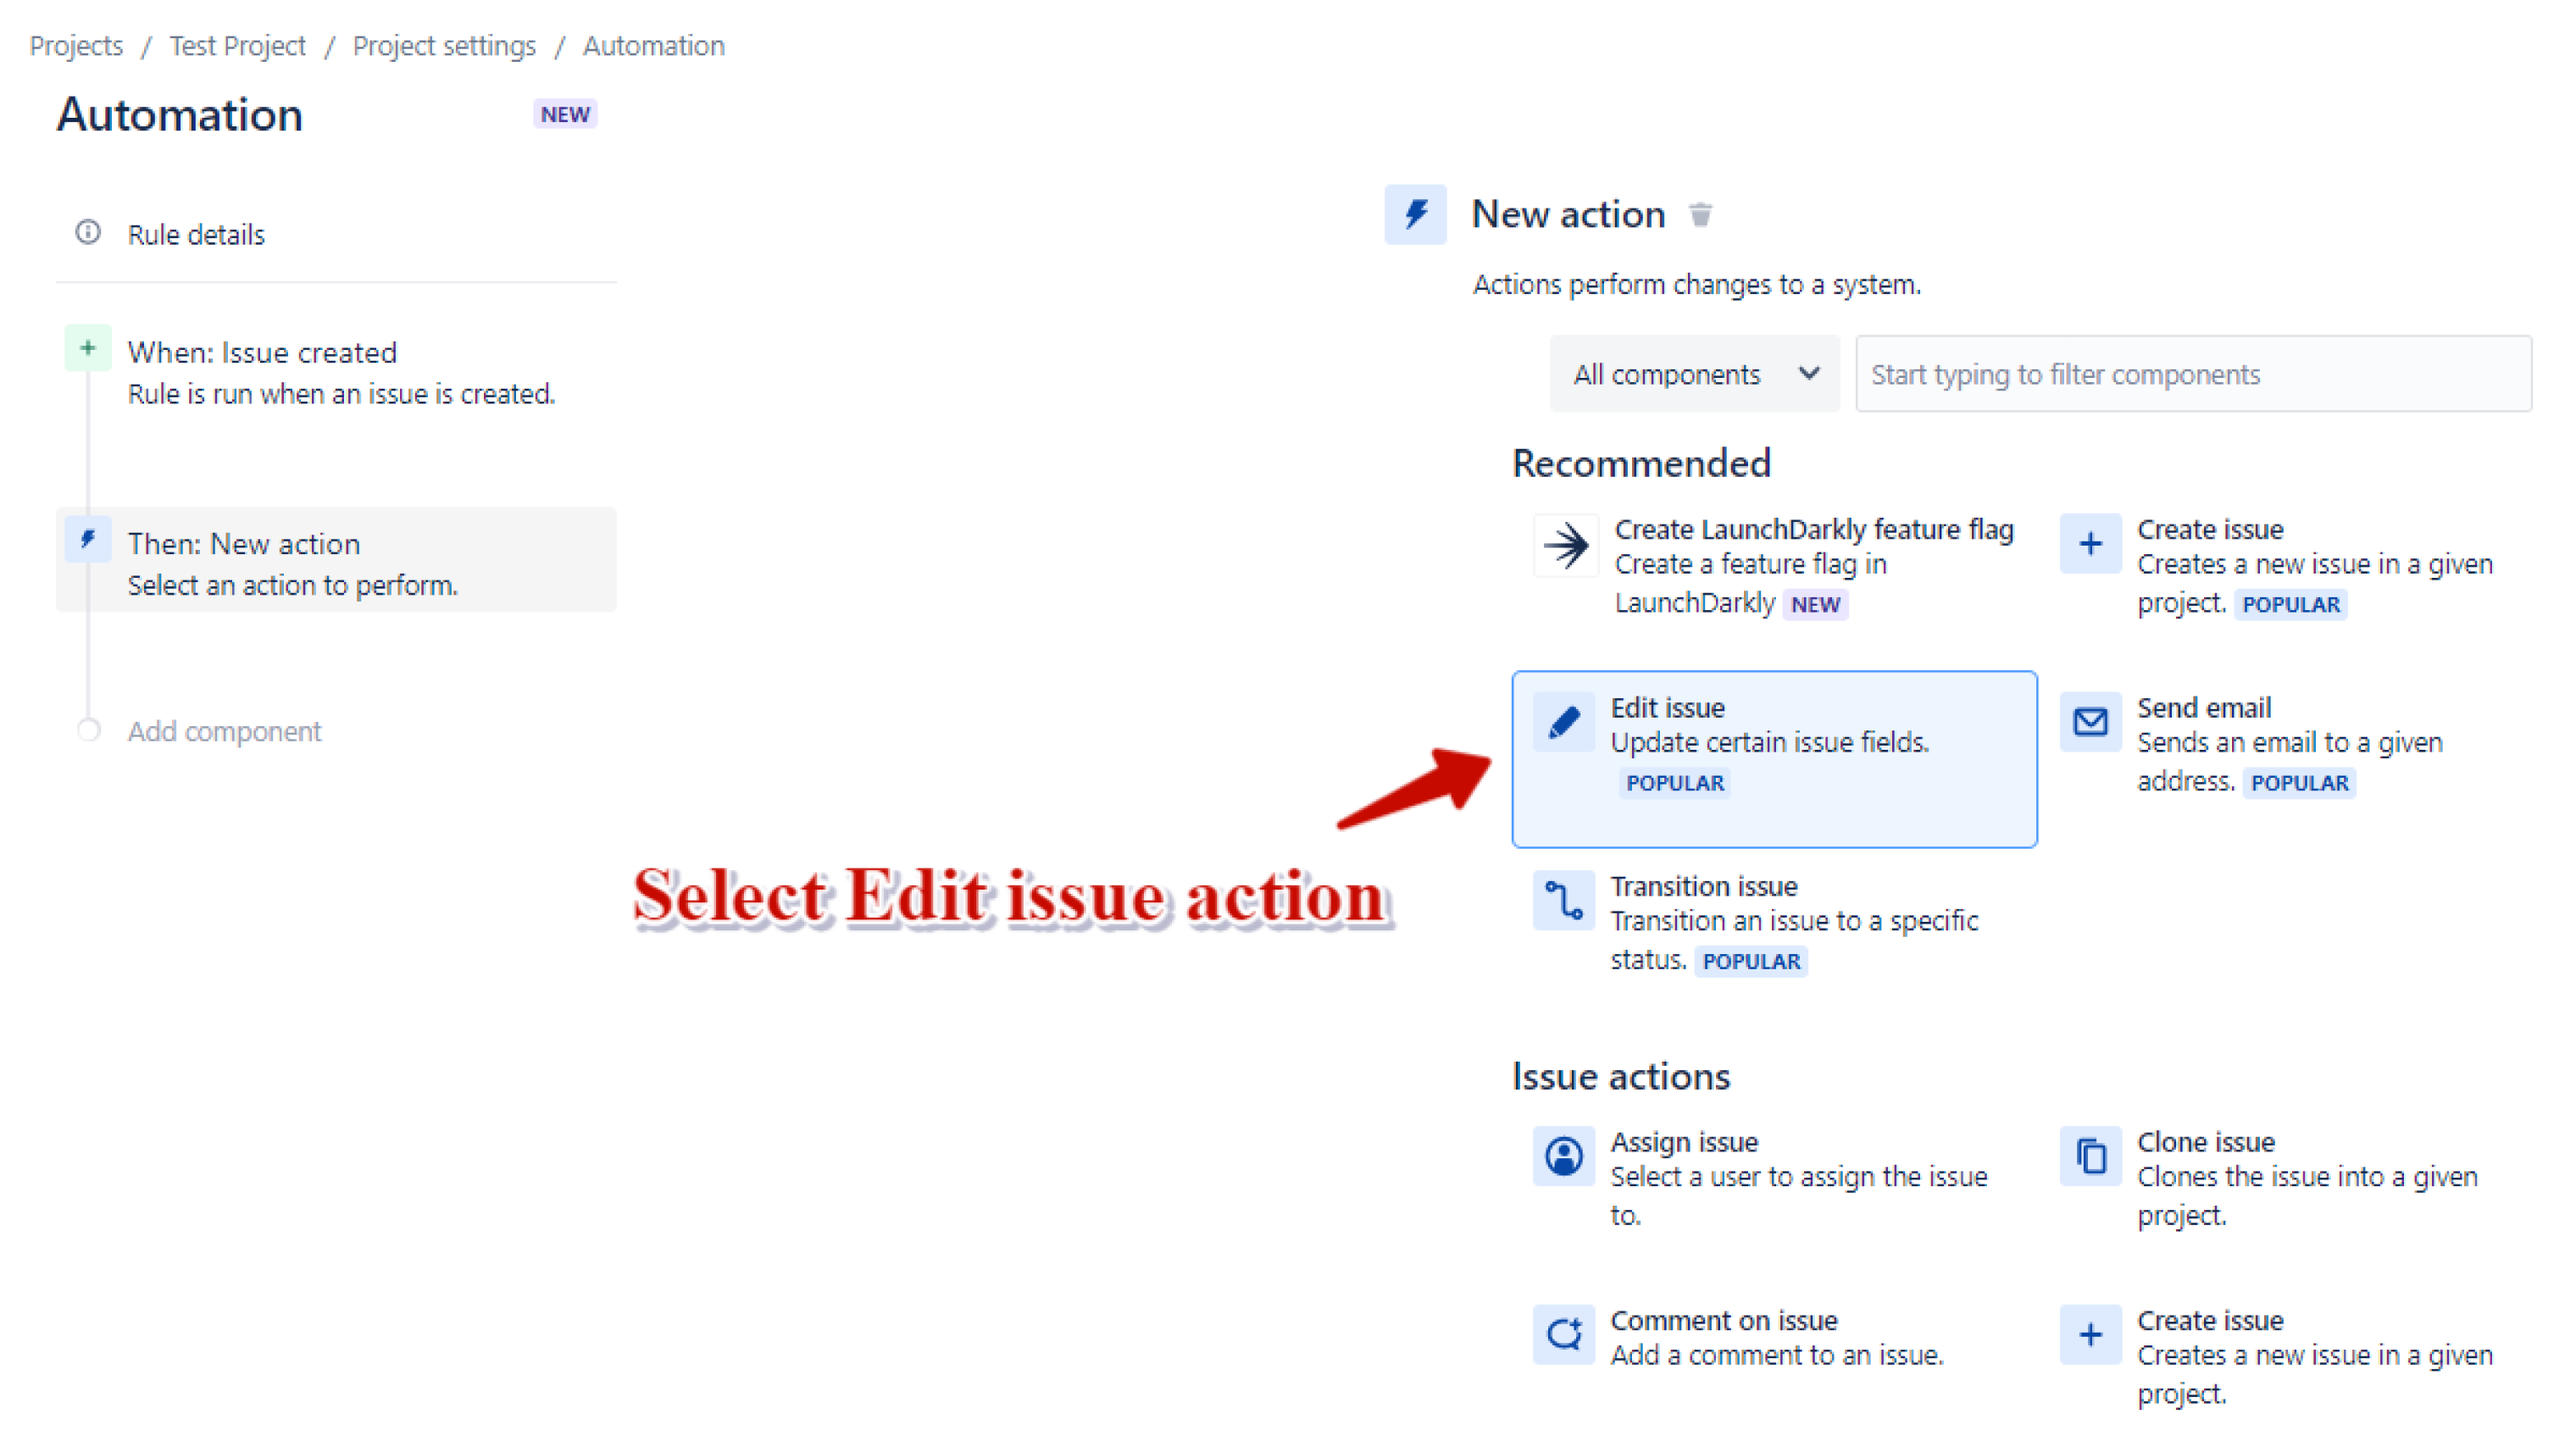
5. Add a New action component.
6. Select Edit issue action
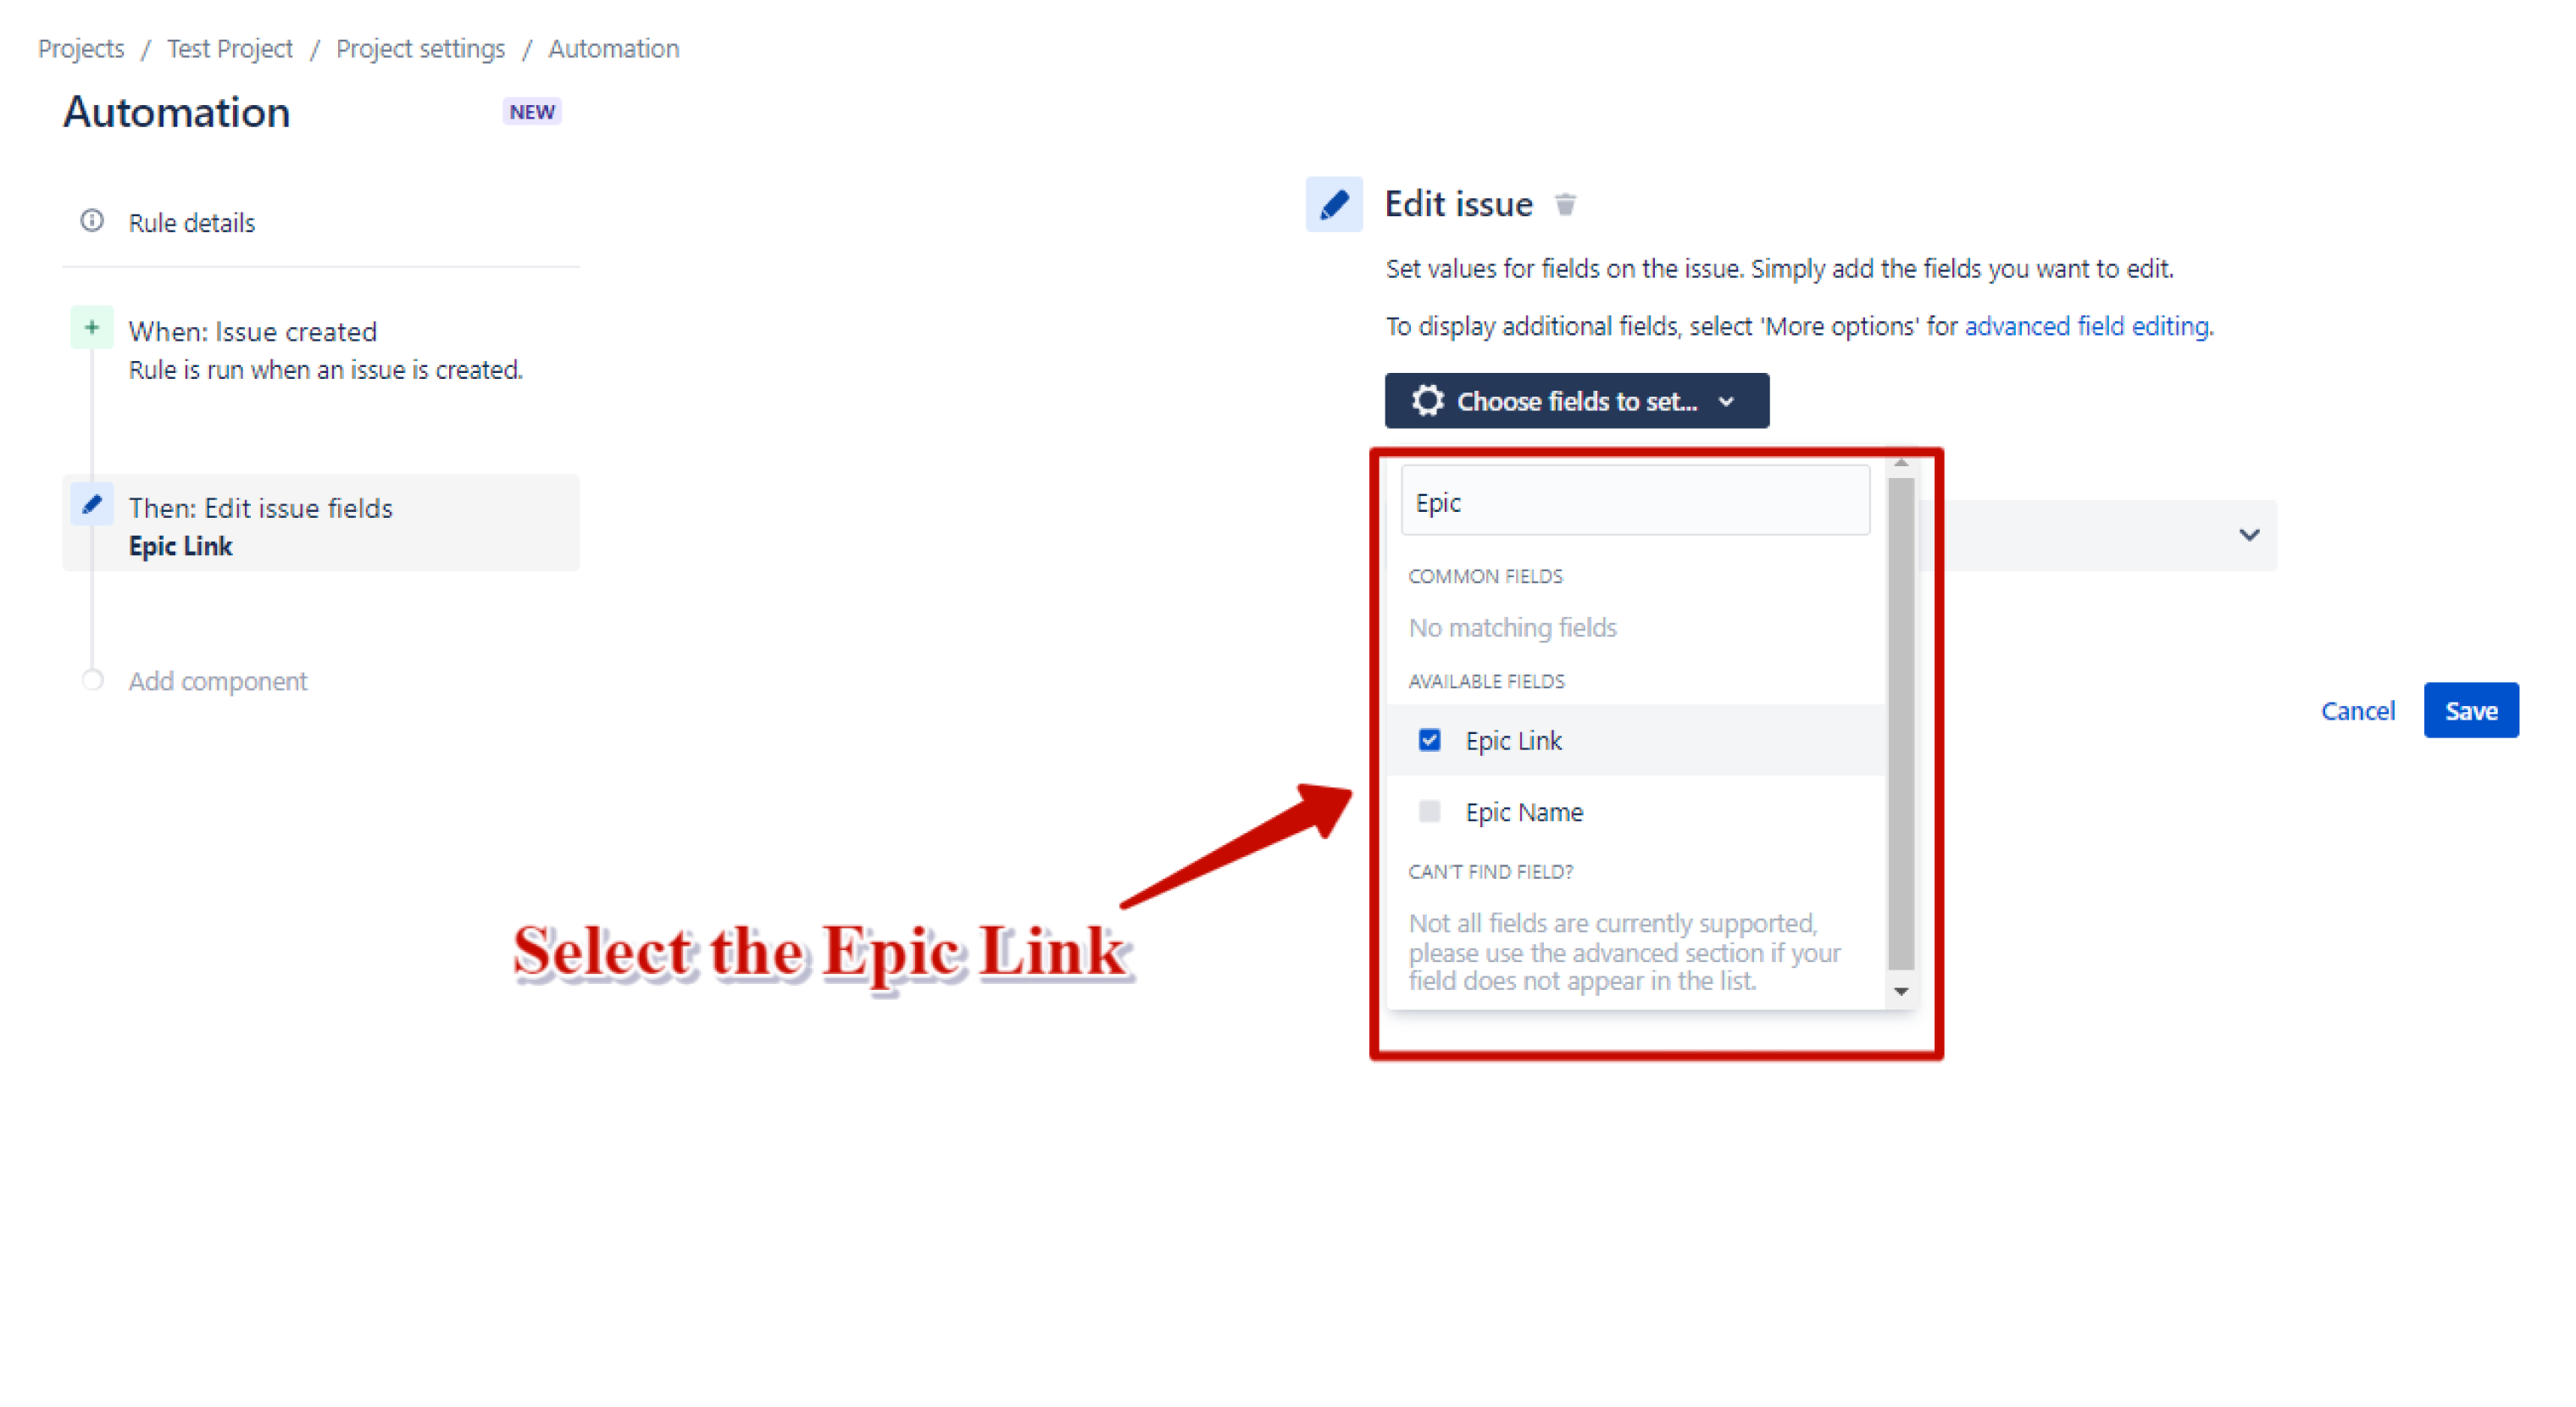
7. Select the Epic link option
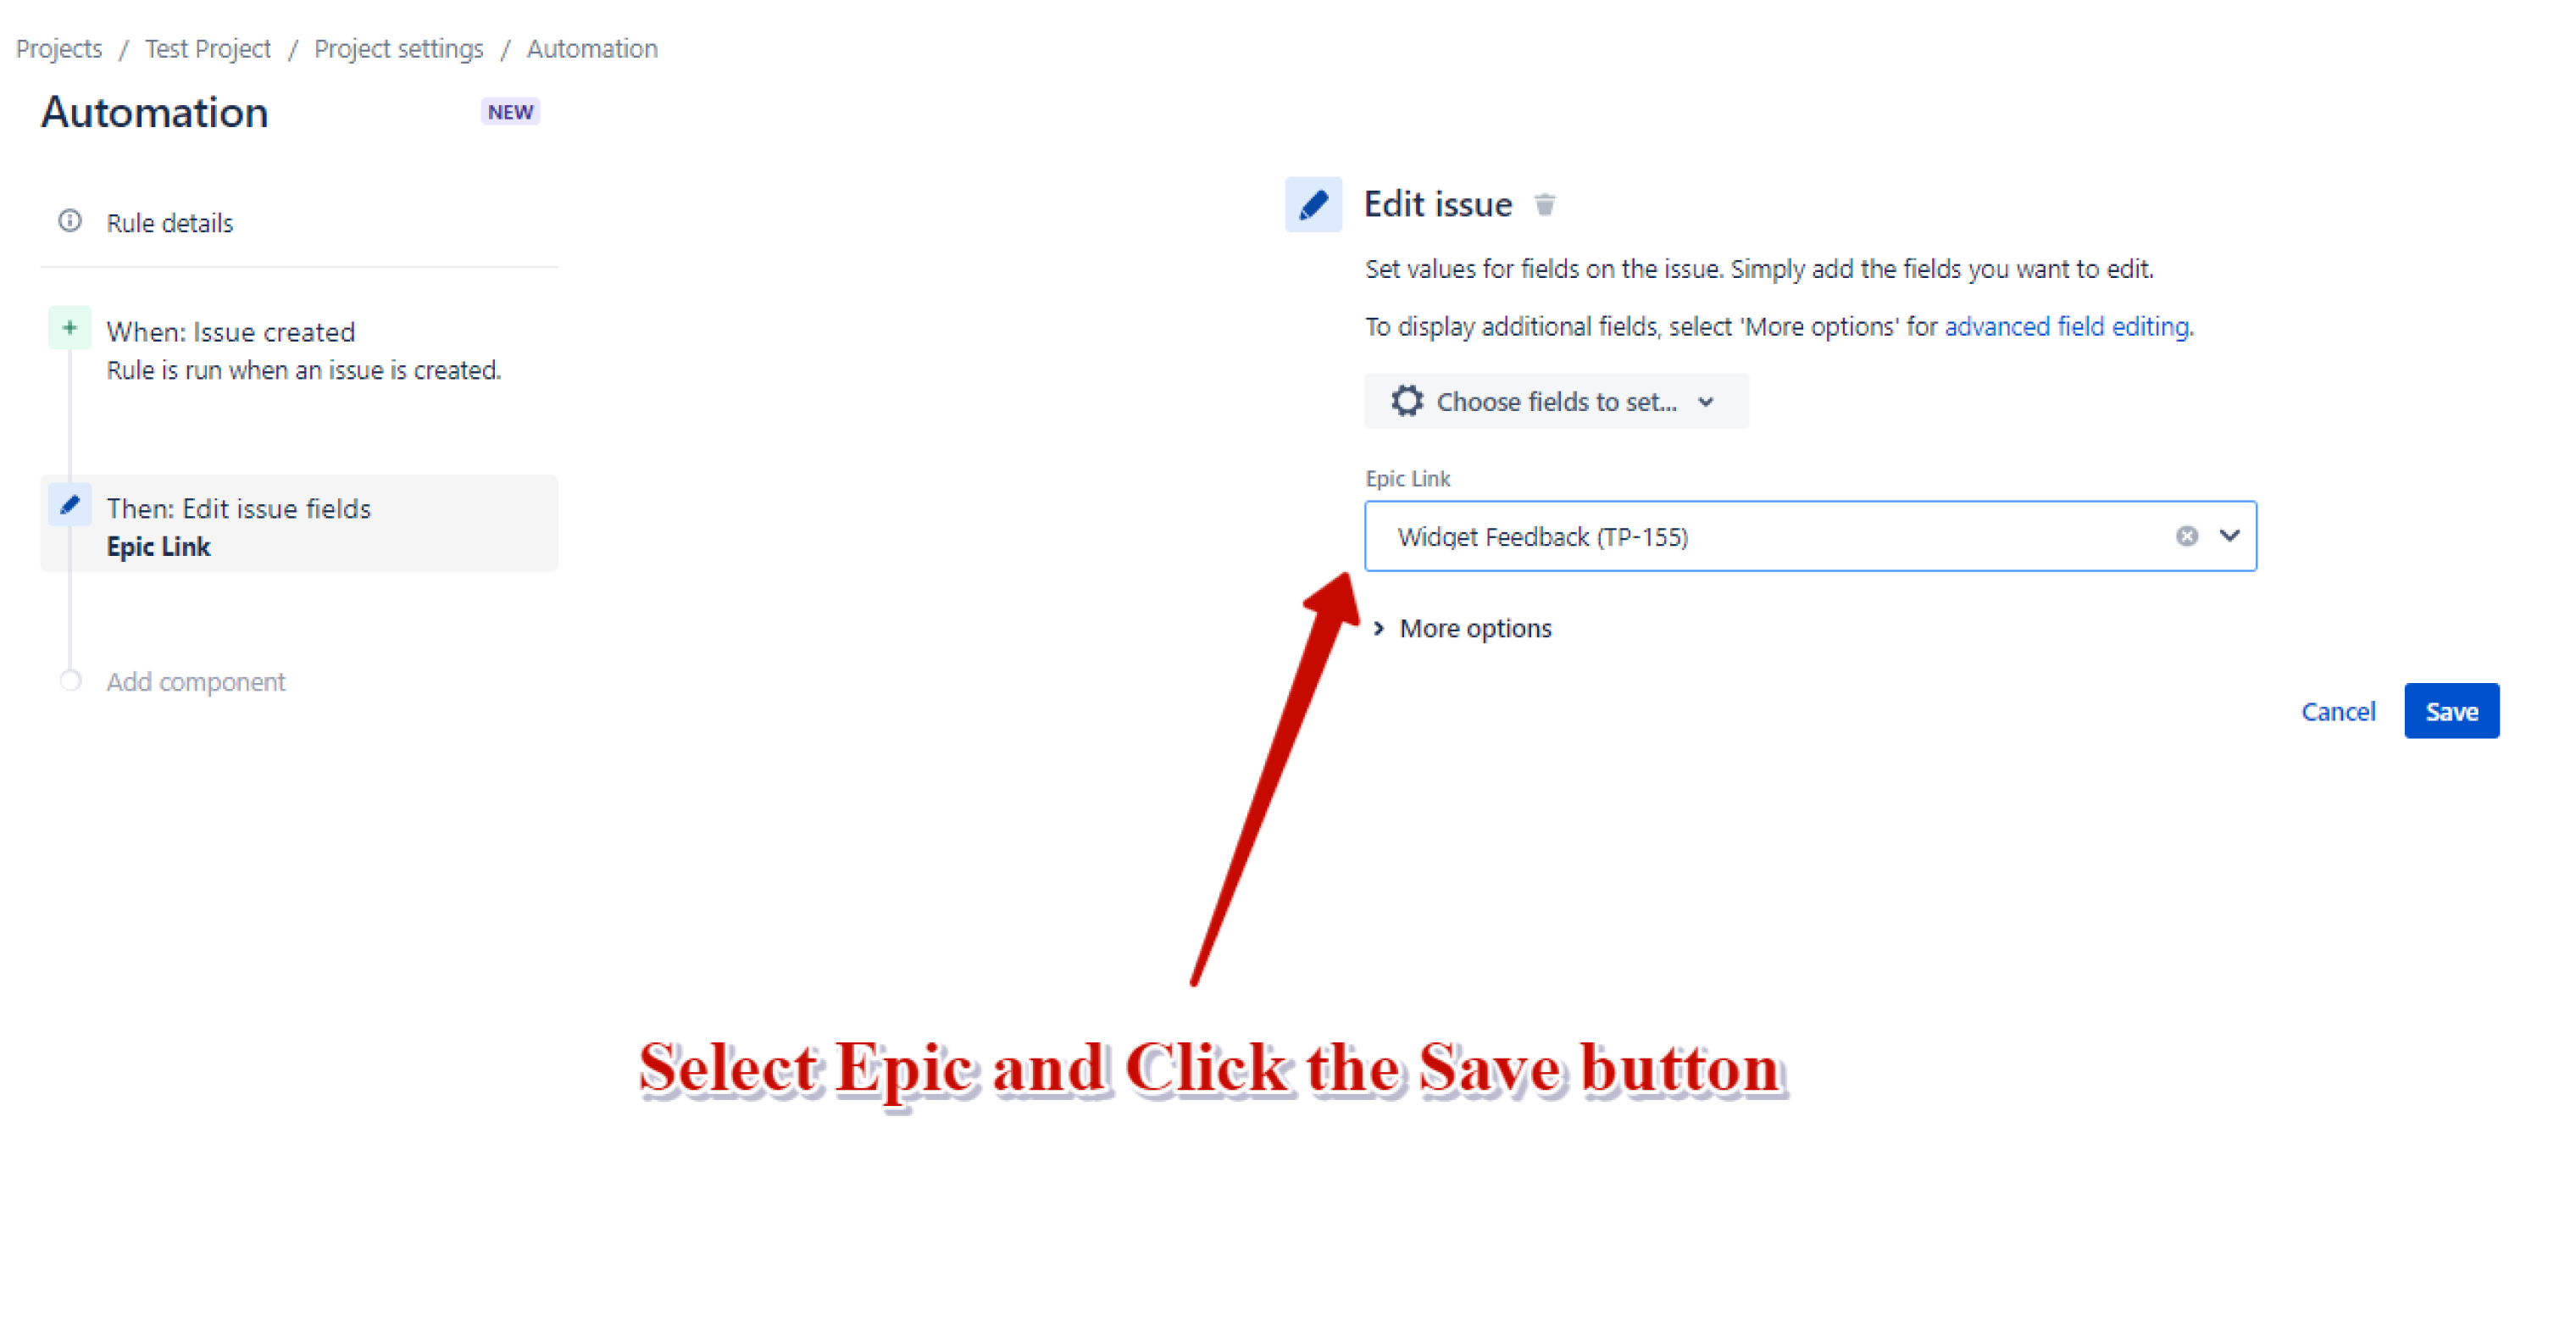
8. Select the Epic that you want to configure to the label and click the Save button
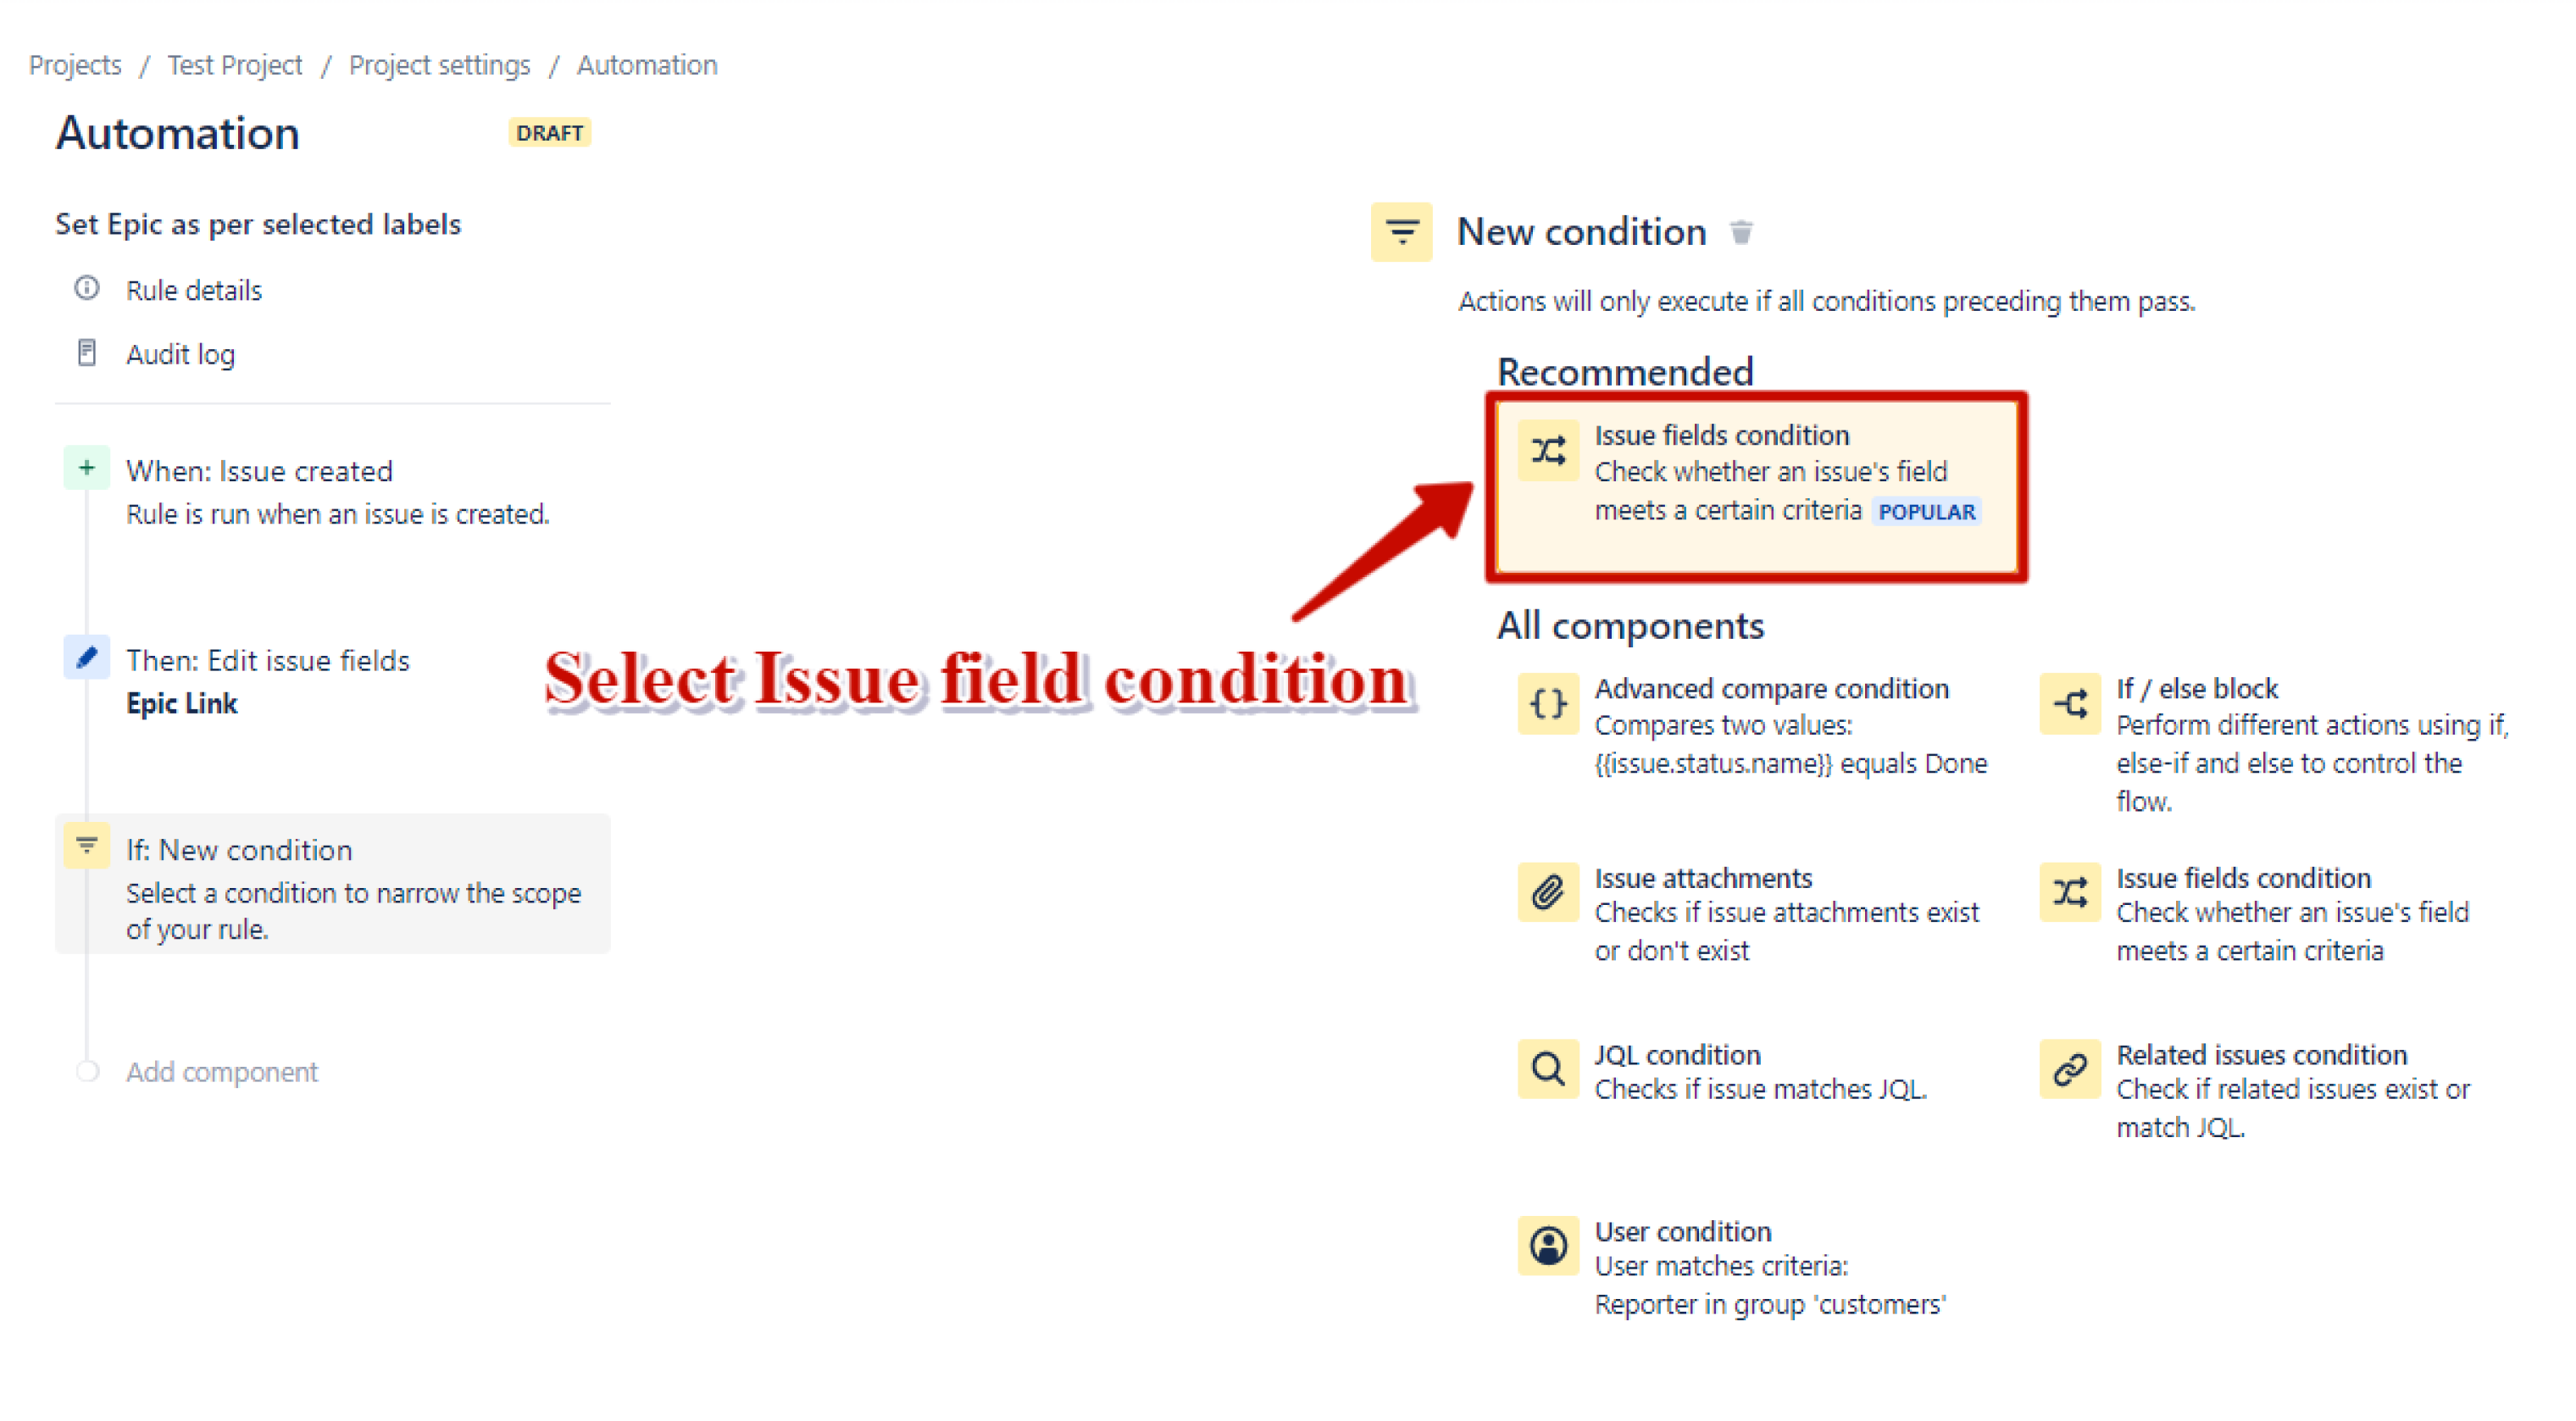
9. Add New Condition component

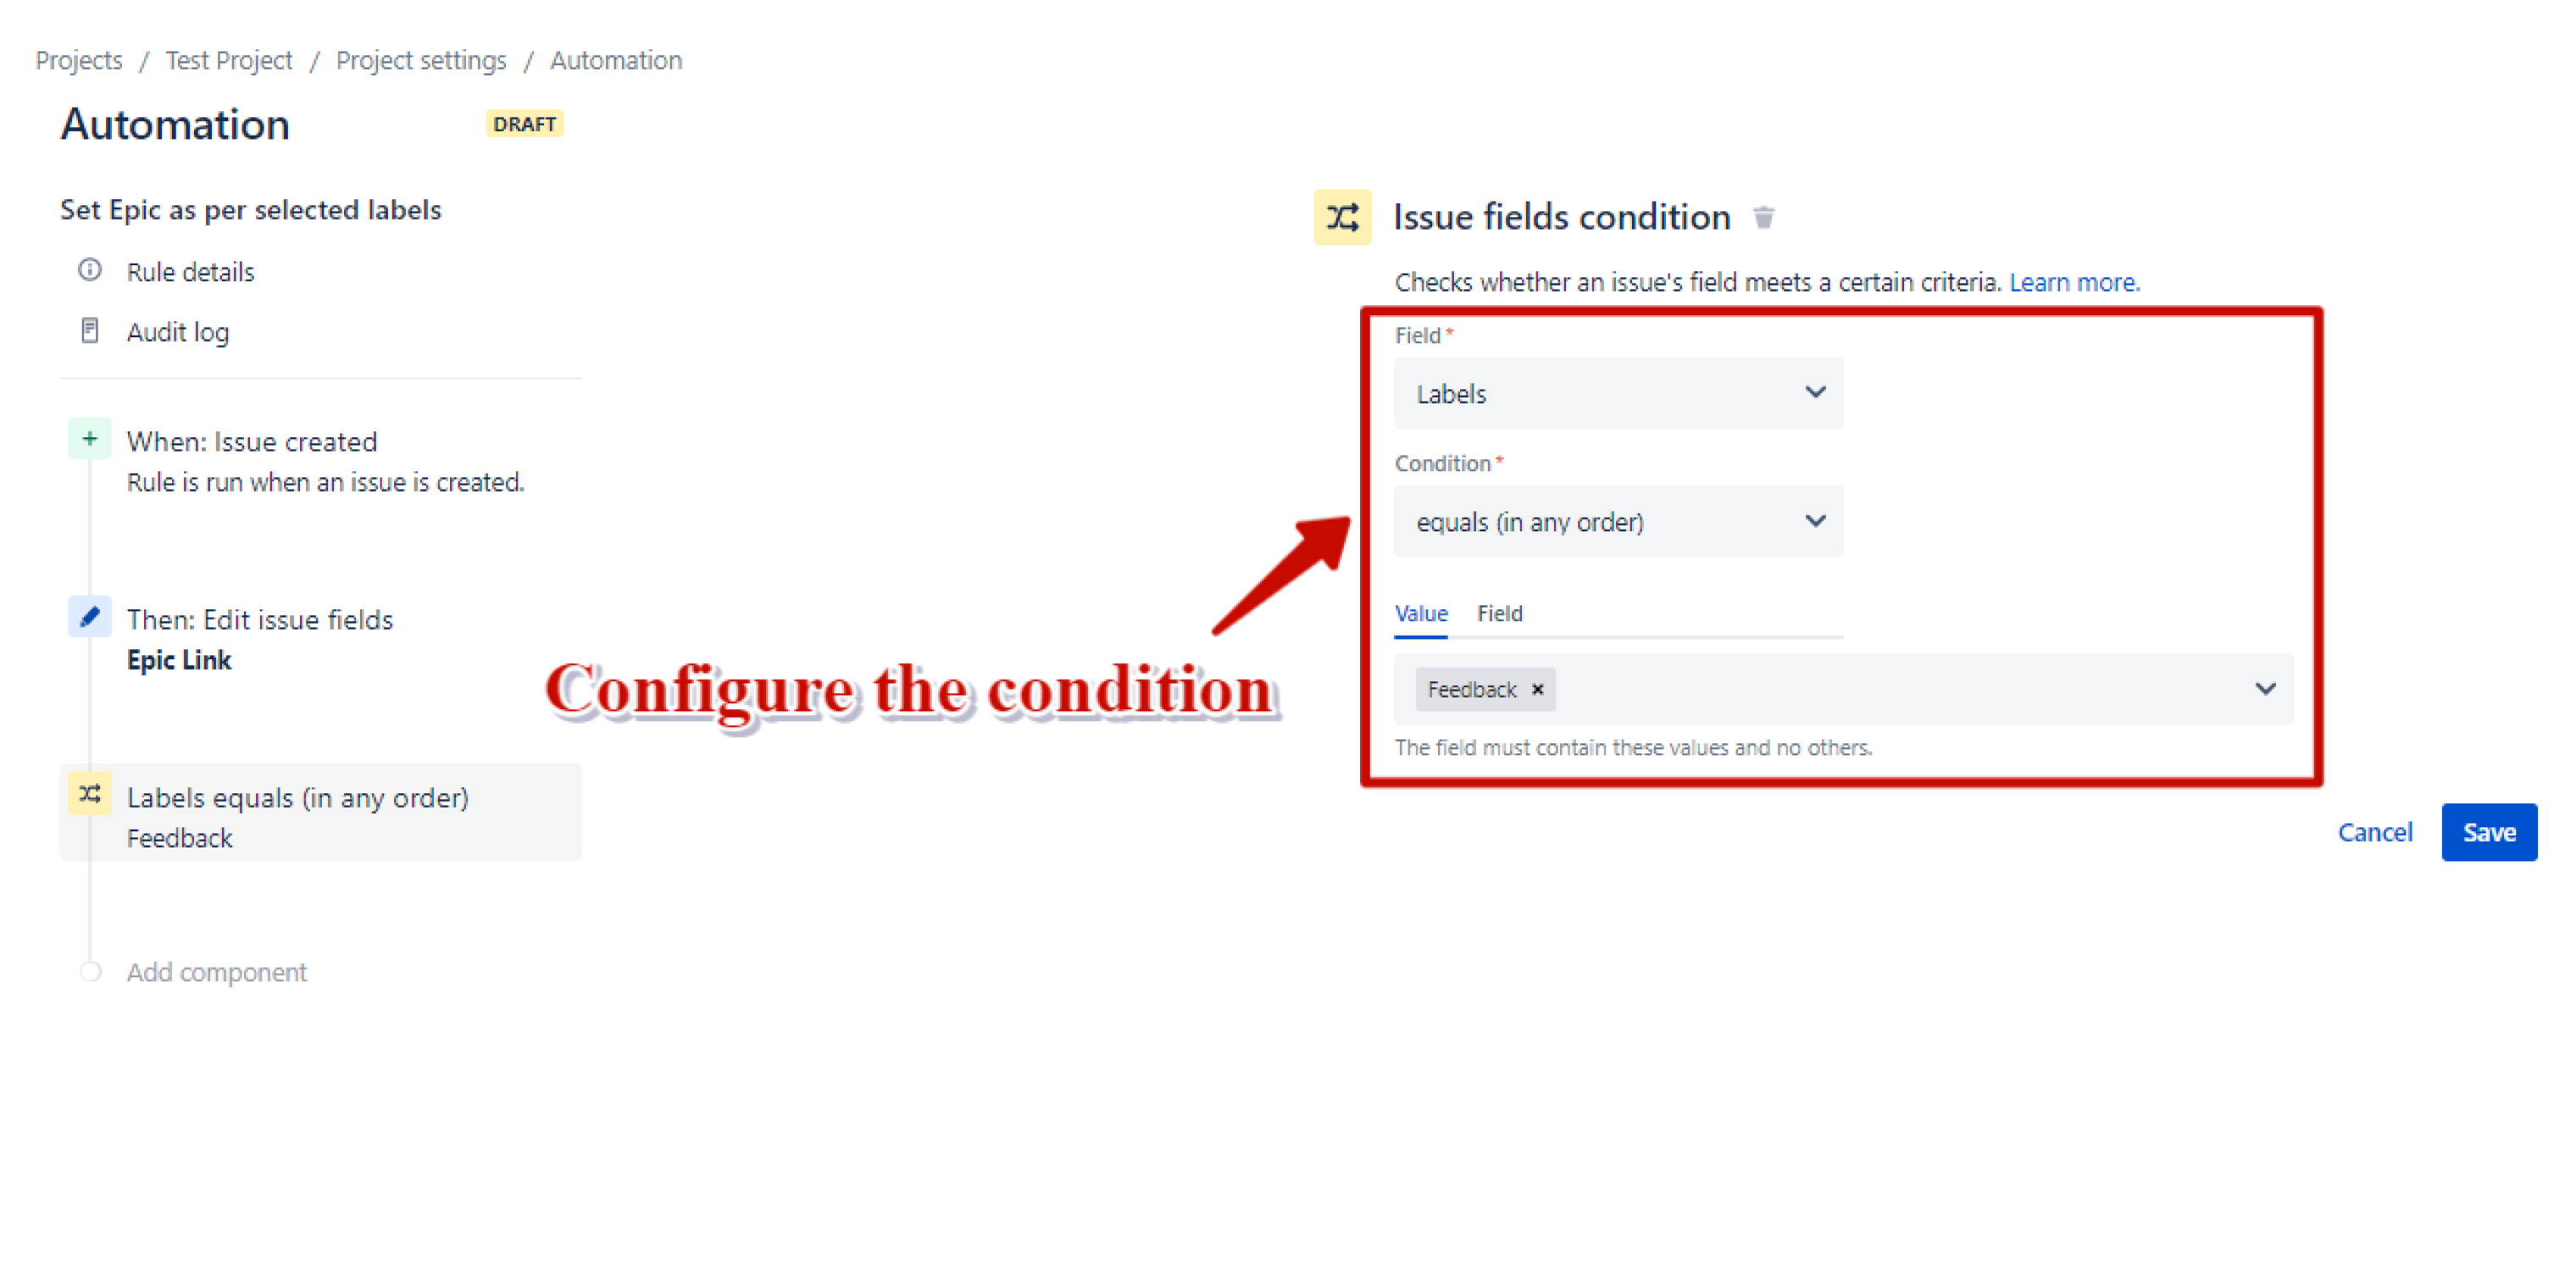
10. Select Issue fields condition
11. Configure the conditions by selecting the following options in the particular fields
- Field - Labels
- Condition - equals (in any order)
- Value - “Label name” that you want to configure with Epic
12. Publish the changes