Redpen's One-Click Capture Screenshot feature simplifies capturing the perfect shot of your webpage with just a single click. This feature eliminates the need to navigate through multiple windows, tabs, or screens, providing a seamless and efficient screenshot process within the Redpen widget.
Enable One-Click Capture Screenshot Feature: Step-by-Step Guide
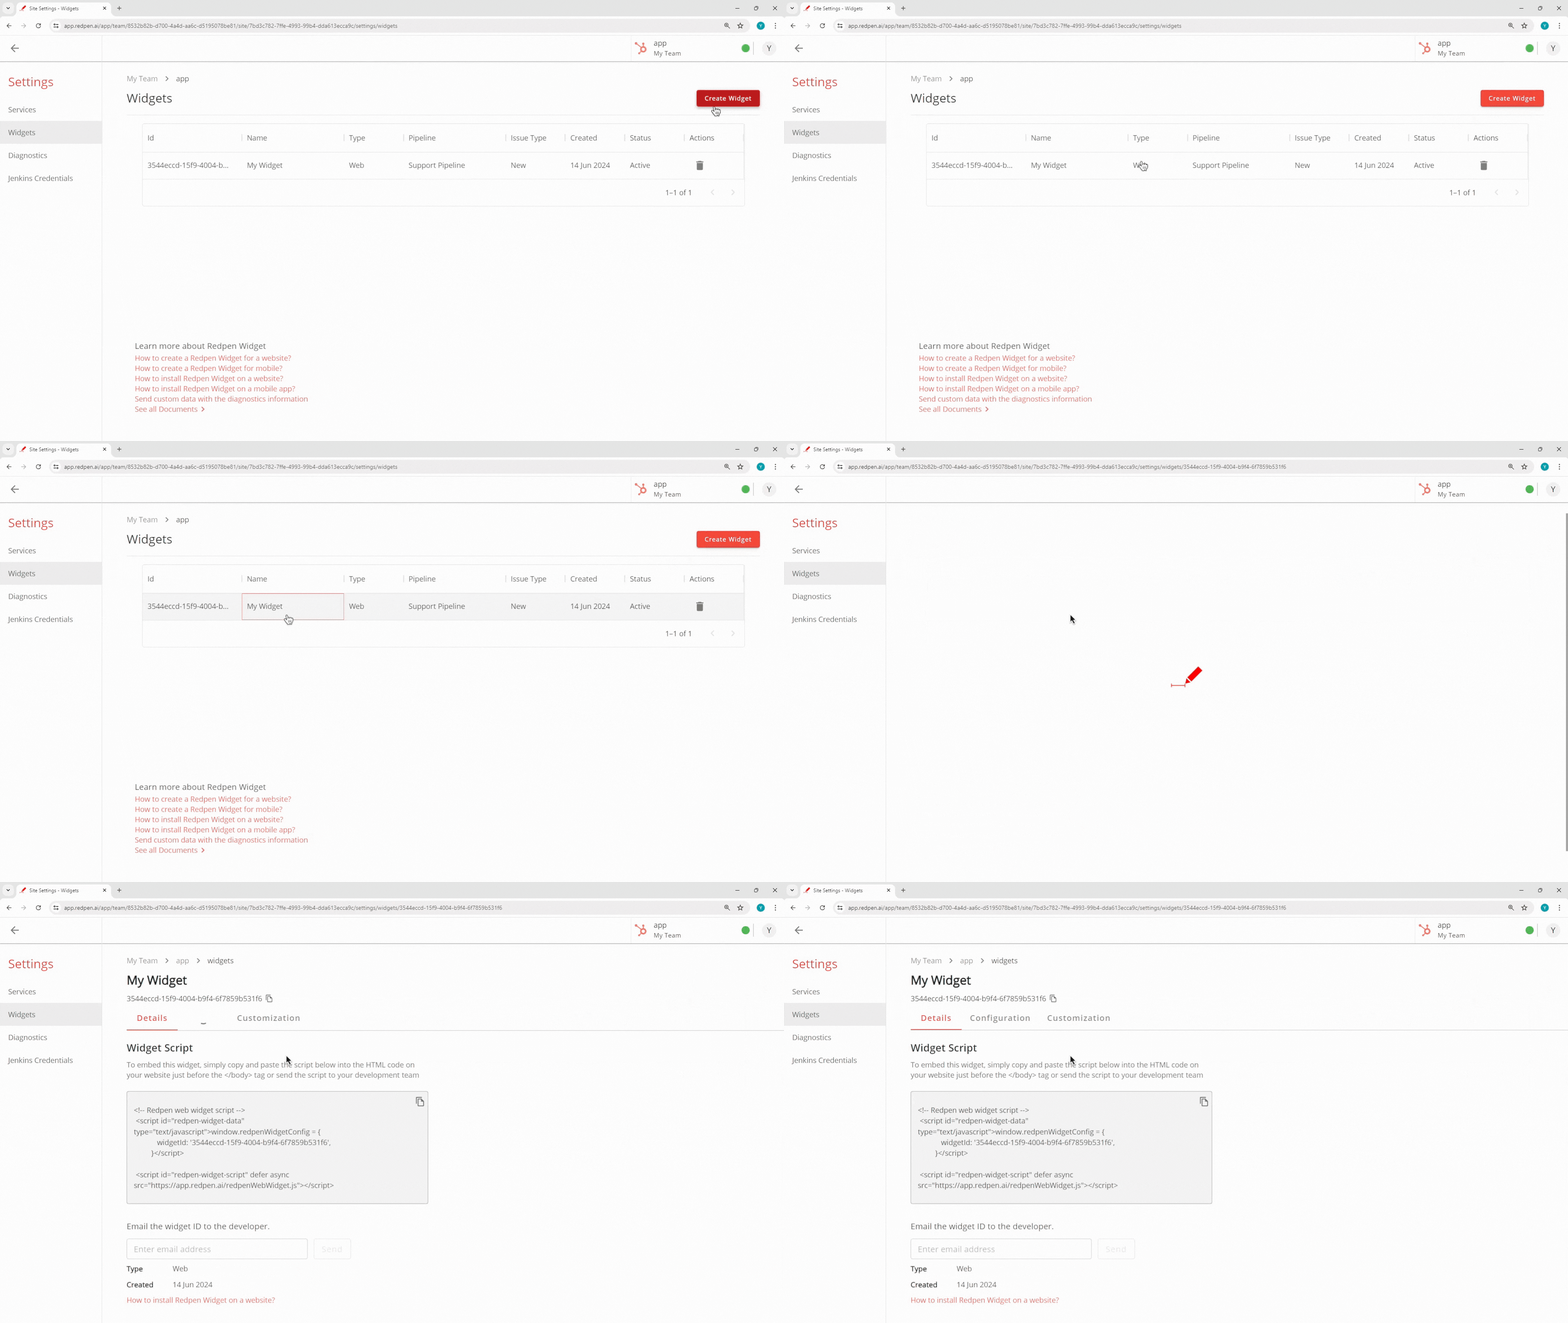
1. Access Widget Settings
- To access Widget Settings in the Redpen Web App, open the app and select Widgets from the profile icon dropdown. Alternatively, you can go to My Team, click the three-dot menu, and select the Widgets option.

2. Choose the specific widget
- Select the Widget you want to enable the One-Click Capture Screenshot feature.

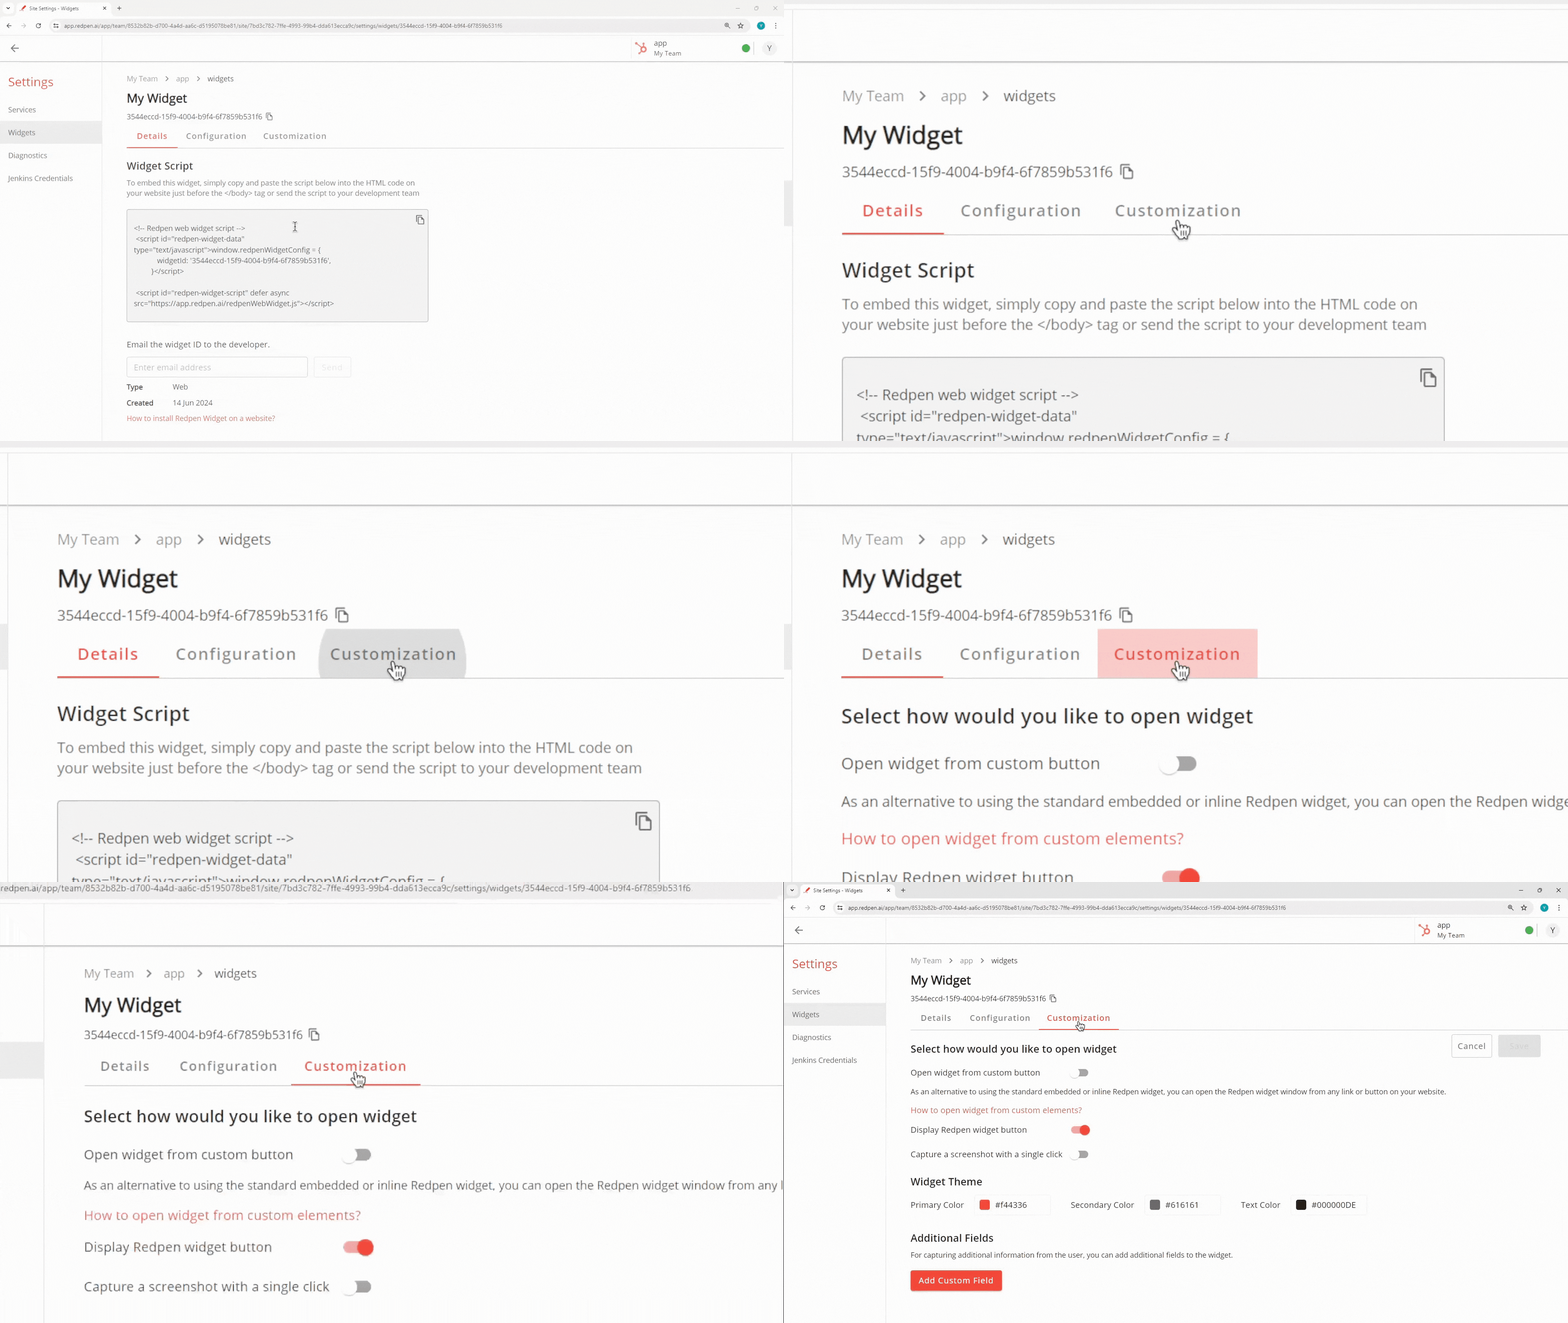
3. Go to Widget Customization
- To access the Widget Customization in the Redpen Web App, click on the Customization tab.

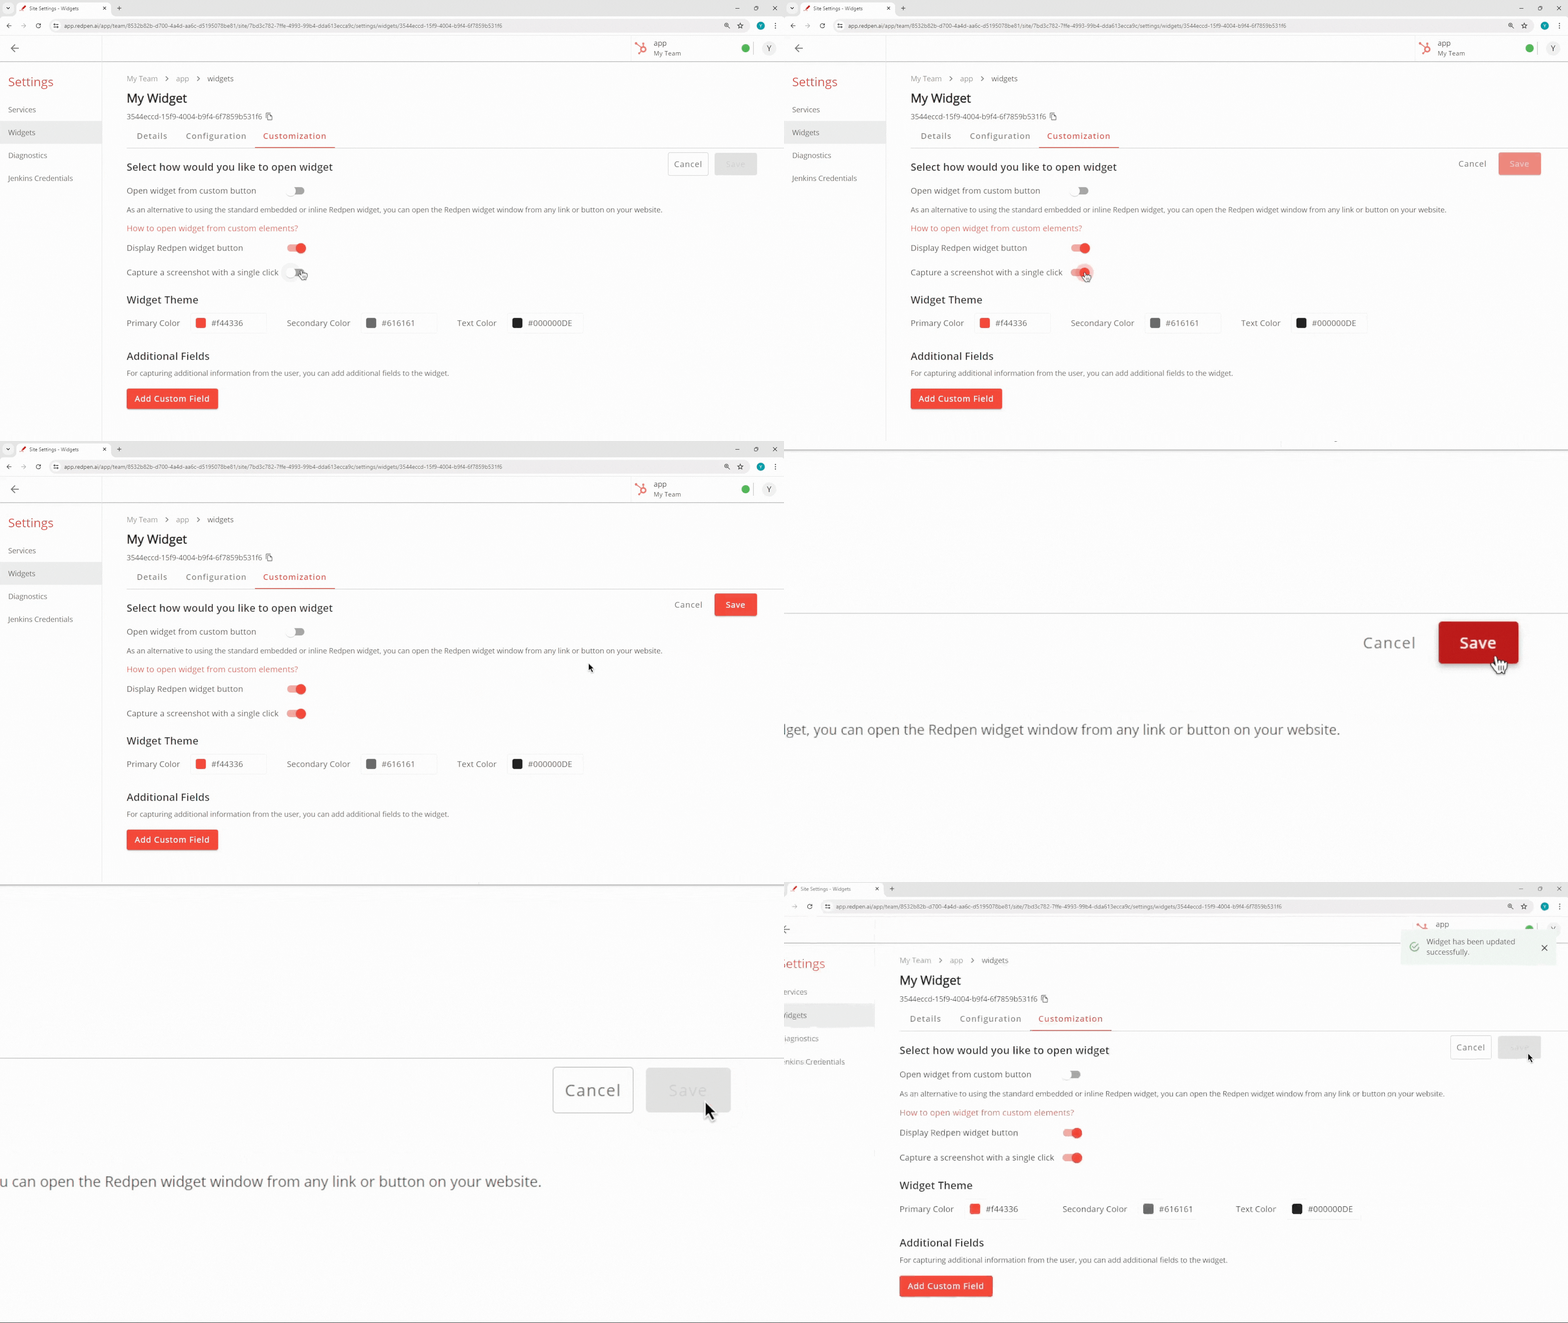
4. Activate the One-Click Capture Screenshot Feature
- To enable the feature, toggle on the "Capture a screenshot with a single click" switch and click the Save button.

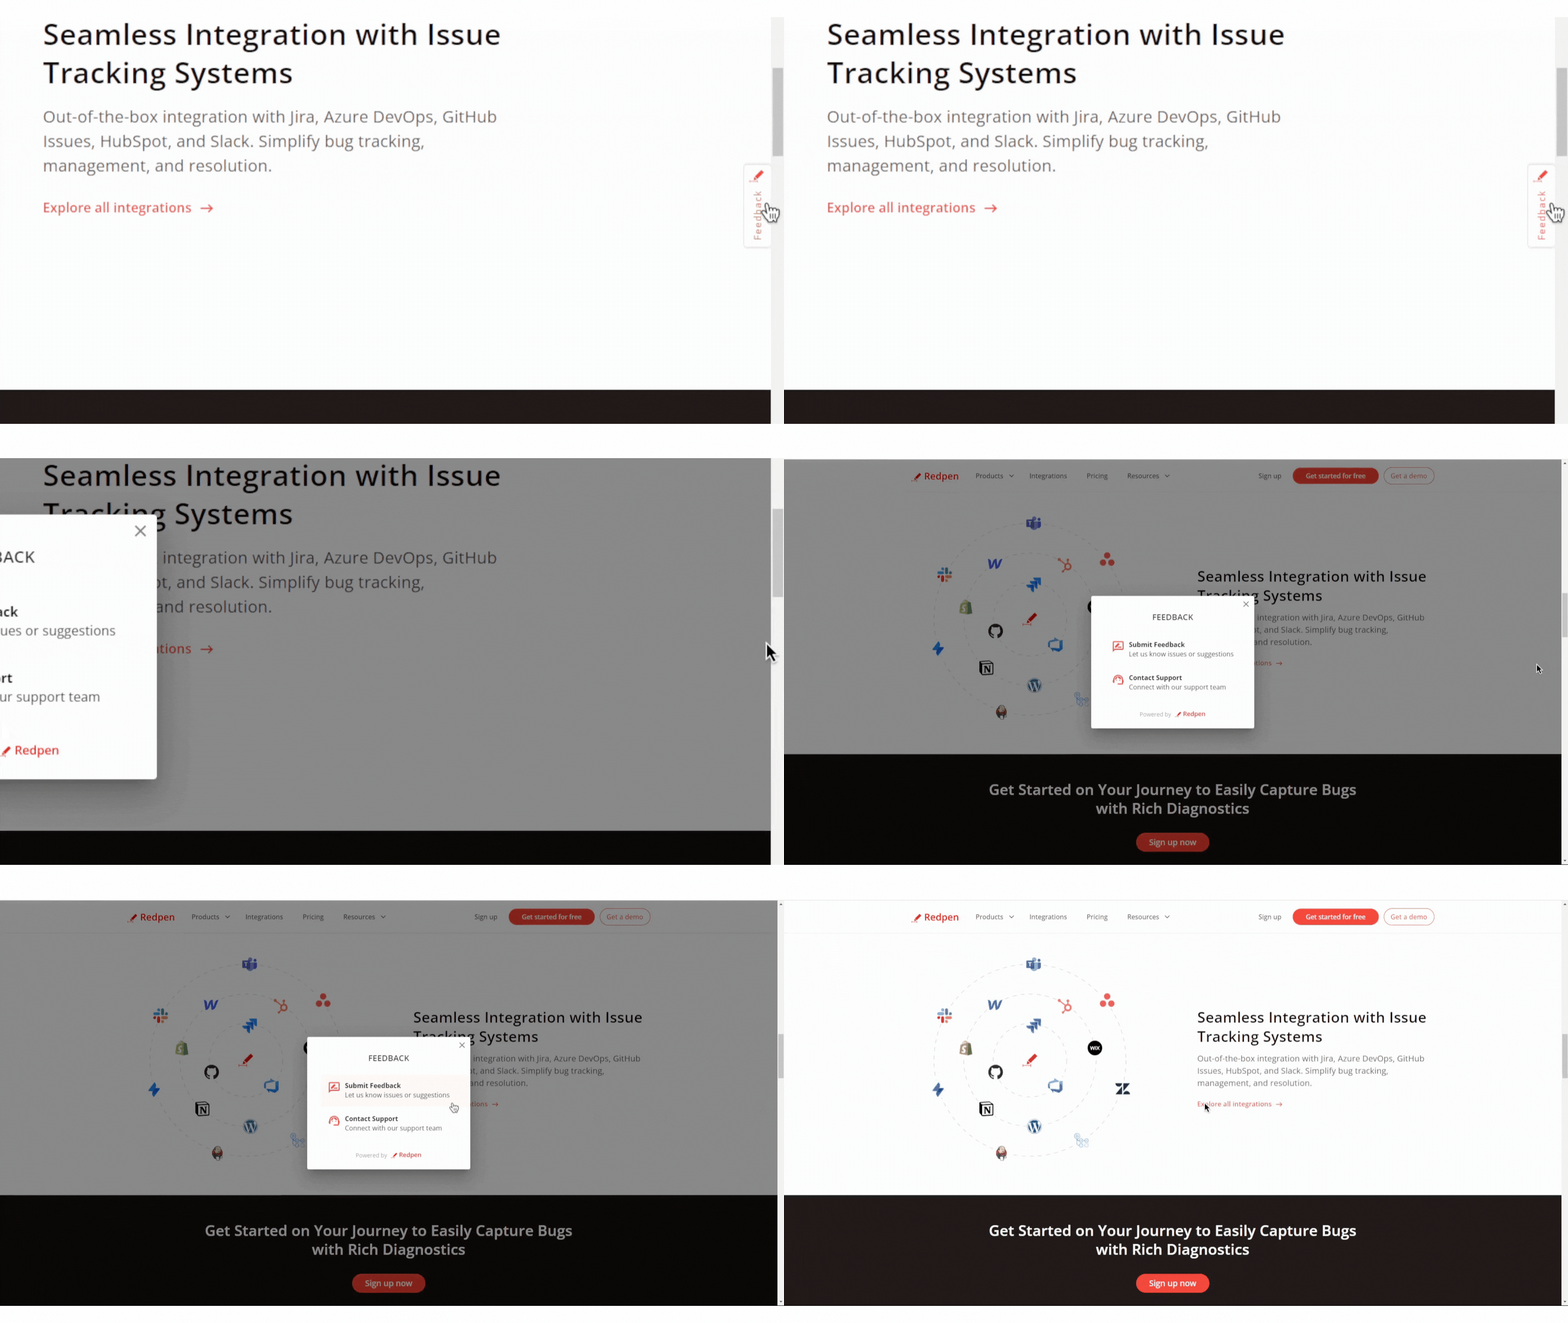
How does the One-Click Capture Screenshot feature work?
1. To initiate the capturing process, click the Feedback button.

2. To initiate the capturing process, click the Feedback button.

3. To capture a screenshot, click the Capture Screenshot button.

4. View the captured screenshot directly within the Feedback interface.
.png)