This document will help you create your first issue using Redpen.
Creating the First Issue Using Redpen: A Step-by-Step Guide:
1. Capture screenshots, record video of the browser tab, or attach images/files to add them to the issue.
Once the Redpen browser extension is installed, do the following:
To capture a screenshot or record video:
- Open the browser tab of which you want to capture screenshots or record videos.
- Single-click on the Redpen browser extension to capture a screenshot of the browser tab opened.
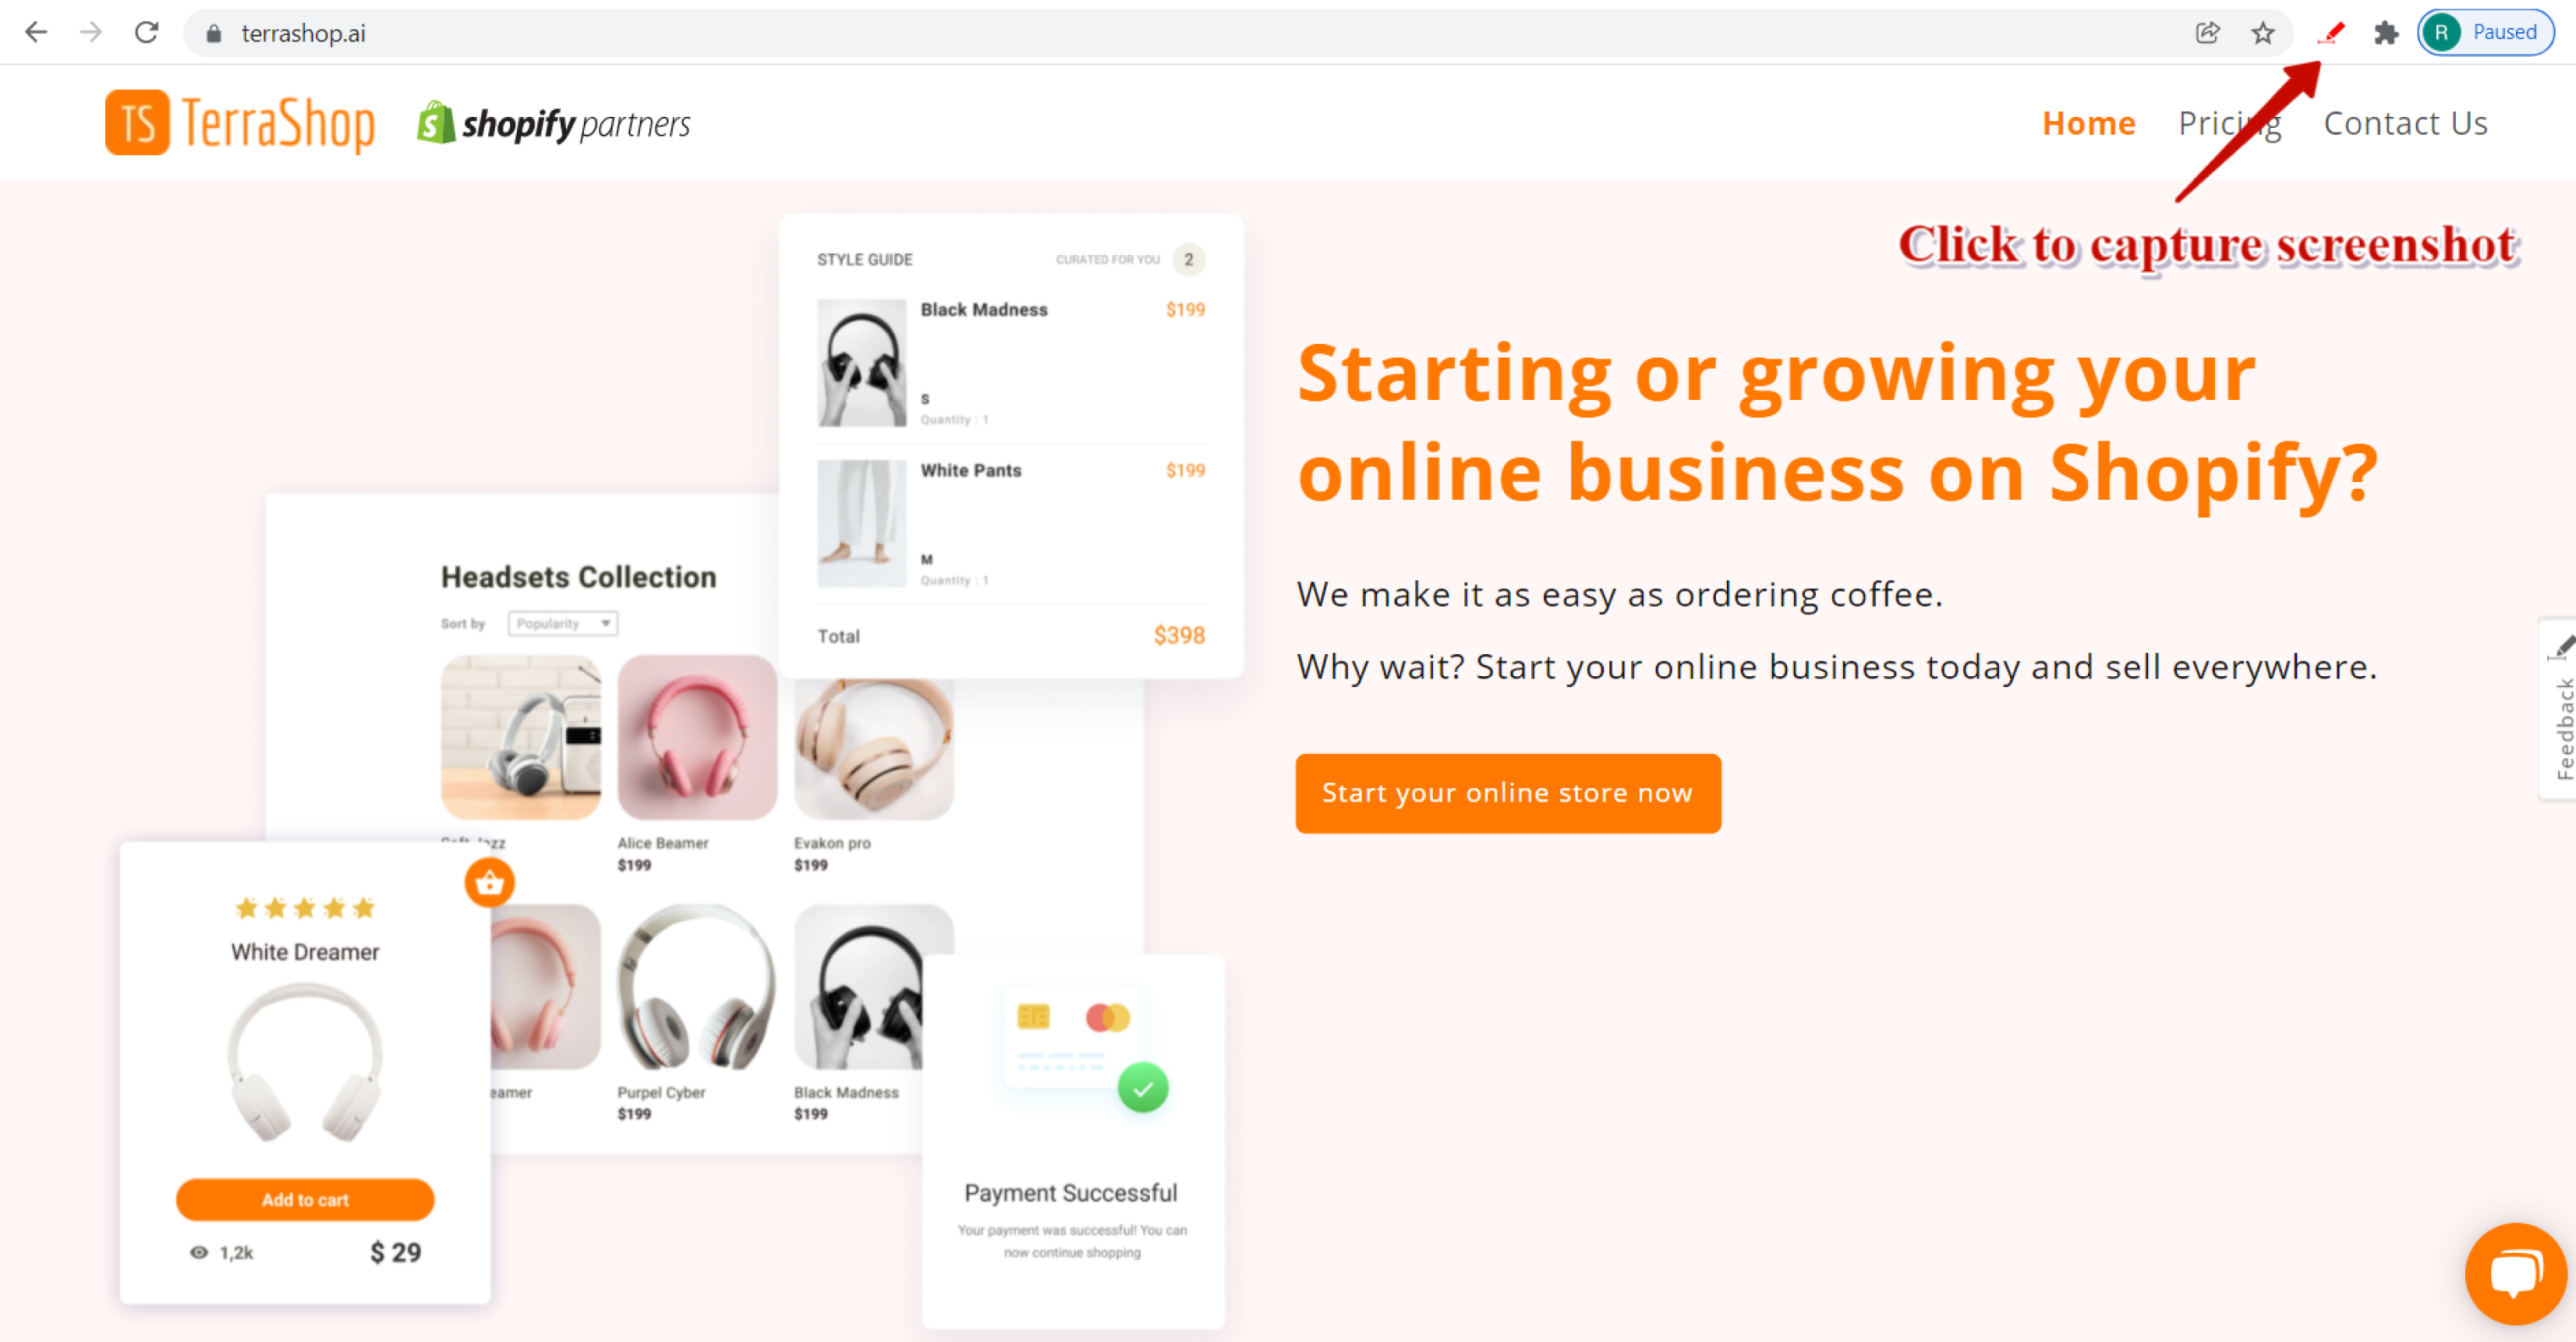
- Double-click on the Redpen browser extension to record a video of the browser tab opened.

To attach images or files:
- Open Redpen web application.
- Click on the Upload button to attach images or files or click the Paste button to paste the copied image.
2. Visually explain the issue.
- By using the Redpen annotations or editing tool, you can highlight or explain the issue visually on the captured screenshot, or attached image.
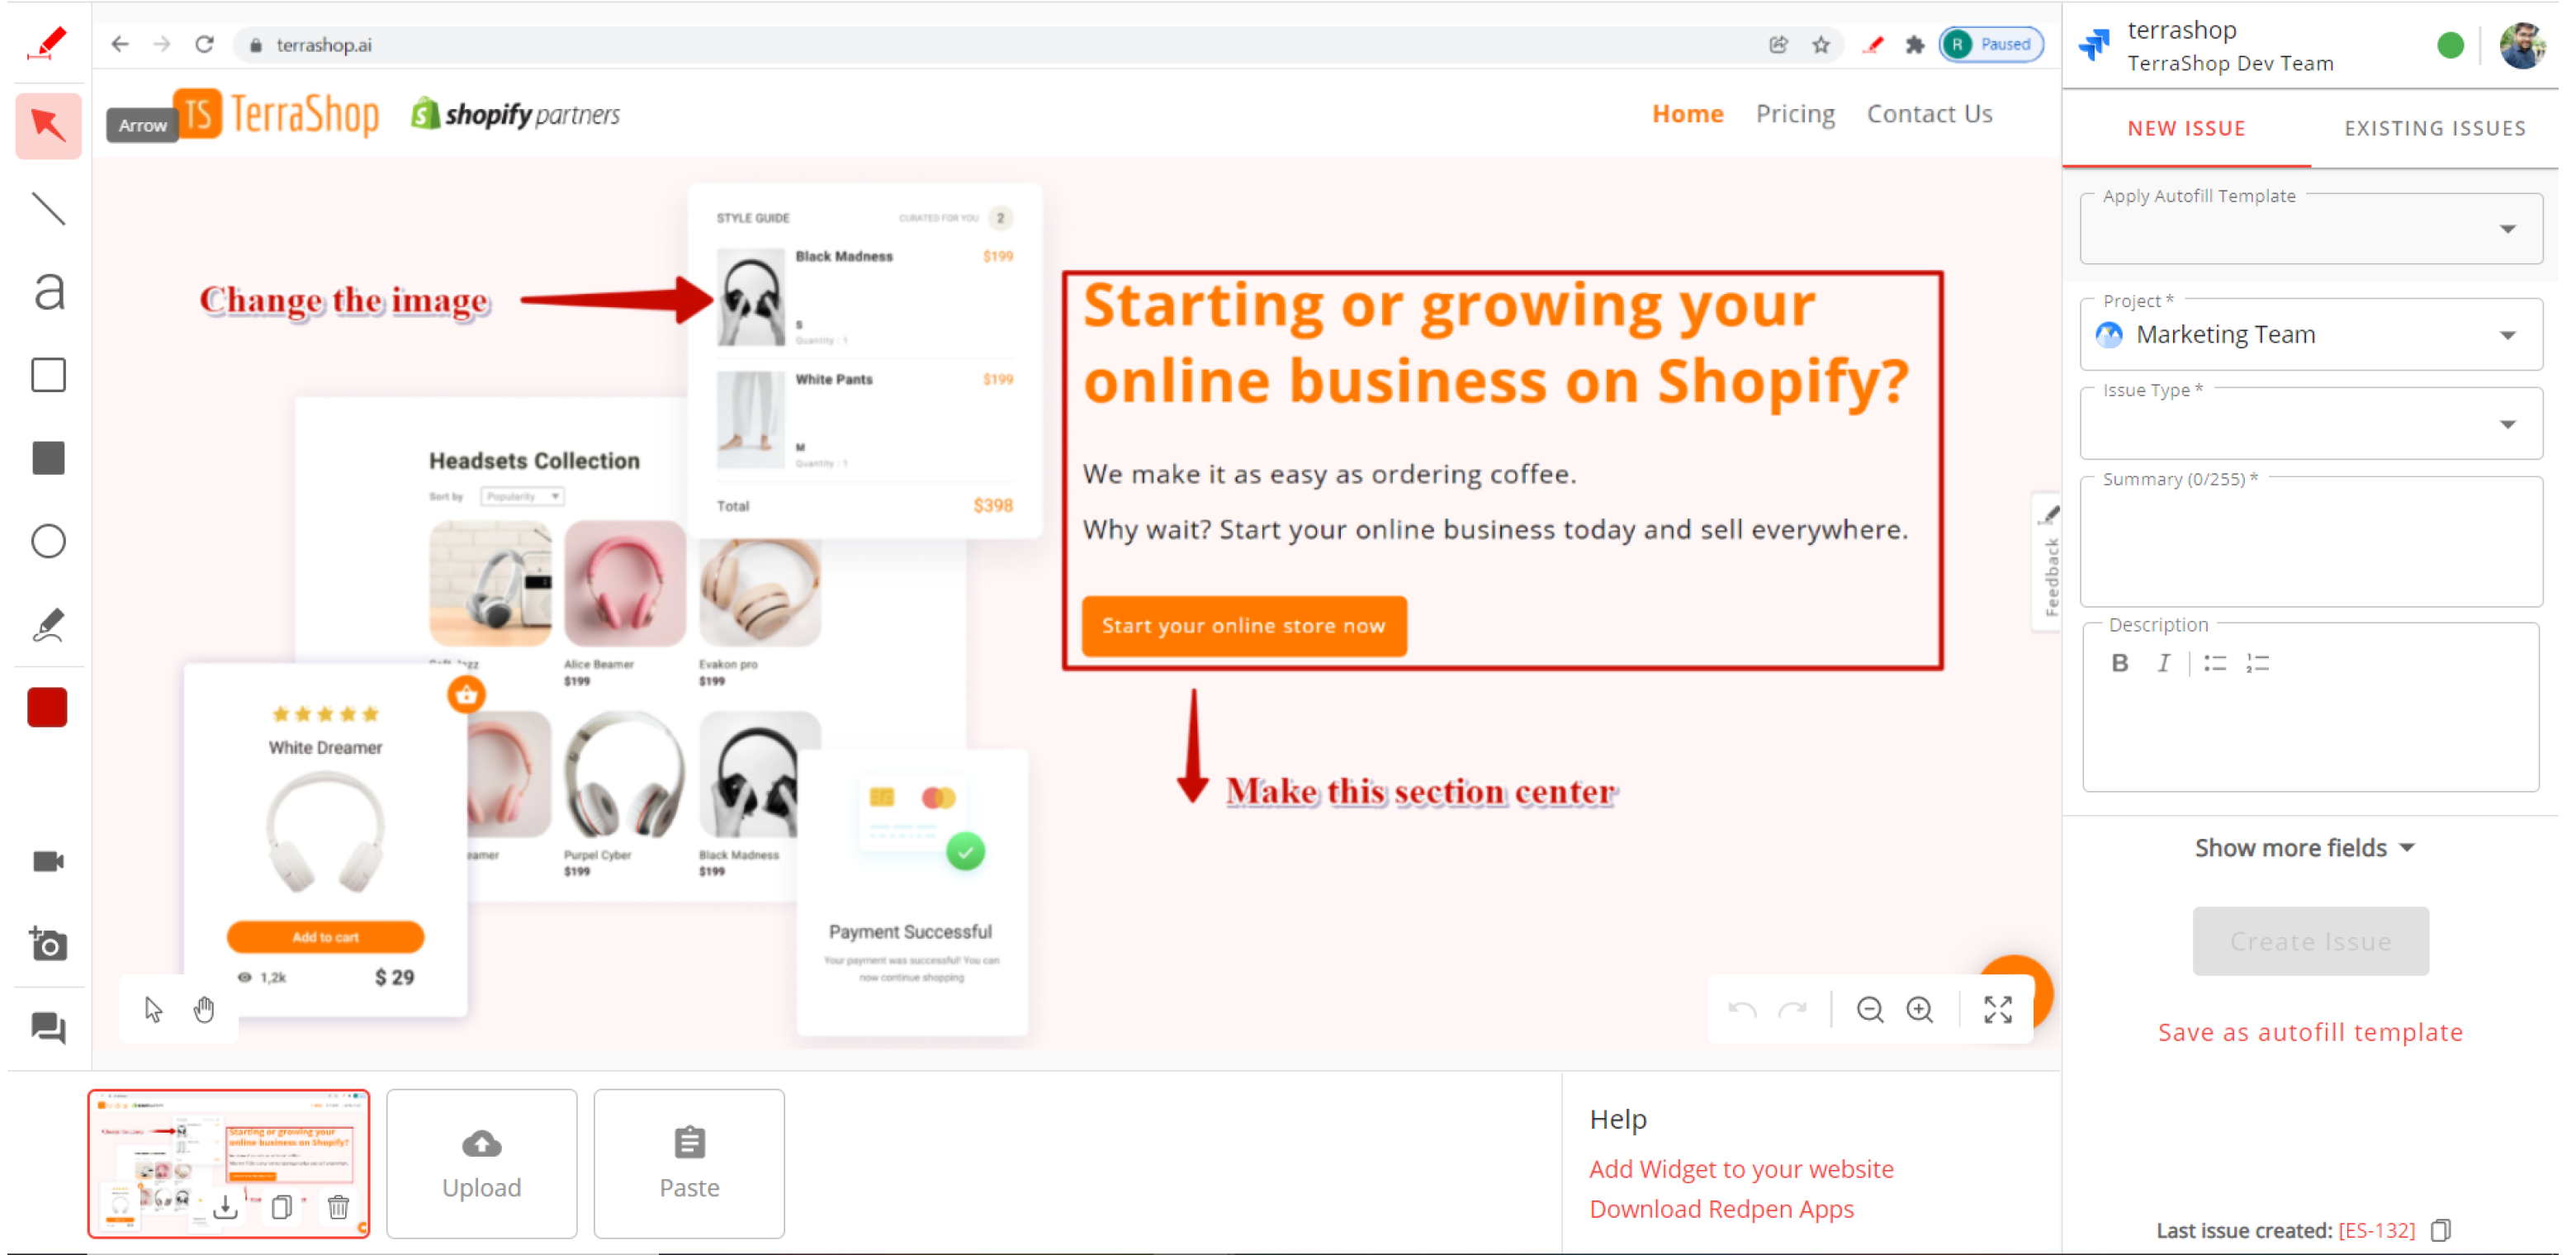
- For videos, highlight issues by using the annotation tool and with your voice comments.

3. Connect to an issue tracking service.
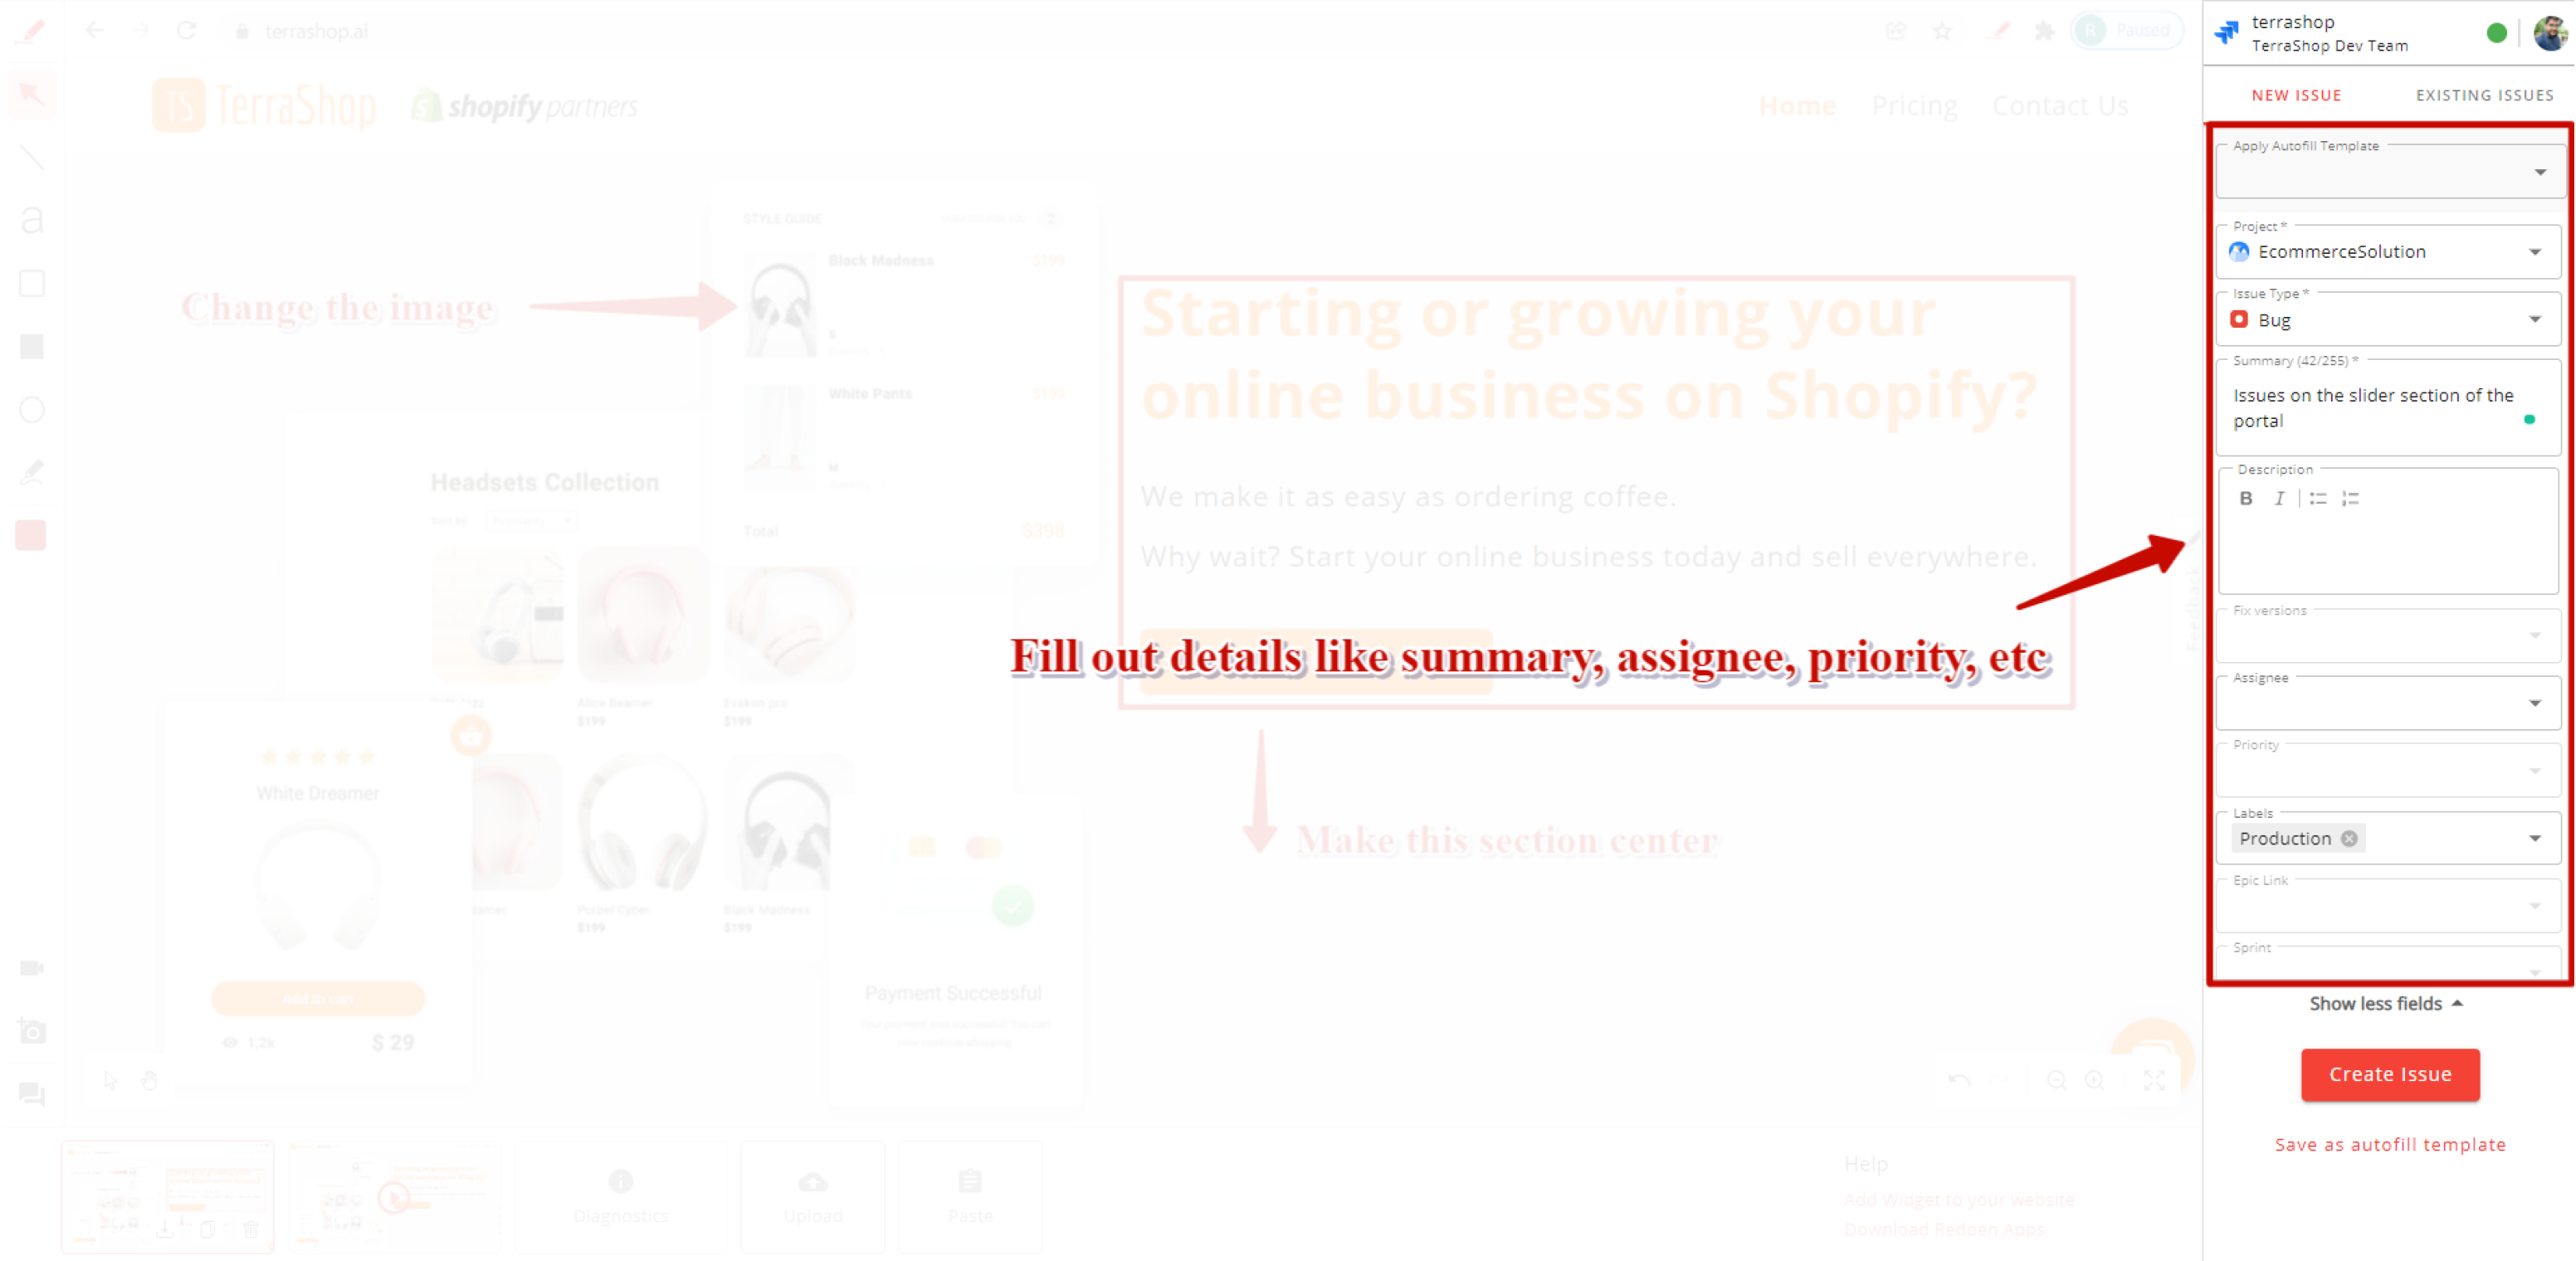
4. Add issue details.
- Explain the issue in more detail by filling in the issue form. To see the issue form you need to have at least one site connected.
5. Create the issue.
- Click the Create Issue button to create the issue in the issue tracking service/product.
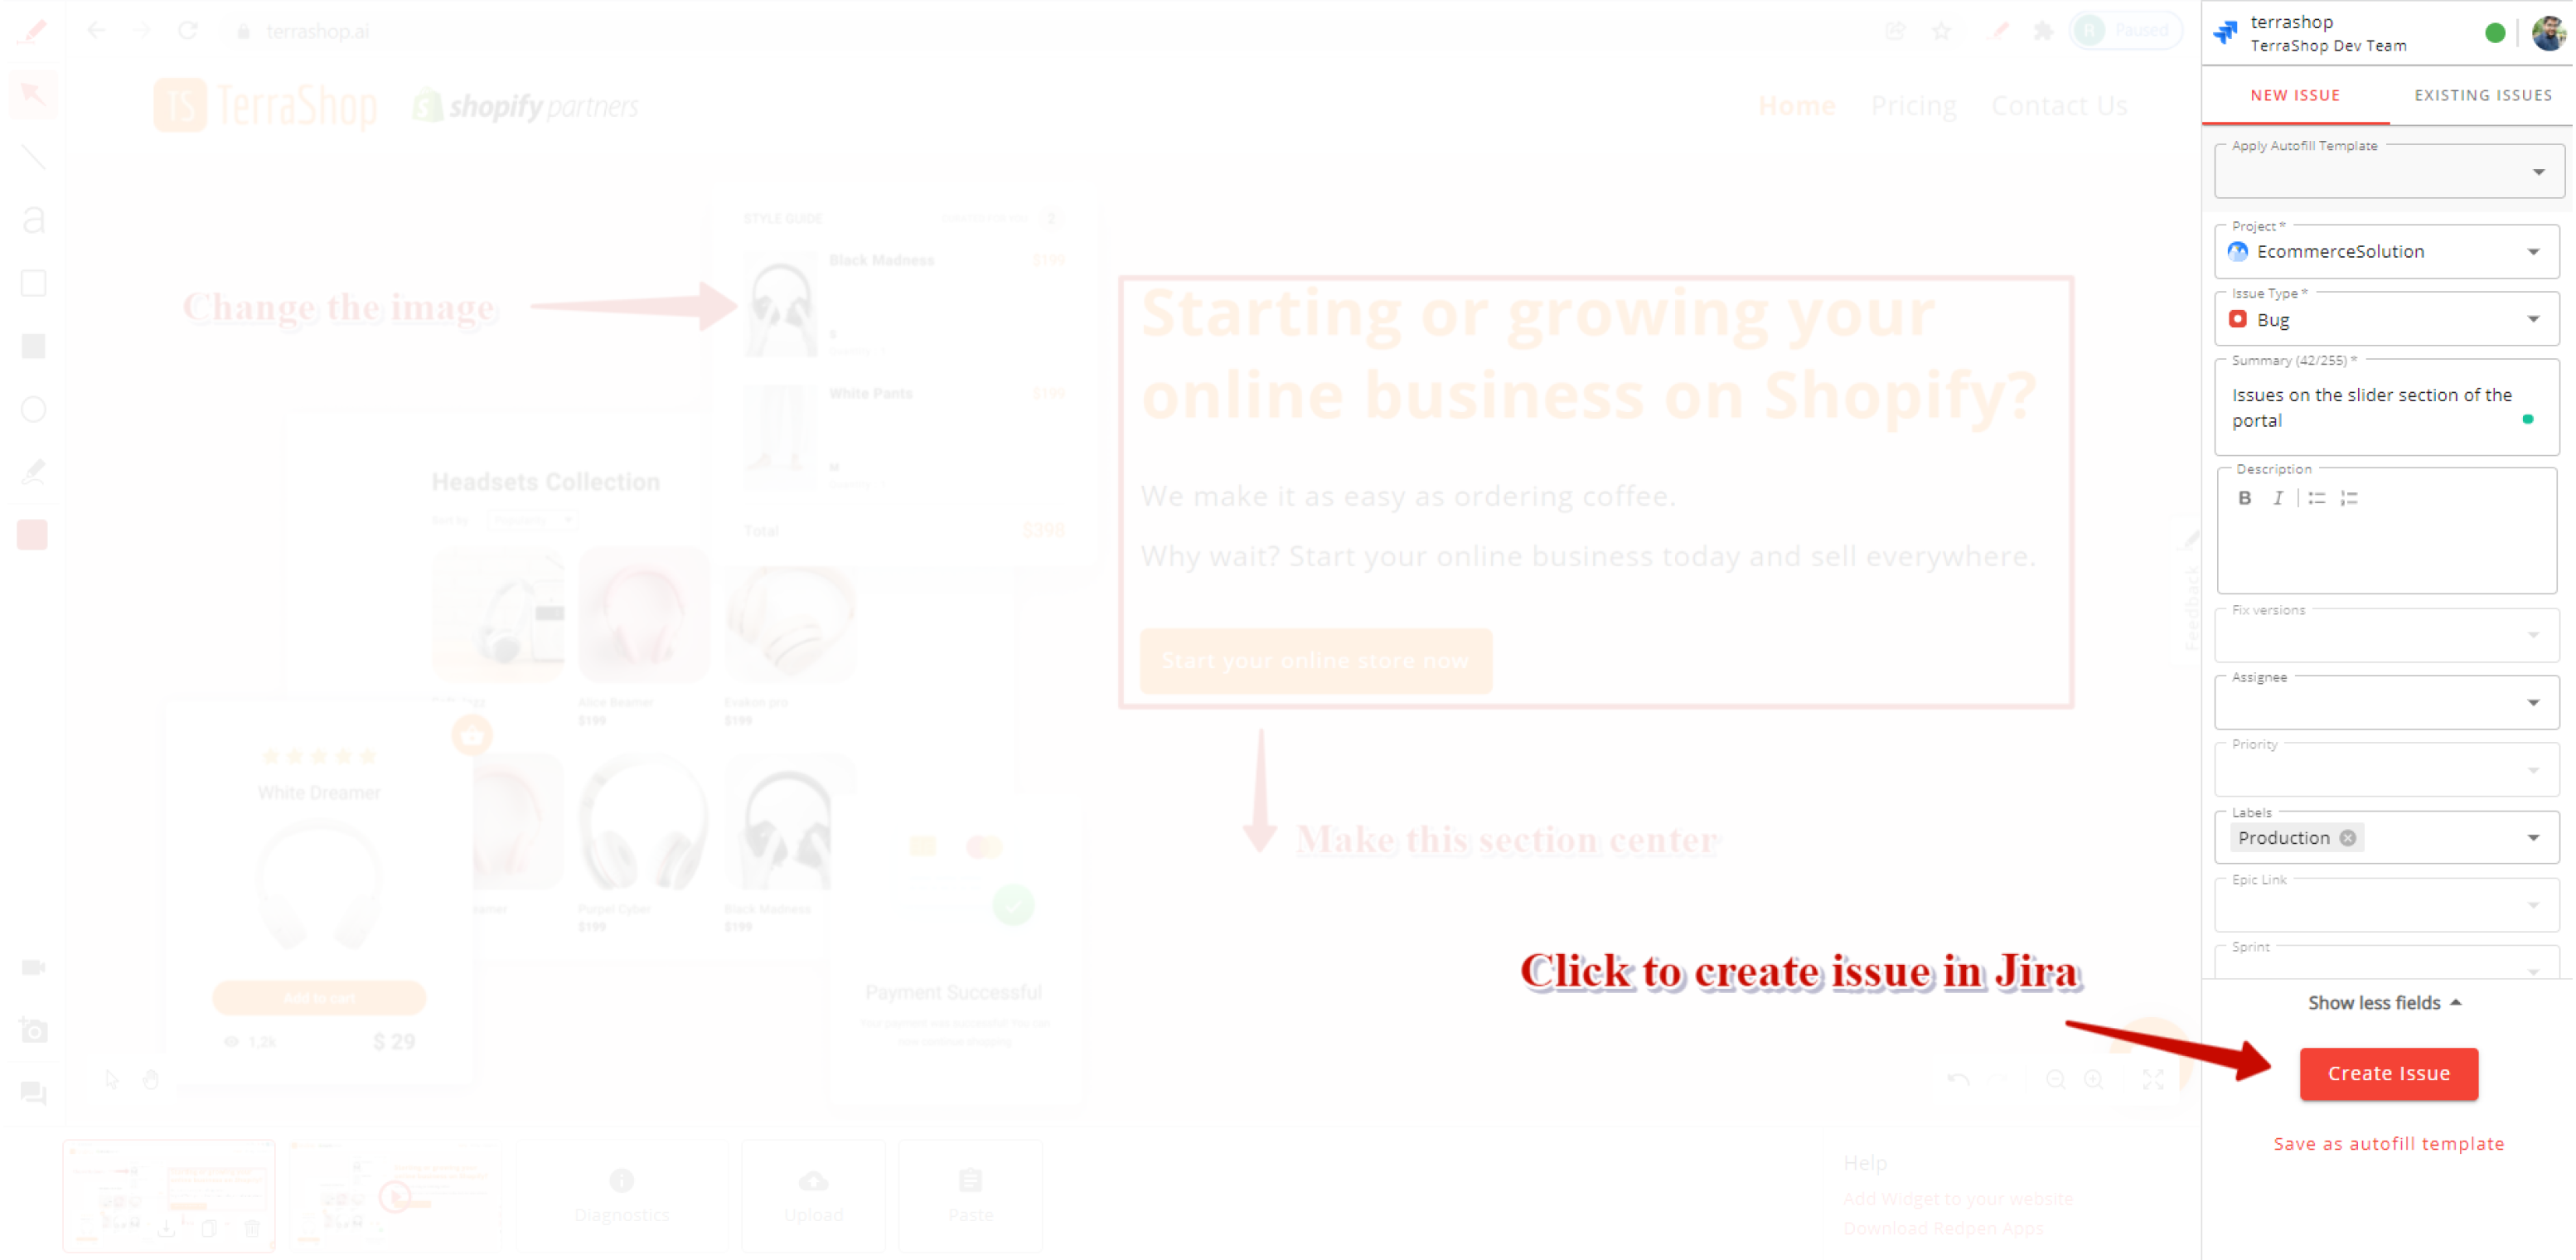
6. View the issue created.
- To view the issue created in the issue tracking service/product, click the success message toaster or click on the Last Issue Created link at the bottom of the issue form after the issue is created.

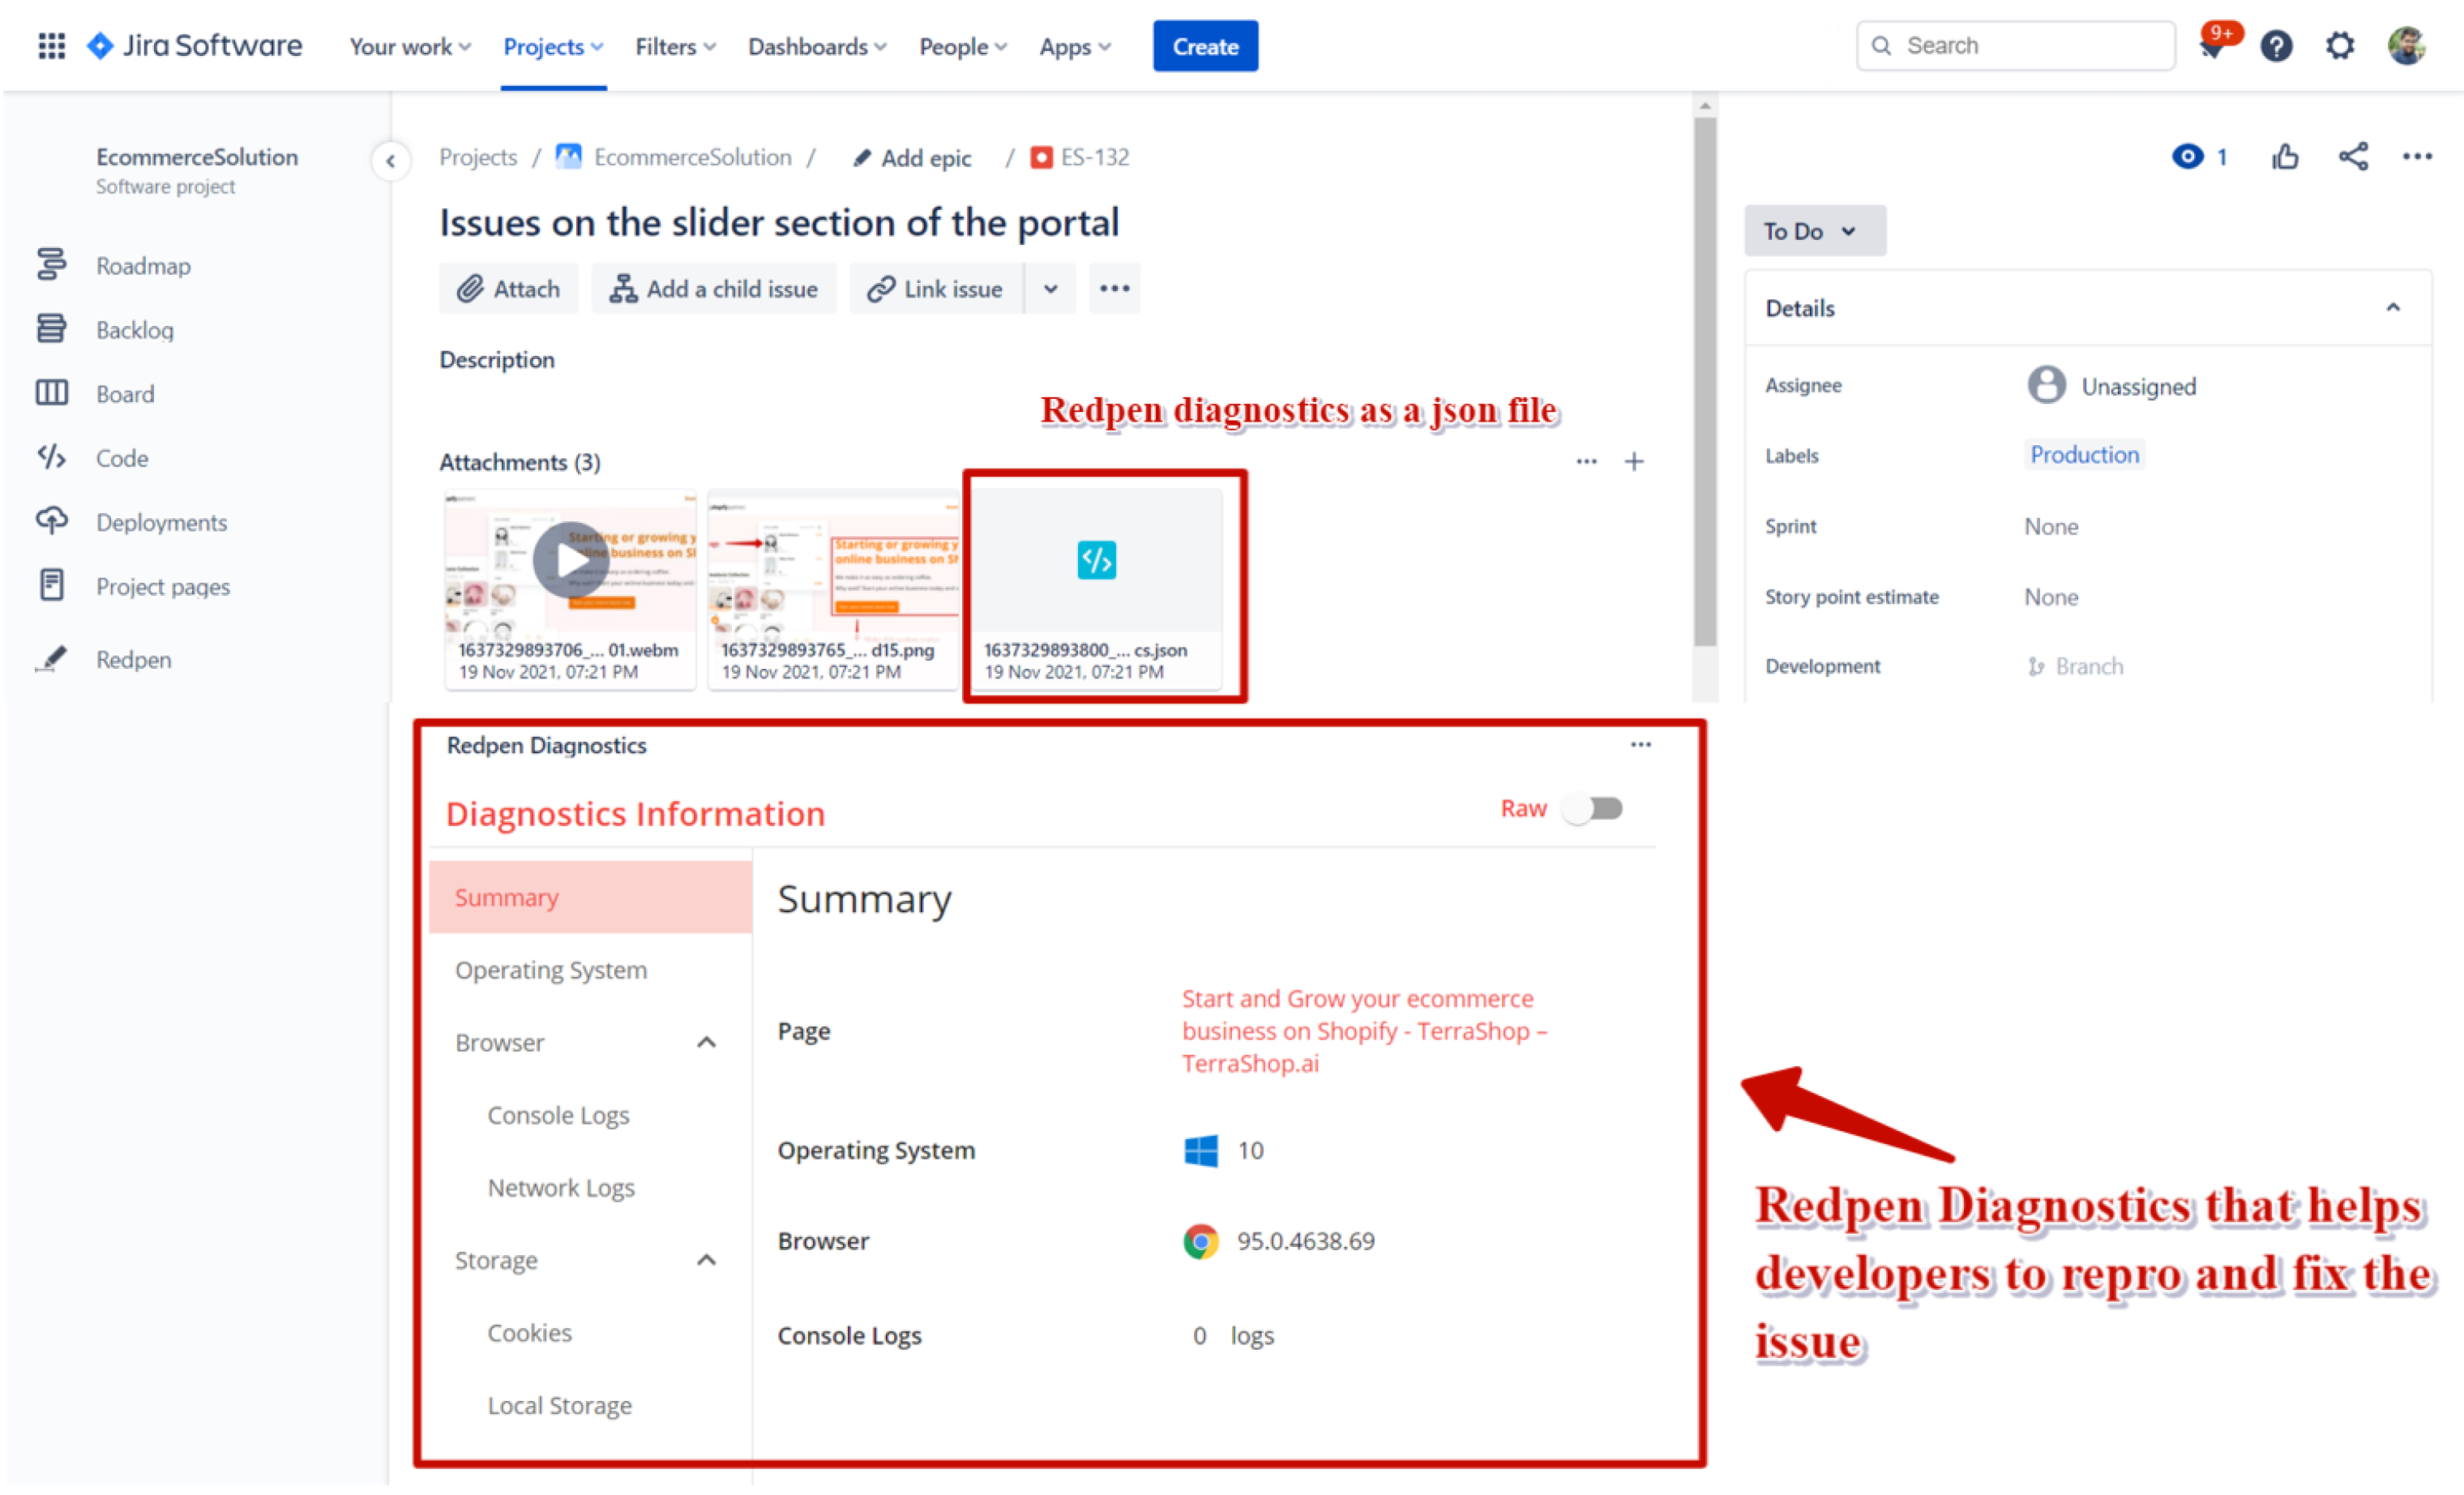
Jira Issue created using Redpen.
Done!
That is how you can create issues easily by using the Redpen web application.